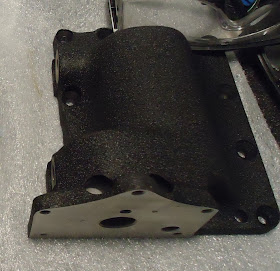
Arley was kind enough to give me a nice chrome Custom Chrome replacement lid. Which I promptly took to the powdercoater for a proper black wrinkle re-do.

Now to make it happen.
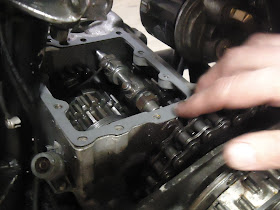
The primary pieces were already pulled off for powdercoat, too. So the clutch cable needs off next to get at the bolts and get the release lever off.

There are 11 regular bolts and one vent bolt find them all.

Some are in really tight spots.

Go ahead and pull the release level now.


The vent bolt is the slotted head. Remember it goes into the only through hole in the case.

The shift linkage needs to go.

The two bolts directly on either side of the seat down tube are the tightest spots for sure.

I had to use all of these to get that left front one out, but I didn't have to pull the transmission out of the frame.

Now to teardown the lid on the bench.

Yeah, those are really stuck.

This is what's under the linkage piece and dust cover.

Six(6) bolts here.

These bolts are in threaded blind holes except this one.

Use a backer wrench on that one.

The bolt with the nut is the short bolt the rest are the same length.

A few whacks with a mallet.


The real cover is off now to reveal this piece.

That pulls off, but be careful not to shoot the circumferential springs(left) out. The stepped pins are also spring loaded(right) watch for those as well.

Pull the circumferential springs

Pull this screw next.

Get the impact driver if it's too tight.

The back comes off.

Unbend the lock tabs on the stop bolt.


Remove the stop bolt.

You can try to drift the shaft on now, but it won't work.

If you want the shaft out you need to scrape off the gasket here.

And remove this special set screw.

Dang, it's tight too. Get the mini-impact.

With the set screw removed the shaft comes straight out.

Then the drum.

Unbend and remove the cotter pin.


Tap out this shaft.

It didn't show in these pictures, but there is a short fat spring in here, too.

Pull out the neutral light switch.

The only thing left in the lid now is this pressed in bushing. Heat the lid to loosen it up.

That's really tight. The brass drift didn't budge it.

We finally got it out using these tools. The C-clamp and block with hole got the bushing pushed out to flush with the inside and then the tire tools got under the outside lip pried it off.

The bushing went into the freezer for a bit and when we got back at it we heated the new lid.

Now to pound in the cold bushing.


The next part was tough. I believe there is a proper reamer for this bushing, but we don't have it and the shaft is too tight in the bushing the new lid. Pat really worked over the bushing. Fit, file, sand, fit, file, sand, until the shaft fit and moved correctly.

This picture shows the timing mark alignment on the shaft. The timing mark on the large inside gear is by my left thumb. The flat of the first gap on the smaller outside gear lines up that mark. That's the plan when you put the shaft into the lid.

Put the shaft through the bushing, the spring

Tap to get the shaft all the way into the inside gear and flush with the bushing.

Put in the cotter pin.

Gasket here.

This little nick on the gear is the timing mark on the shift drum.

That mark lines up with the same timing mark on the large inside gear should really.

Fresh o-ring and oil on the shaft.

Put the shaft through the drum.

Remember the set screw goes here.


Clean the old thread sealant off the stop bolt.

Apply fresh sealant.

Install and bend tabs on tab washer.


Lay the spring plate on and align the gasket and plate with the outside bolts barely in place. Align the slot in the plate with the middle gap of the exposed gaps in the outside gear as shown.

The screw threads need chased.

Install screw to hold the spring plate in place and then remove the outside bolts.

Install springs, there's still plenty of grease on them.


The top plate goes on go now. The plate in my right hand should basically flip over and on to the spring plate in my left hand. The notches in the pins fit into the gaps of the gear and the stand off on the plate fits between the springs. So you have to slide it up from the bottom get the pins in aligned in place and then press the stand off into place. I should have got a video to demonstrate this better.


In place and ready to go.

Grease it up.

Top cover next. Clean off the out gasket.

Align this notch on the cover with the spring plate notch.

Install dust cover and shift connector.

Install neutral light switch.

Scrape out gasket off the top of the transmission case.

New gasket. Free up the forks, too.

Find neutral on the drum which should look like this.

Install lid onto dowel pins.

(This is a different shift than lever before and I will blogging about that soon.)

Install bolts and make sure the vent bolt is in the correct hole.

The bolt that gave me the most trouble is easy to access with the oil tank bolt remove and regular l-key.

The lid is done, but the primary and things to need to be put back on.