See those little teeth in the middle? Those used to be full splines.
I guess I was lucky because the last of the splines gave way in my garage and not 100 miles away from home. The nut got loose or when I switched to acorn nut to use the road side tool that acorn bottomed out. (I thought it was deep enough.) The other somewhat frustrating thing about this nut is the conflicting advice I have gotten on how to tighten it. Lummie says a little blue loctite and torque it. Ed says don't loctite it or it will get stuck, so just hit it with an air impact going on. I honestly hate the idea of using an impact gun to install anything. I am pretty sure I need to shim it some and this loose/non-shimmed nut could have been contributing to the engine's crank seal leaking issues as well. I ate up most of my rotor teeth, too. Thankfully, the crank splines still look fine.
This is where I photo document the projects I'm working on, fixing, or fixin' to fix.
Topical Link Pages
▼
Tuesday, January 20, 2015
Saturday, January 17, 2015
1500 Vulcan Exhaust Leak Fix
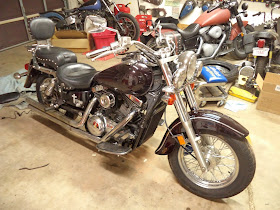
So I finally got this bike put together and ready to ride, but alas it has a nasty exhaust leak. Blue flames out the rear pipes and pops. I swapped the pipes and got new HD exhaust gaskets, but I was lazy and re-used the stock acorns on the exhaust studs. I should know better than to ever use acorns and I had swapped those nuts on my other 1500 Vulcan a long time ago.
An acorn nut will bottom out in the cap before it tights or, like these, get stuck in place. These aren't even the same effective length anymore.
The last time I helped a friend with jammed up acorn nuts on his studs, we tried every trick in the book to get them apart and still just bought new studs. At that time, we walked up to the auto parts counter and said we need 8mm studs and they got them from the back somewhere. I went to a couple of parts stores and the computer jockeys behind the counter couldn't find studs unless they could look it up by make and model. Anyhow, the parts book for 1500 Vulcan shows a 8mmX25mm stud. That's way too short. I managed to find these all by myself. HELP! card PN 03109 has two studs and nuts. This kit was less expensive(under $3) than just one stud from ACE($3).
They are 38mm length and that was still a bit short, but useable. There was another HELP! kit that had 56mm length; next time, I might try those.
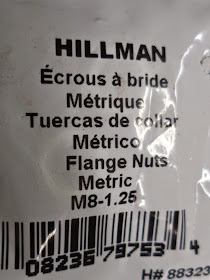
Just about any nut that fits would be okay, but I prefer the flange nuts. I found 8mmX1.25 flange nuts at Lowe's because ACE didn't have metric flange nuts. The main trick is still finding the right drawer though. 2 bags = 4 nuts.
Two nuts together to set the studs, and some anti-seize.
Hotsause(Scott) came up to help with this project. (We were thinking there may be an intake leak and carb fine tuning to be done, too.) His advised to add some Ultra Copper to the gaskets. It should seal better and actually hold the gaskets in the exhaust port while you get the head pipes into place.
Goop the gasket. Stick it in the port.
Goop the pipe.
Install pipe with flange nuts.
The clamp from the rear head pipe to muffler wasn't clamped well either. It was bottoming out without squeezing the pipe. Some of the clamp flange needed removed.
A little dremel work and it was good to go.
The front exhaust pipe got the same treatment except it's studs did not need to be replaced.
Saturday, January 3, 2015
Deja Vu: Almost fully geezer glided out
A proper rat's nest
Friday, January 2, 2015
Jason's Half @ss Shovel
So the goal was to figure out the nasty vibrations that have plagued Jason's bike in it's latest configuration. Paul called the meeting at Jason's house and the problem was to be determined and resolved(hopefully) by committee.
First order of business was to make sure the bottom motor mounts were torqued correctly and shimmed if needed.
Zip ties had been used to keep the shifter from vibrating apart.
The spacer for the top mount needed to be "machined" a bit to fit correctly.
The two-piece top mount is now a one-piece and the weld bead needed some clearancing.
Hit it with a hammer to see how much???
Pretty close.
A little dremel action.
Torque the nuts all down.
Ed, Lummie, and Dually supervise.
We tried everything to get the front engine sprocket completely torque.
And I don't think we ever got everything fully locked up and torqued, but close enough.
Hopefully, the loose motor stuff is all taken care of. Now onto the other issue, the ignition. One of the magnets came out of the rotor and ate the inside of the ignition all up.
Lummie donated a Dyna-S single fire ignition to the cause, but we soon realized that the rotor was nowhere to be found.
We did have this points plate, but it was wrong, too.
So we went back to my house and brought the proper points plate for an alternator(cone) shovelhead. The one on the left is correct for an alternator model. Note the length of the points cam follower. The one on the right is correct for a distributor style Harley motor(maybe an old Chevy??) If you run the short follower on an alternator shovel, your ignition will be too advanced regardless of how much you adjust it.
Paul's on it.
Just a little more help from the committee.
Almost all of the committee helps.
Jason wires the ignition switch.
Paul works on the petcock.
We had two 3 ohm coils for the single fire set-up. Running the dual fire points means running 12V to one post, jumper together two posts, and the trigger wire to the last post. That makes one 6 ohm coil at least good enough to get the motor running and see if the bottom end is the source of the vibrations
Install the battery. If something sparks you need to double check the wire routing.
After limited success, more gas was added and it actually started. The bottom end seems just fine, but transmission mount, primary belt tension, and primary belt alignment are suspect at this point.
First order of business was to make sure the bottom motor mounts were torqued correctly and shimmed if needed.
Zip ties had been used to keep the shifter from vibrating apart.
The spacer for the top mount needed to be "machined" a bit to fit correctly.
The two-piece top mount is now a one-piece and the weld bead needed some clearancing.
Hit it with a hammer to see how much???
Pretty close.
A little dremel action.
Torque the nuts all down.
Ed, Lummie, and Dually supervise.
We tried everything to get the front engine sprocket completely torque.
And I don't think we ever got everything fully locked up and torqued, but close enough.
Hopefully, the loose motor stuff is all taken care of. Now onto the other issue, the ignition. One of the magnets came out of the rotor and ate the inside of the ignition all up.
Lummie donated a Dyna-S single fire ignition to the cause, but we soon realized that the rotor was nowhere to be found.
We did have this points plate, but it was wrong, too.
So we went back to my house and brought the proper points plate for an alternator(cone) shovelhead. The one on the left is correct for an alternator model. Note the length of the points cam follower. The one on the right is correct for a distributor style Harley motor(maybe an old Chevy??) If you run the short follower on an alternator shovel, your ignition will be too advanced regardless of how much you adjust it.
Paul's on it.
Just a little more help from the committee.
Almost all of the committee helps.
Jason wires the ignition switch.
Paul works on the petcock.
We had two 3 ohm coils for the single fire set-up. Running the dual fire points means running 12V to one post, jumper together two posts, and the trigger wire to the last post. That makes one 6 ohm coil at least good enough to get the motor running and see if the bottom end is the source of the vibrations
Install the battery. If something sparks you need to double check the wire routing.
After limited success, more gas was added and it actually started. The bottom end seems just fine, but transmission mount, primary belt tension, and primary belt alignment are suspect at this point.
Déjà Vu: Getting there little by little
It's hard to believe that I have put this much effort into a running bike and still not rode it anywhere. I have tackled all these little and big jobs before, but it was always just a little at a time I guess.
I replaced the rear brake pads and flushed/bled the line. Surprisingly, there was some pad material left back there at 8,000 miles.
I swapped the pipes and went ahead and did the MS clutch spring and Judge's washers. This spring was not slipping yet, but check out the wear marks at 8,000 miles.
Fresh rear rubber. You don't need to pull the fender to change a rear tire, but I needed to swap the rear fender so I pulled it.
So I put my new old fender on it. Oops, the wires are on the other side on this one. That's wierd.
Pull the fender again and reroute the wires.
Another Harley part that works well on a Vulcan. A HD laydown tag bracket wedge. For about $8, it works as well as any more expensive Vulcan specific tag laydown set-ups.
See these two holes pretty much line up.
I had planned to use the old tag bracket I had, but then I realized half of the fancy billet tag ring set-up that came with this bike could work with laid down wedge and that probably no one would give me $40 for the stuff that cost $165 in 2002. I had to cut down an L-key to get at the hidden hardware so close to the fender.
I kind of hated to do it, but the big sissy bar went back on. It's tough to build an all day long two-up bike when you are used to chopping stuff up to bare minimum.
Dang, I hit the front axle nut with an impact gun and more red mud fell out of the fender.
I tried to change the front tire and managed to pinch the tiniest hole in the tube. ugh. I pulled the brand new front fender from the attic and put it on the bike. All the green flames are gone now. I put a spare wheel and tire on the front so I could get it off the jack for the day.
Finish the front tire, finish a bit of wiring, and put a seat and bags on it, then ride it until it drops.