Here's the strap for the crosspiece.

Tick marks for our knotch cuts.

Make a cardboard piece to the same size and shape to check fit our plans.

Looks good.

Wow, check this out. The bike traveled cross country in a trailer just fine, but the I-40 crosstown knocked it over in the trailer and bashed the points cover.

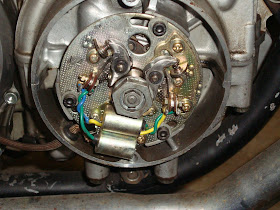
Luckily, the points still look okay.

Bierkan hammered the dent back out., mostly.

We need a bend in these to fit the headlight right.

Fastfoward a day or two, and Beirkan took the oil bag front support to a band saw and cut the knotches.
Set it in.

Bierkan studies the welder's set-up charts, then set every to MAX. I think.

Time to get to it.

Try to tackt it in place.

That didn't work well because of all the paint still on the frame. D'oh.

Now it seems to work.

Tacked in place.

The little seatpost support piece won't fit, but we don't really need it. Mark the spot for the tank.

Center punch the center of the mark.


Center drill the center punch mark.


Drill it.

Hey, let's cover those carbs and the alternator area so we don't get more chips in them.

Now let's finish the hole.
Perfect.
Bierkan pulled the tank and finished the full welds for the bracket.

Now to the back supports. The plan is to use all-thread to support the back end. Two five inch sections should do it. This is how I cut all-thread to length. Double-nut both sides of the cut line.

Then cut it. I used angle grinder, but I have used a hacksaw to do it before. Taking the nuts off helps to clean up the threads at the cut, too.


No comments:
Post a Comment