
I always buy extra valve guides, because I always seem to use more than four.

I went to put the first seal on the new exhaust valve guide.

It's a press fit, so I thought I would try the smaller attachment for the valve spring tool. It didn't work. Nothing did. These seals just would go on at all.

Then I noticed the difference between the new exhaust valve guides and the old exhaust valves guides and the intake valves, too. There was not chamfer to help the seal on.

I tried to just knock off the sharp corner, but that wasn't enough.

Die grinder and rotary file did the trick.

I lubed the valve stem and seal, then used a socket, extension, and hammer to drive the seals on.

Perfect. I think my final count was 10 seals used to get 4 on correctly.

Now the spring is compressed and keepers installed.

I managed to drop and lose one keeper. Ugh. I had to buy a whole set to get going again.

I decided to swap out all the old keeper for the new keepers. The keepers are a bit thicker than the old ones.

But wait, this new keeper(left) is missing the shelf cut. Ugh again. I'll just leave one set of used keepers in one head.

Seals, valves, and springs installed it the heads.

Now to put the rocker boxes on. This is the gasket I have metal in the middle and gasket stuff on both sides.

I noticed this last time I built these heads. I don't know why, but the gasket doesn't drop onto the head. The cooling fins are in the way.

So I have to cut this part of the gasket off. It doesn't affect the sealing surfaces.

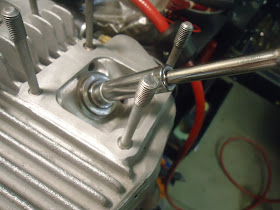
So I'm on to putting the rocker box on the rear head. Put the washers and nuts on studs.

Use the torque wrench tighten things properly.

Okay two of the studs break before the wrench clicks. Ugh, ugh, ugh.

Textbook ductile tension fracture, not metal fatigue. The stress in material made it to the yield strength of the material. Plastic deformation caused the cross section to thin and then break. Fatigue leaves beach erosion marks..

Back to the parts store for new studs. Double nut and set the studs.

The torque wrench still didn't click on only those two studs, but I didn't push my luck this time though.
The rear built.

The front went together without any issues.

hey,
ReplyDeletehow did you get those studs out? just had the same thing going on...
thanks!
I'd cut some threads on the remaining end. Tighten a nut on it and spot weld it to the stud. Heat the whole head in the oven and then remove the rest of the stud.
ReplyDelete