Topical Link Pages

Monday, December 21, 2015

Figuring out the gearing

So I misspoke about the smaller engine sprocket helping to lower my highway rpm's. The smaller motor sprocket would help me get off the line, but raise my highway rpms.

So let's start back again with the long story of my gear ratios. (I'm using calculations and images from Bakers RPM Calculator.) This was my first build set-up. It worked fine, but I wanted to drop my 70 mph rpm just a bit.

I'm running a light rigid bike with 93 inch motor with T&O torque monster wheels.  Even with a high ratio FX first gear, I think I have plenty of torque to get going off the line with higher gearing overall.

This was my first plan. Drop the rear sprocket to 46 teeth and the rpm drops about 120.


But then when I was doing the swap over, Ed didn't like the condition of the 24 tooth sprocket I was running. The only sprocket available in town on Monday was a 23 tooth. So we did that and I was exactly where I started.


So now where am I going to be with a 39 out front? Way up to 2945 rpm. That's 80 higher than I was when I wanted to go down.


So let's look at a 24 or 25 on the transmission. I'm thinking the 25 is what I need. Usually, a sprocket that big could be a clearance issue but with the open belt set-up I'm running it should be fine.

Sunday, December 20, 2015

How to use adjustable wrenches; "Crescent" wrenches

If you must use an adjustable wrench do it correctly. Push toward the adjustable jaw. Pushing towards the adjustable jaw reduces the changes of slipping and damaging your fasteners and/or your knuckles. Please don't call them "Crescent" wrenches, unless also call all combination wrenches "PLOMB" wrenches.

(I stole the image from the interwebs somewhere.)

Wednesday, December 16, 2015

Weekend Full of Motorcycle Stuff


Last weekend was full of motorcycle stuff for sure.  I have two friends that needed MSF cards to get their M endorsements so I did a free class for those guys.  Ed and Glen came up from Texas. Glen has a sweet Panhead and didn’t need to take the class. Ed brought his 100 inch Shovelhead with a foot clutch. Jason and his half@ss shovelhead still ain’t quite right so I lent him my 1500 Kawasaki. Both of these guys have ridden motorcycles way longer than I have, but that’s beside the point.  We were doing the one day Basic Rider II course. I’m really glad that I was doing the course for two very experienced riders, because the heavy dew on the still pretty freshly sealed asphalt made the range really slick. Did I mention that Ed was on tires so new that they still had the nubs on them? Anywho, the class went fine. Both Ed and Jason passed, and no bikes were dropped. I did discover that my Kawasaki had an intake leak though.

We got home about noon, and Ed and Glen were dying to get my shovelhead back together and running. Russell had sent me a nice stator, so basically I had everything to get it together. We got the primary back together. I had been somewhat concerned that the primary belt was too tight, but not sure. The belt was indeed too tight and the transmission was all the way forward.  The experienced guys being there to help was good. My front pulley is 40 tooth, so I decided to order a 39 tooth version. The 39 will lower my highway rpm a bit and hopefully not lug the motor from a stop. It’s frustrating because I just bought the 40 tooth in January when I blew out my last one when things got loose.

I would have stopped working on my bike when the belt decided to be too tight, but Ed and Glen were having no part of that. “It’ll start and run with the belt tight like that.” So onward we went. We got it together and I got to kicking on it without any results. I had left the plug in the oil pump vent and crankcase from when I had pressure checked the crankcase. I fixed that, but still no fire. The battery and ignition were good, so that left the fuel situation to be evaluated. Did I mention this pig had sat since May? The petcock was flowing well.  The carb and gas in the tank were nasty. The pilot was plugged and the main was almost plugged. The accelerator pump wasn’t squirting at all. This motor has to have the pump squirt to prime and kick start. The little o-ring on the end of the accelerator pump had turned to goo.  That tiny o-ring is another deal breaker.  Ed and Glen went to the parts house and the gas station. They got a HELP! assortment of fuel o-rings  and one fit just fine. I got the jets cleaned and the pump working on the bench, and then put everything back together. Still no light off. The pump wasn’t pumping again. Ed threw a cap full of gas in the carb intake and blam-o, it fired right off. And the accelerator pump starting working again.

We took a little ride.  I’ll fix a primary sprocket and intake o-rings for the Kawasaki when those parts get here.


Sunday, December 6, 2015

Swapmeet Scores

JamesD gave me these super nice NOS "KAW" pegs. I swapped a box of odd stuff for the twisted struts and twisted highway bar. The rest cost real money.


Sunday, November 29, 2015

Long story short

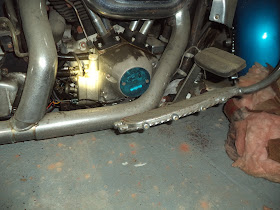
Well, this had to be the simplest project that took way way too long. My front exhaust pipe's T-slot was a bit too far forward and T-bolt keep falling out. I got a nice P-clamp from Columbus and noticed it would work nicely directly off the transmission mount. Doing the spacer was the trick. It took more than one try and I should have pulled the rear pipe to get it right the first time. But hey I'm happy with final results.


Crank seal up attempt getting started at least

So JB in NC told me try a 11167 o-ring behind spacer to keep the on in. Worth a shot, right?


It fits way done in there.


I bought a new Jim's spacer to go on.


New seal, greased on the rubber side and no sealant on the metal side, installed with my high tech specialty tools.


Well this job is postponed again. The stator wires are in too rough of shape to go back up any farther.


Thursday, November 26, 2015

Care Package from Bruce

As a thanks for checking out that bike for Bruce, he sent me a box of goodies. I told him I didn't need anything just for taking pictures of a bike. He insisted on something so I told him to send me some wild parts with something for my pegboard and not  a restaurant gift card.

His package of goodies was perfect. A ratchet top clutch release arm, a crankcase breather with mount, a bicycle style kicker pedal, old o-ring pegs, a single spring loaded peg, some knick-knacks, a twenty dollar bill, and a highway bar with genuine Anderson pegs on it.

I was pretty jazzed about all of it. The crankcase breather with the mount is exactly what I haven't gotten around to getting on my Kawasaki. The lucky twenty dollar bill will go in the shovelhead's toolbox with my lucky one dollar bill from Ed. The rest will go on the wall.


This peg had a hole drilled in it at some point.


This one has a bit of rash on it, but I like my pegs to have a back story.


Here's this crazy peg with a detent spring. (I'm easily amused.)


Keychains and belt buckle... It's hard to believe that the MoCo licensed cigarettes as late as the mid-1990's


Wednesday, November 25, 2015

Barn Find Garbage Wagon

This bike is not really a secret. It's been on the local craigslist for a very long time.  If there are pictures in the ad, they are pretty much terrible and the asking price is on the high side of perfect.  I haven't been in the market for a hack rig, so I never called.  However, my internet friend Bruce from Nebraska was really interested and asked me to go and check it out.  I know why the ad pictures are so bad. The bike has been in a dark warehouse since about 1994, I think.  That was the last tag on it.

Here's the sidecar.


That's actually the seat for it sitting in the sidecar. Blue velour, yo.


All duded out even a side mirror for the hack passenger to use.


Lots of bumpers. Safety first I guess.


I haven't seen all this twisted rod stuff before.


The dude straight bought the full catalog's worth of the stuff though.


More bumpers.


Breaker ONE-NINE, breaker ONE-NINE!


This was the deal breaker. Bruce was told that the frame numbers for a 1971 should be on a boss on the frame leg not the neck. I don't know. I don't much about stock.


AMA.


What do you call this style of paint? Fishscale, maybe?


Bruce didn't buy it, but he sent me a very awesome care package and I got to see a crazy old bike on a Sunday afternoon.

Shovelhead crank spacer condition

Tomorrow is now. Let's get this figured out. I pulled the nut and "pipe tool" spacer and this is what I found. It's oily-gooey around the splines and spacer and yes some surface rust on the spline.


This is actually a good sign. Oil has seeped out from being parked. I would think that this would point to a seal problem more so than a crank case pressure issue.


Definitely oil coming out from the spline area and maybe the outside of the seal.


Well this is not expected. The holes I drilled to get the seal out should be bleeding like that. I don't know if that's a return issue or a regular old little sump issue from sitting four months.


Delkron cases, so I pulled the drain plug and it completely filled this drip pan.


Clean this up and take a look.


The little drain return here seems clear so that's good now.


Here's how the spacer fits to the crank. I think this is too loose and from the witness marks I would think it chattered and vibrated. I need a new spacer. I'm not sure if it was always loose or got loose when the front primary sprocket got loose.  I don't have one today, but that's the next move.