
I managed to find the place. It's about 150 miles from my house.

Motor on the bench. There were a lot of pictures that turned out like this. Daniel and Jeff are meticulous, but definitely move with purpose and don't slow down. I couldn't get my usual picture of every step and bolt coming off and on. I definitely caught the high points and got explanations from Daniel on everything I didn't understand or hadn't seen before.

Just like this, getting straight to it.

One head off. That's a lot of carbon for like 2000 miles. I never did get the jetting nailed down.

Going down in a hurry for sure.

Ew, the pistons are scratched.

Is the piston clearance too tight or what?(More on this later in this blog post.)

This may be the cause of the scratches. We didn't properly fit the wrist pins to the wrist pin bushing doing the S&S topend redo.
Well, the cylinder spigots did have holes after all. That's disheartening, I really wanted to find a smoking gun.(More on this later in this blog post.)

I knew there were holes here already.

Daniel still working quickly and carefully.

The wrist pins are shot.You could feel the grooves.

We put the cylinder back on the cases and blew air through the oil drains to see if the holes matched. Air seemed to flow okay.

Jeff was working like a mad man the whole time, too.

Daniel thoroughly cleaned up the base gasket area to be able to check for bent or twisted rods.

This is a precision ground pin that will show you if anything is out of whack. This looks okay from the feeler gauge.

This one looks okay, too.

Turn it up to dump out the oil. Even with the Delkron drain plug there is a lot of oil in there.

On to the rocker boxes while the case drains. The end clearance is good here and there are no wavy washers installed.

Pull the cam cover and blow through the oil passages.
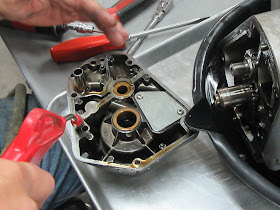
The heads are good to go, just a thorough clean by Jeff and fresh gaskets.

Time to split the cases.

Take out the bolts.

If I recall correctly, Daniel is working to get that snap ring off the oil pump shaft.

Here are the case bolts. The sealant on the case halves was something really stinky. I have no idea what it was.

With the oil pump off, all the oil passages were checked with air.
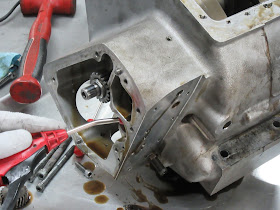
Daniel has all the specialty tools in the catalog for these engines. Instead of working hard to split cases and then pressing out the crank, this tool splits the cases and presses out the crank all at once.

Works pretty slick.

All apart.

A couple of little pieces of something seems to be flowing around.

More air to check all the oil passages.

Daniel discovers and explains one of my errors.
He inspects the bearings.

Now to check and true the flywheels.

About 0.002 out to start with
A little bit of work on them.

Under 0.001 once he was finished.

A little crud in my oil pump screen.

With the cases apart you can get a good look at my suspected problem. Yes, the cylinders were pre-drilled in spite of the S&S instructions, however, the holes do not fully line up with the holes in my cases. It's at least half restricted, probably worse, with a base gasket pushing the cylinder up a bit more.

Back to plan A. Instead of a 90 degree drain hole in the cases and through the cylinder, we'll drill straight down through the cases to dump the oil straight on the flywheel. This is similar to an Evo oil drain and Daniel has used this method successfully on other stroker Shovelheads without issue.

What a mess.

Jeff went to work on cleaning things up. Jeff is pretty amazing at cleaning stuff. It like he cleans for a kitchen or an operating room.
Just a shot of the shop and work going into it.

Once it was cleaned up, Daniel pressed the bearings and flywheels back into the case.

This a key step that Daniel says people miss often. You need to check the bearing play.
Too tight so it comes back out. With case already apart he just used the arbor press to get the flywheels back out instead of the tool he use earlier.
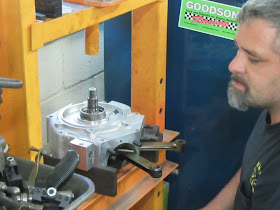
Now to find a properly fitting spacer.

These don't come labeled in different thickness, so you have to find one by measuring what you have and finding one that is slightly different due to manufacturing variances. Daniel had a drawer full.

Find one the size you like and put the wheel back in and check again. This is how it should stack up.
Daniel uses this lube on the seal lips.

Back to working on the right side case.

Checking the cam end play.
Checking the breather gear end play,
Oil pump back on.

Daniel used this for the case halves. I wouldn't be surprised if it's the same as Moto-Seal Gray.

Sealant on the case.

Anti-gallant on the bolts.
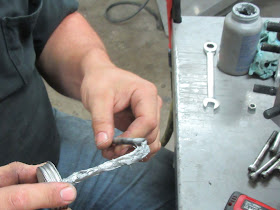
Carefully torque the case by the book.

Stack this correctly this time.

Another handy specialty tool.

Everything properly torqued.

Well, we knew that we weren't going to be able to finish, because we didn't have the correct new wrist pins, but we didn't think this would be the stopping point. One of the tappet block screw hole with the funny 1/4-28 pitch stripped out. So we need to get a helicoil kit. UGH.

We will go ahead and measure the piston-cylinder clearance. Those are good, 0.005 inch for a forged piston. The scratches on the pistons are most likely from the wrist pins rocking.

We are stopped for lack of parts. A lot of progress in one Saturday. They could have easily finished the motor in one day if all the parts were there. I am extremely impressed with how quick and thorough these guys worked. Usually you don't get those qualities of work in the same package.

I had already ordered a tire from Daniel for my springer, Daniel can order and drop ship a tire to just about anywhere and about as cheap as any internet store, but it will be a fresh tire not an old one. Anyhow, Daniel mounted the tire for me. That's about the first since like 2004 and 70,000 miles of motorcycling that I actually had that done at a shop with a machine.

Good to go. Now I can mount my springer on my frame and have a roller to put the motor back into.
