Search

Search all blog posts here.

Search This Blog

Sunday, February 15, 2015

HD Teardrop Toolbox on a 1500 Vulcan Classic

So I put the second regulator up front in the wind, where it should go. Now on to mounting a toolbox. The original Gadget write-up gave me the inspiration on my last bike, but I must admit that it actually took me several sets of holes to get where I wanted it. This set-up has carried a toolbox full of tools for at least 50,000 miles on my first 1500. I like using the old style key, because I can use the same key for the box on any of my bikes that mount a box, too. Here's the box and bracket off that I have been using. Remember this is a right side box that will be mounted upside down on the left side of the bike. Using a left side box won't open all the way, but be careful because the lid will hit the ground when you open it.


See all the welded up holes from my original mock-ups?


Trace the shape and basic location of the holes that I know are right. It's a tight tolerance, but a general area. I will probably drill the first hole and then transfer punch second mark with the box on the bike.


Something like this.
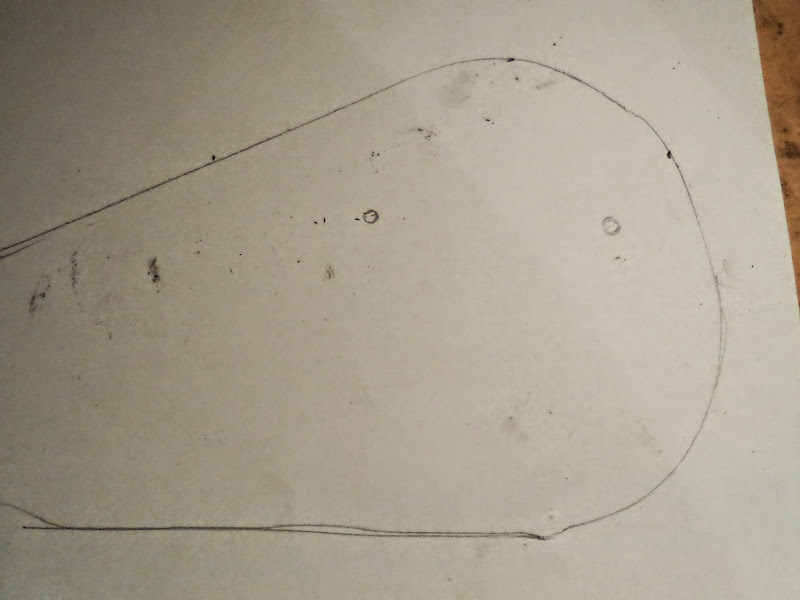

Click the picture below and you should be able to print this at 100% to work from at home.


Now to modify the regulator bracket. "jr(The quiet one)" [VROC #30869] donated this to my efforts. Thank you, sir.


Cut the stand offs off.


Grind off what's left.


Last time I just taped around the bare area and rattlecanned it, but I think I will send this one to be powdercoated. No real reason to, but I still will.


Lets deal with the stock holes on this box. I pick these stupid boxes up everytime I see one at a swap, but I must have traded off all the ones I had. So this one is a Taiwan Ted special from Ebay. The new chrome will look nice on this bike, instead of my usual black paint on nasty old box.


Lummie said he would help with the welding. Clean around the holes a bit.


Cut a blank to cover the hole.


Use a space washer to make the correct size for the plug.


Make it round enough to fit.


Plugs that fit okay.


Spot them in place and then go back and do a full weld.


Holes filled.


A little "Okie Chrome"(silver paint) on the raw metal to stave off the rust for a bit.


I have taken a few days off on this project so it took me a couple of looks to see how this template should work. It was done through the back of the old box.


So put a little hole in the template and flip it to find the spot.


Drill first hole.


Bracket fresh from the powdercoater.


Hung on the bike.


Bolt the box in place.


Double check clearance with the passenger floorboards that I'm planning on running.


Oops, I did get a little crazy with the silver paint, but a little paint thinner will clean off the over spray and runs.


Proving once again that nothing is so simple that can't be screwed up. I transfer punched the second mark through the bracket while all attached to the bike. I guess I drilled at the wrong mark and then tried again. I got a nice snowman holes at the wrong spot. ugh.


Okay so I smoked the first bolt tight and took the bracket back off and onto the bench to find the correct spot.


Finally right, now I need to take it back to Lum to weld up the snowman.


This should be good to go. I need to put the bike back to stock height and I shouldn't have any issues with it.


Sunday, February 1, 2015

And now the clutch hub, too.

I was having clutch issues last season and I thought the long bearing kit, adjustable retainer, and aluminum plate would fix it nicely under $100. That would be a lot cheaper than a Rivera Pro Clutch. Right?  Then, I needed frictions and steels and springs, too. Well now I tore into it again to replace the front pulley and rotor that I tore up, yep the clutch hub long studs are screwed up now too.  I've replaced it all now chasing my clutch issues and should have got the Pro clutch first.


Exhaust still leaking

I still had a small decel pop on Deja Vu. I was asking Hotsauce for more advice and he said check the coasters for leaks.

Yep. The gasket was goobered up.

Clean and reinstall with ultra copper. I hope that holds.

Tuesday, January 20, 2015

Stripped the front primary sprocket

See those little teeth in the middle? Those used to be full splines.


I guess I was lucky because the last of the splines gave way in my garage and not 100 miles away from home. The nut got loose or when I switched to acorn nut to use the road side tool that acorn bottomed out. (I thought it was deep enough.) The other somewhat frustrating thing about this nut is the conflicting advice I have gotten on how to tighten it. Lummie says a little blue loctite and torque it. Ed says don't loctite it or it will get stuck, so just hit it with an air impact going on. I honestly hate the idea of using an impact gun to install anything. I am pretty sure I need to shim it some and this loose/non-shimmed nut could have been contributing to the engine's crank seal leaking issues as well. I ate up most of my rotor teeth, too. Thankfully, the crank splines still look fine.

Saturday, January 17, 2015

1500 Vulcan Exhaust Leak Fix

So I finally got this bike put together and ready to ride, but alas it has a nasty exhaust leak.  Blue flames out the rear pipes and pops. I swapped the pipes and got new HD exhaust gaskets, but I was lazy and re-used the stock acorns on the exhaust studs. I should know better than to ever use acorns and I had swapped those nuts on my other 1500 Vulcan a long time ago.


An acorn nut will bottom out in the cap before it tights or, like these, get stuck in place. These aren't even the same effective length anymore.


The last time I helped a friend with jammed up acorn nuts on his studs, we tried every trick in the book to get them apart and still just bought new studs. At that time, we walked up to the auto parts counter and said we need 8mm studs and they got them from the back somewhere. I went to a couple of parts stores and the computer jockeys behind the counter couldn't find studs unless they could look it up by make and model. Anyhow, the parts book for 1500 Vulcan shows a 8mmX25mm stud. That's way too short. I managed to find these all by myself.  HELP! card PN 03109 has two studs and nuts. This kit was less expensive(under $3) than just one stud from ACE($3).


They are 38mm length and that was still a bit short, but useable. There was another HELP! kit that had 56mm length; next time, I might try those.


Just about any nut that fits would be okay, but I prefer the flange nuts. I found 8mmX1.25 flange nuts at Lowe's because ACE didn't have metric flange nuts. The main trick is still finding the right drawer though. 2 bags = 4 nuts.


Two nuts together to set the studs, and some anti-seize.


Hotsause(Scott) came up to help with this project. (We were thinking there may be an intake leak and carb fine tuning to be done, too.) His advised to add some Ultra Copper to the gaskets. It should seal better and actually hold the gaskets in the exhaust port while you get the head pipes into place.


Goop the gasket. Stick it in the port.


Goop the pipe.


Install pipe with flange nuts.


The clamp from the rear head pipe to muffler wasn't clamped well either. It was bottoming out without squeezing the pipe. Some of the clamp flange needed removed.


A little dremel work and it was good to go.


The front exhaust pipe got the same treatment except it's studs did not need to be replaced.


Saturday, January 3, 2015

Deja Vu: Almost fully geezer glided out

Huge seat and sissy bar on. My son tried out the new sofa p-pad and liked it. I need to add the leatherlyke bags to be done. No windshield is going on this one though.


Waiting on the new tube for the front tire or otherwise I might have at least rode it around the block.

A proper rat's nest

I finished wiring Deja Vu. The signal lights are running lights now, the battery tender and heat glove connection were added, too. I don't how stuff ends up this ugly, but it works. And gets covered up by the seat.