Search

Search all blog posts here.

Search This Blog

Tuesday, September 28, 2010

Handlebar prep for internal wiring

I learned how to do internal wiring handlebars from a great Bikernet.com tech article, but I can't seem to find it now.

Bars back off the bike again and taped to protect the powder coat and for marking. I also marked the bar center to help up it on in the middle.


Drain the front brake and master cylinder. I need to have new line built. The stock length is plenty, but will do stainless line covered with rubber to match the clutch line.


Right side controls on.


Here's the left grip. It's for a late model harley so it has lip that should bolt into the control housing.

The lip is needs to go. It's stiff plastic so the hacksaw make quick work of it.

Perfect.


Left controls on. Those $5 swapmeet grips are great.


I zip tied the wires to the bars so I could check the length of the wires once they are ran inside the bars.


Bars back on the bike. The wires are barely long enough to work, but the plugs will be behind the headlight bucket and not in it. I don't like that and given a choice I would rather solder extensions than de-pin the plug. I figure 6 inch extensions will fit the bill.


Mark my top holes.


I marked the handlebar clamp and a place for the bottom slot. There are too many wires on this deal, but I'm planning on keeping the safety stuff and turn signals, so they have to stay.


The #3 uni-bit is great because you can go all the way to the 1/2in hole and not hit the other side of 1 inch bar.


Now make the two holes into a slot with a dremel and cut off wheel.


Getting there.


Now to get rid of the sharp edges so the wires won't get cut. (I need a smaller sanding drum.)


I used a round file and deburring tool, too.


If you bleed doing this, keep working on it.


Now the top holes.


I used regular bit for a pilot hole because my center drills were in the garage and I was in the workshop.


Uni-bit again.

Okay.


Work over the edges the same way, but can't use your fingers so I paper towel can help you find the sharp spots.


Looking good. Now do the other side.

Sunday, September 26, 2010

Spotlight bar rebuild

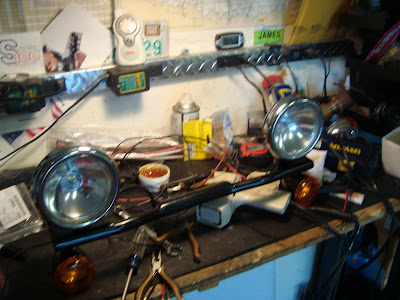
On the right a big ugly cheesy plasti-chrome marker/turnsignal from a Cobra lightbar.
On the left an all metal late model Harley style marker/turnsignal $10 from the swap meet and a spacer. Both of those went to the powdercoater for satin black.


Reflector and pigtail go in.


Bolt, star washers and spacer on the bar.


Looking good.


I had to rebuild the power wires and build brand new ground wires because they won't ground through the body anymore with the powdercoat on them.

Connect the wires and pop the light and bezel on. The powdercoat has made the bezel super tight and tough to get on.

Looking good, but the bad news is that I'm not going to be able to perfectly hide all the wires as I had plan, although it will be cleaner than before.


Thursday, September 23, 2010

Slam the fender

Okay the front fender is a bit high, and I think we can fix that with a lowering plate. Otherwise I would have to cut, section, and reweld the fender mounts.

Throw some hose on there to make sure we have clearance.


We can do it.


Measure the fender mount...


Transfer to the metal piece.


Measure the height....


Double it and transfer to the metal.

Cut.

Oops not a great cut.


Fix it.

Sand the edges to be safe.


Cut again.


Two plates cut.


Center punch the hole locations.(It would be better to measure, but you can get by like this.)


Four spot to drill.


Center drill.


Uni-bit.


Deburr.


Looking good.


Things went terribly wrong about right here. I use the first plate to mark the second. I guess I should have used the fender again.


My center drills were way out of place.


I tried to line up the first holes and use the first plate as a drill guide.


It was better, but I need to remove this much to work with fender.


Trusty dremel. This will be the left side plate for sure.


Bolt them to the fork.


Mount the fender. Clearance is still good.


The plates need the corners rounded and they will probably be painted to match the fender.


Before and after.