Search

Search all blog posts here.

Search This Blog

Wednesday, April 9, 2014

Exhaust Leak Fixed - Hopefully

I found this relatively minor leak when I was trying to dry out the clutch after I washed it.


This gasket isn't sealing and I think I know why.


I pulled the Evo gasket and sure enough the pipe doesn't fully seat into the new S&S heads. I should have checked this before I installed the pipes into these heads the first time.


Time to make the pipe fit.


I filed a nice chamfer on the end of the pipe and filed off the ceramic coat.


A little work and the pipe fits nice.


Get another Evo Screaming Eagle gasket.


It's work to get it on.
 

Put it all back together and hope for the best.

Monday, April 7, 2014

Good lesson and GREAT NEWS!

Lesson of the day, before installing fresh used tanks ensure all vents and flow passages are clear of any obstructions.

If you don't check the passages and fill the left tank with gas and then don't have gas flow to your carb, fuel filter, petcock, or the crossover line from the left tank, then you might decide to clear the crossover line with compressed air. Even with the vent cap on loosely, gas will get all over your right tank.

The good news is that SprayMaxx 2K Clear is pretty much gas proof as advertised. I wasn't figuring on testing it so soon.

Bad news is there is still some type of crap floating around in these tanks.

New Tank Bib - Part 2

Putting the holes in the edge for the lacing. This 4-n-1 punch was supposed to make the job easier. This thing is a lot work to get four holes punched. But it seems to do a good job of laying out my holes.


This regular punch seemed to be easier to use once my marks were made.


Lots of marks.


Does it seem normal for the cutting board to get this torn up?


Lots of holes.

Tuesday, April 1, 2014

New Tank Bib - Part 1

Here's my pathetic excuse for a tank bib. Genuine naugahyde and yes a pocket to keep a piece of milk jug in to make it stiff enough not to sag in between the tanks. It was only temporary like three years ago.


It worked kind of like this with the tanks on. I need to make something with a hole in the middle that will stay in place. This thing got to be a mess once I started to add electronics to the day. Nothing like being reminded of things that didn't work right the first time. A headlight switch was added when the VW relay set-up didn't work out correctly. The voltage meter was added because of charging issues. The neutral was added to help me figure out jockey shifting which I abandoned during other engine and transmisssion issues, but I may revisit that idea again.


Here's the start to my pattern for my new bib. It seems that Braum's and liquor stores are the only places you can get brown paper sacks from these days.


I figure 6 1/2 inches is a good width to start with. So cut the piece and left it as long as I could to start with.


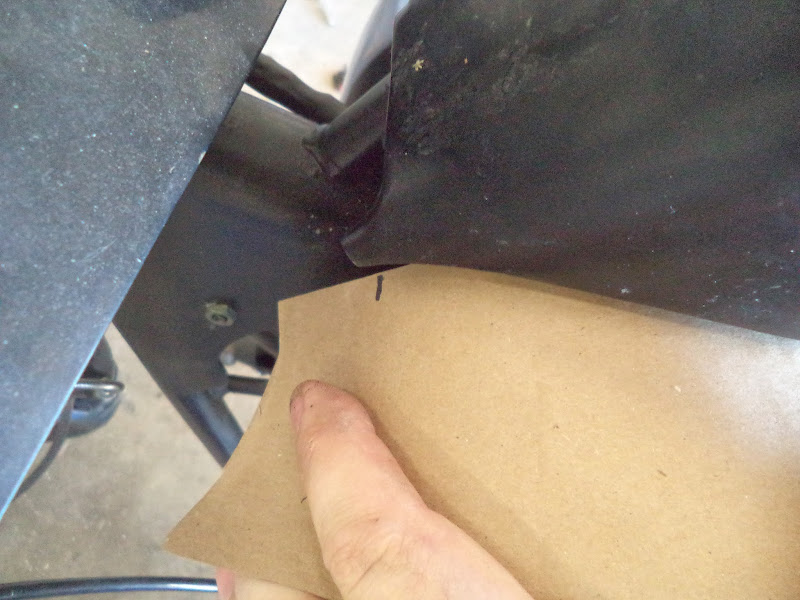
I folded it in half down the middle and marked out about where I need the hole to be.


Cut out the hole like a grade school Valentine's heart.


A mock up of the pattern showed I need a bigger hole. So I did that. Again.


Once I was comfortable with the hole in my pattern, it was time to get to work on the leather. Cut it to a 6 1/2 inch wide strip.


Lay out the pattern on the leather.


Start cutting with the Exacto knife.


A mock up with the real piece showed that the hole still wasn't quite there yet.


A little more cutting to do.


I think the hole is good now.


I have no idea how many times I put it on, marked it, took it off, and cut it to get the fit and shape I wanted. Here's what I'm calling good.The edges aren't perfect or really pretty, but the final product will have lacing around the edges though. I hope lacing is to leatherwork what caulking is to construction.


I started into practicing making the holes for the lacing with this piece. I think the leather I have is the meanest cow that ever lived. I got a few tips from Joker on how to do this easier and I'll show more of the process on my next blog about it.


World's Largest Compression Sack

I am getting tired of bungee strapping ten things, one-at-a-time, to the back of my bike to go somewhere. I have seen Texas Mark's big duffel bag on the back of his FLH a time or two and it works pretty good. Load up one bag and attach it and go. Mark's bag isn't big enough to store my tent and the rest of my gear in and neither were the store bought motorcycle travel bags. I don't always carry a full load either. So here's what I came up with, the world's largest compression sack. I got a 18 inch diameter by 36 inch long duffel bag, 1 inch nylon webbing with reflective stuff on it, buckles, and keepers off the innerwebs. I have always added a reflective belt to my t-bag for safety sake, so I figure the webbing could be one less thing again.

I cut four lengths of webbing to 5 1/2 foot. That may be longish, but I can cut off more later. I figured out how the buckles and keepers go on.


My cousin Troy has a good heavy duty upholstery sewing machine so he helped me out on this project.


Simple if you have the tools and know-how.


The long straps will get us tight circumferentially. I most likely won't need the full length of the bag either. So I cut four 6 inch strips and doubled each over with a female buckle and Troy sewed those pointing outward from the carry handle straps.


It wasn't exactly the original plan to use the end strap loops to hold the circumference straps in place, but it worked out nice that way.


We tacked each circumferential strap down in one place as well. This should help me easily find the buckle and not lose a strap either.


I cut pieces and added male buckles to make the end straps. The criss cross through the end handle wasn't a part of the initial plan either, but I think it will work out nicely.


I went back and singed all of the cut ends with a lighter to avoid fraying.

I'm pretty jazzed about how this turned out. I can't wait to try it out. Pack it on the ground, cinch it tight, and bungee down just one (hopefully tubular) bag. I think it will work great for hunting and camping gear not on a motorcycle, too.

Helicoils for my lower legs

Globalization ain't nothing new. This is the inside of the fork leg of a late 1970's 35mm narrow glide. The funniest part is that it's about the only genuine Harley Davidson part on this Shovelhead.


Anywho, back to the task at hand. There are no threads left in the rear fender mount hole on either leg.


HeliCoil to the rescue.


Drill to oversize. It's really more of ream to size at this point.


Clean out the chip, but don't get any in your skin or eyes when you do it like this.


Geez, even HeliCoil is made in China now. UGH.


Use the special tap make threads in the hole.


Looking good.


Thread the insert onto the install tool.


Thread it all into the hole.


That looks about deep enough. Note the tang still attached to the bottom of the insert.


Break off the tang with a punch and hammer. It's scored to break off so it doesn't take much.


Make sure you get the piece back out of the hole.


Test fit the bolt.


Do the same to the other bad hole and then we're ready for the fender to go on. Then take it back off and reinstall it facing the correct direction.