
Well the spacer doesn't fit. If the plate was flat it would be fine, but the rolled edge of this stamped piece is right in the way.


I can fix it though. I marked the spacer because the shape is so odd that it takes about ten tries to figure out how it lines up with all the holes otherwise.

Dye-chem time.

I scribed a line where the bottom edge of the plate touched the spacer and then scribed another parallel to it about the width of the rolled edge. Now I need to go to the bandsaw. Oh wait, I don’t own a bandsaw.


This line will help me keep the hacksaw cut straight through the spacer.

This thing is so odd shaped that is almost impossible to clamp tightly and cut. Man, I need a bandsaw.

Fortunately my bench has T-slots for workwooding purposes. So I managed to bolt it down and start hacking.


When I was getting close to cutting my bench I moved the spacer back to the bench vise and finished the cut.


Of course the holes still don’t quite line up.

Sand, check fit, sand, check fit, sand, check fit.

Now it should bolt up okay.

Fitting good now. That spacer will have to blacked out soon.

Amazingly, with the spacer in place, everything, including the rotor cover that I uglied up, clears just fine.


The front two bolts for the kickstand plate go through the spacer now. The bolts from ACE were too short or too long in the size I needed for the job. So a bit of dye-chem on the offending extra length and the dremel cut it off.

Kickstand plate on.

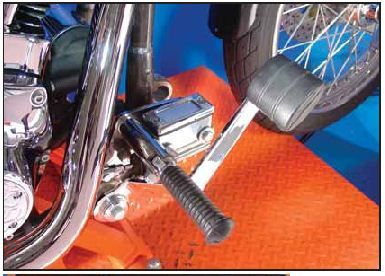
I threw the old control plate up there to see where the peg used to be. I don’t think I want to run a peg in front of the pedal though.


I think my best bet is to put a peg on the end of the pivot shaft. It’s a 1/2 – 20 threaded end. There I can control the clutch and friction zone with my toe and have my heel resting on the peg.

Let’s try this peg mount. It’s a swapmeet find from way back.

Nope, it won’t work it’s too thin walled to drill and tap to the correct size.

This could work. It would need to be drilled and taped larger.

I have these, too.

I’ll just throw the old peg mount out front for now.

This is how I install a kickstand and spring. Hook the spring on the stand and holder with the stand forward.

Roll the stand back.

Add the stop and top nut.

Finally back on a real sidestand. Luckily the spacer didn’t seem to affect the lean of the bike on the stand so its good to go.

Aw geez. The L-shaped kickstand stop, that keeps the stand out of my primary belt, interferes with the hangy down part of the foot clutch pedal. I have no idea why these pedals are shape this way unless it is to mimic the old mechanical brake pedals.


Let’s see if we still need a L-shaped stop with the control plate spacer on there. I swapped the stop around to be more like a standard stop. This looks okay.

¡No bueno! The first bump I hit will roll this up and into my belt.

This thing has got to go. Man, I need a band saw.


Cut…

And sand. I see black powdercoat in this thing’s near future. I guess I can’t have nothing chrome on this bike.

Everything works together now.


Now back to the foot peg issue. My buddy Jason at Blue Collar Choppers hooked me up with two of these peg mounts. Already taped for 1/2 - 20, pin and snap-ring instead of a through bolt, and already black.

Oh yes, I do like that.

I had a set of genuine Kuryakyn fat Iso-pegs that I had blacked out a long time ago, but I haven’t run them on anything. I think I will now.

Here's a comparison of the two release arms. The top one is the new unmodified one and the bottom one is the modified version that I got for free, but it would work.


New arm on.


Primary belt in.

Clutch basket goes on.

The springs, pressure plate, and cover go together next. Lay them over on the bench and figure out where the springs go.

Put the springs on. (I didn’t get pictures of the next steps.) Then add the pressure plate with the adjustment out through the hole in the cover.

Don’t knock the springs over while you add a washer, big fender washer, and lock nut to the adjustment screw. Get it tight enough that the spring stay put.

Flipped over the assembly looks like this.

You may need to move the springs around a bit so all the clutch rods will go through.

Put the assembly onto the clutch rods and studs. Make sure the stud stick out where they should.

Put the nuts on the studs and hold the adjustment screw while you remove the lock nut and washers.

Now adjust the adjustment screw. Note the position of the release arm.

When you bottom out the adjustment screw the arm will go back. Adjust the adjustment screw so that the arm still clears everything with a little room around it.

Hold the adjustment screw and run down the lock nut and set it.


Every thing fits with my belt guard, but it's close. I really need the flat part of this rod to run parallel to the guard to clear. This used rod has worn in and wound up bent a bit with the flat wanting to point up and down. I need it straight to position it were I need it. It will mostly likely bend again into the position.

A little hammer work and it's straight enough.

The rod is on and roughly adjusted.


Now to see if it works properly. Seems to work.
I got it running and I ran it around the neighborhood. Jockey shifting is fun, but will take some practice to do without thinking about it. Neutral is easy to find if you really need it. I didn't dump the clutch once, but I think I will adjust pedal down a bit and possibly move the rod mount lower on the pedal.
The right foot peg is way different and it does feel lop-sided.
I need one of these set-ups to balance the bike.
No comments:
Post a Comment