So evidently a late model hydraulic front wheel runs the same hub and rim as a springer, but not the same offset. The axle spacing and disk were perfect, but the rim and tire were way right. Let's get started.

Here's the problem.

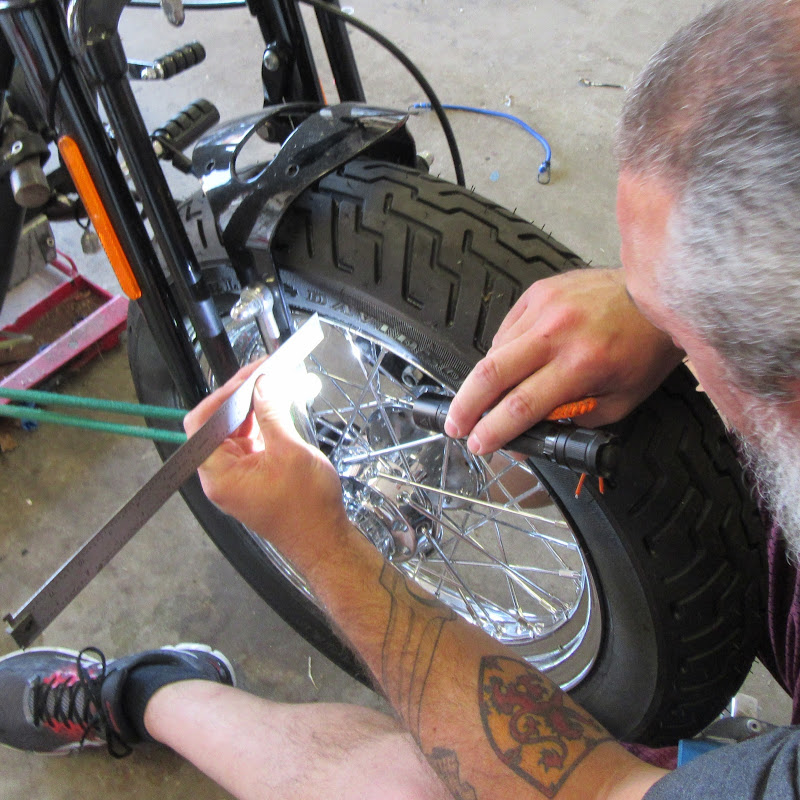
The 100% correct way would involve taking off the tire and using a repair manual to determine the proper offset, but we aren't going to do that. We decided to find decent spot to reference from the fender supports on each side. These wheels aren't supposed to be truly centered between the fork legs. From this point on the left, we measured as 1 and 20/32 inch to the rim.

From this point on the right we measured at 1 inch.

So we figured that the whole thing should be moved 10/32 inch to left.
Off with the wheel.

Take the caliper off, too. The wheel and tire will come off with the caliper in place and no rotor, but the goal is to get a rotor mounted after we get the wheel offset corrected.

Hang the caliper for safe keeping.

Wheel goes into the truing stand.

Now to get a left side reference measurement. 2 and 25/32 inches to the stand.

We did a quick true check to see how the wheel was to start with. It was within spec.

The plan is to loosen the right spokes a bit, knock the rim left a bit, tighten the left spokes, then measure. The first thing to keep in mind, righty-tighty and left-loosey, but that's easy to screw up on spokes, because it's kind of upside down and backwards. We may have tightened and not loosened the right spokes to start with, but we won't admit to it. The first try was loosen by one flat of the spoke nipple. We used the valve stem as reference to doing a revolution of the wheel.

Then some knocking.

Tighten the left spokes by one flat.

So one flat on both sides got us 1/32 of movement.
The next series we loosened two flats on the right spokes, knocked the rim to the left, then tightened the left spokes by one flat all the way around, knocked the rim to left, then tightened the left spokes by one more flat all the way around. That got us an additional 2/32 of movement, for a total of 3/32.
Another series of loosen two flats on the right spokes, knock the rim to the left, then tighten the left spokes by one flat all the way around, knock the rim to left, then tighten the left spokes by one more flat all the way around. Again we got an additional 2/32 of movement, for a total of 5/32. That should be about halfway to the goal.
So it's time to check it out on the bike

Halfway there as we thought.

Back to the truing stand. We did two more series of loosen two flats on the right spokes, knock the rim to the left, then tighten the left spokes by one flat all the way around, knock the rim to left, then tighten the left spokes by one more flat all the way around. That put us at 9/32 total or so, close enough to the 10/32 anyway.
At this point we re-trued the wheel and made sure all the spokes were tight and made the same pitch when struck with the wrench.

Install and final checks. Both sides where pretty close to 1 and 10/32 inch from the reference points.

Looking good.

Well, so much for putting the rotor on the wheel. This rotor doesn't fit the hub. The bore in the center is too small.

No comments:
Post a Comment