Here's a stolen photo of a stock spring plate on a three stud clutch basket. Note the tabs at the nuts that keep the nuts from loosening.

Usually that is all covered with the primary covers, but I'm running a mostly open belt primary and this bigger spring plate to cover the springs. It looks good and keeps most debris out of the springs. However the nuts do back off and things get loose. I have tried just about every type of lock nut with not real success. I considered safety wire, but it seemed like something else to catch a pant leg on with the clutch spinning.

Here's what I got, 5/16 inch aerospace lock tab washers. MS9582-11, MS9581-11, or MS9276-11 will work. I believe Harley part numbers 7402 or 33318-85 would work okay, too.

This is how I take off the clutch plates without shooting the springs everywhere. Take the lock nut off first.

Loosen the adjustment screw, almost all the way out.

Get a big fender washer and threaded the lock nut on again.

Now take off the stud nuts and the plates come off and the springs don't fly off.

The first and last plates weren't stuck, but the rest of the plates came out like this. Stuck together tight. Don't put away the bike wet, I guess.

Bang the mess on the ground and everything comes apart easy enough.

Now to prep the plate. Looks like I need a hole right near the edge of the flat spot on the cover.
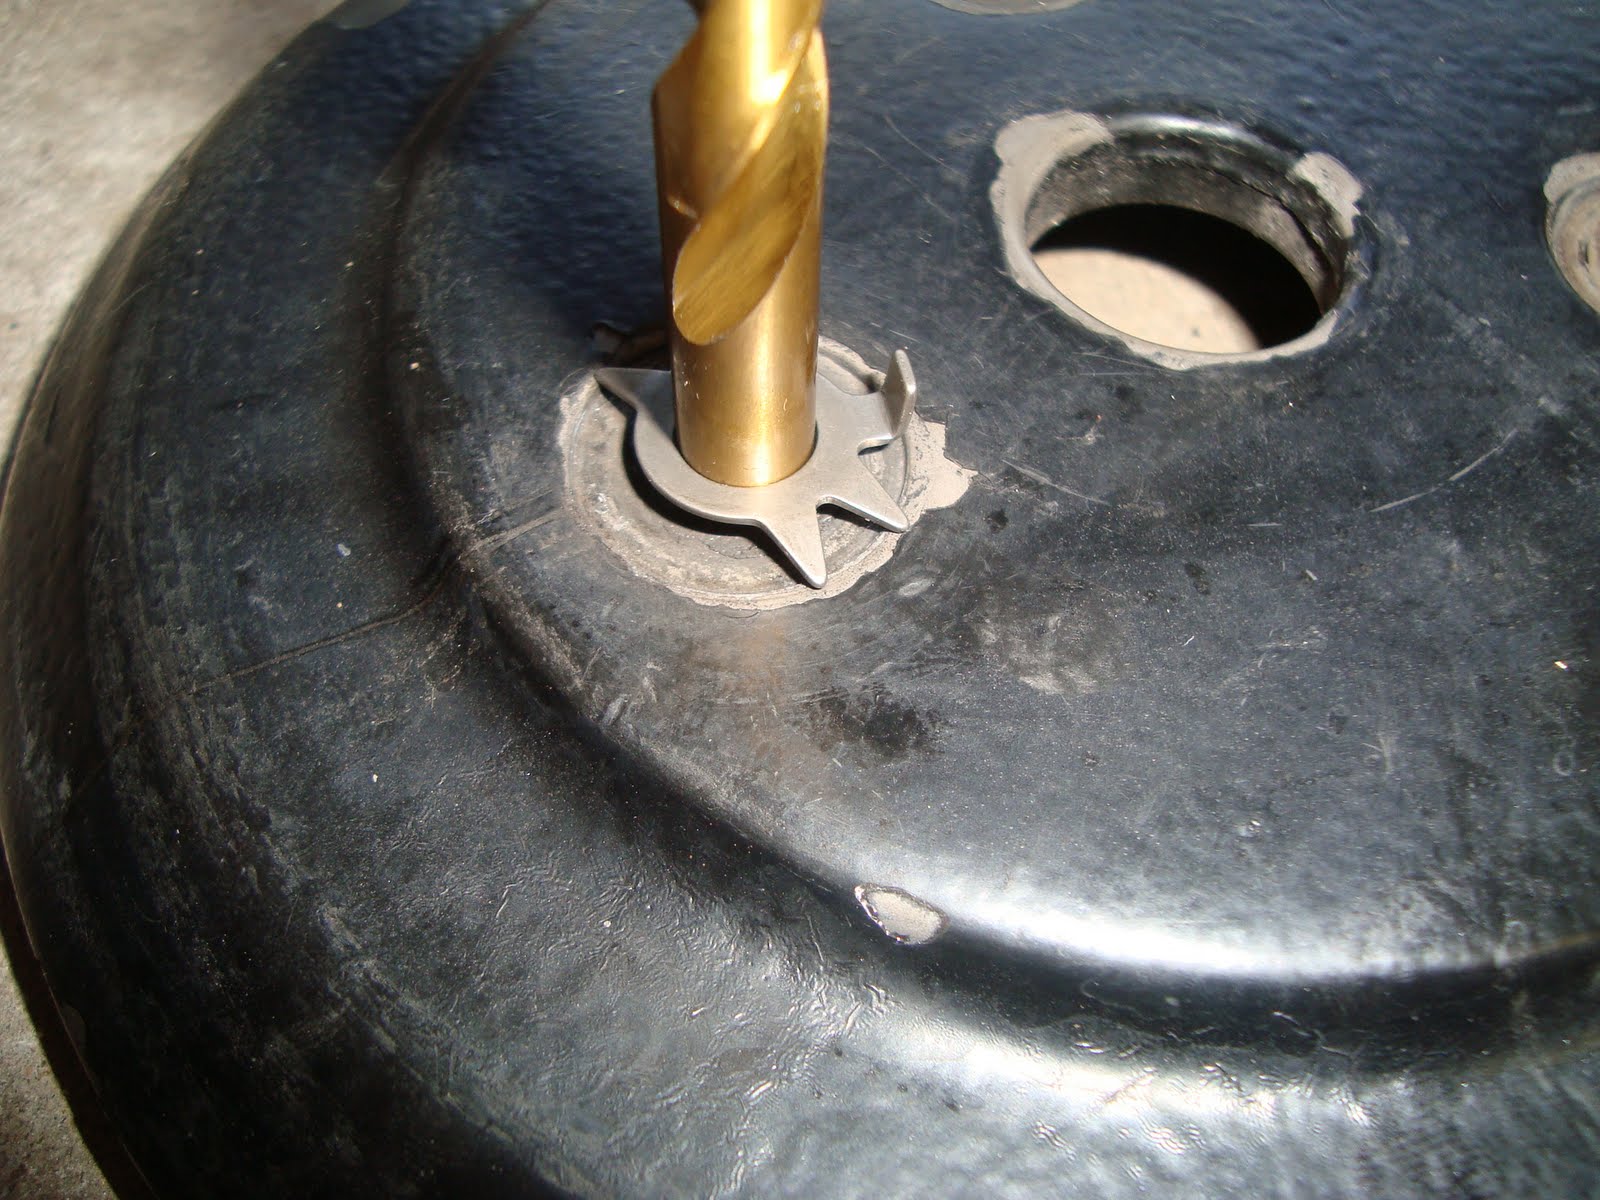
Perfect. (Even if the picture isn't.)

All three drilled. I should have put all the holes to the outside.

Now to clean the plates with brake cleaner and hit the frictions with some rough sandpaper.

Stack the springs. The holes may end up to close to the springs, but we'll see how it goes.

Restack the clutch plates.

Put the plates on like I took them off, and add the stud nuts.


Adjust and lock the adjustment screw and lock nut.

Everything looks good. I won't bend the lock tabs until I'm sure the tension on the springs is where I want it.


