Search

Search all blog posts here.

Search This Blog

Saturday, December 31, 2016

Longbow Custom fixes this Stroker Shovelhead: Part 4

Part 1:
Part 2:
Part 3: 

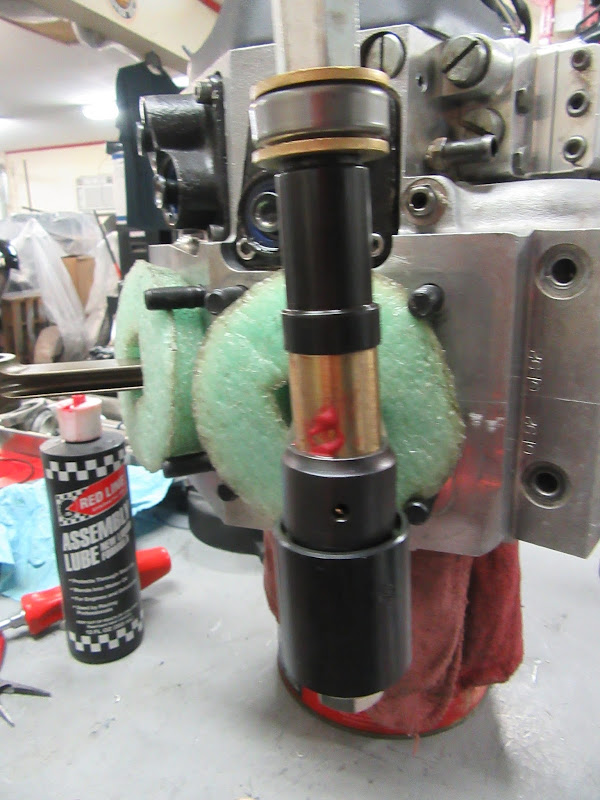
On to the pushrods. When we finished the day that Daniel and Jeff tore down and started back up with this motor, Daniel inventoried all the parts and gaskets I had brought to finish the job to see what else was needed. He asked me about pushrod seals and I was kind of surprised. I figured I would do those once the motor was back in the frame. So I asked him how he would do them without a primary hooked up. That's when he showed me that nifty wrench.


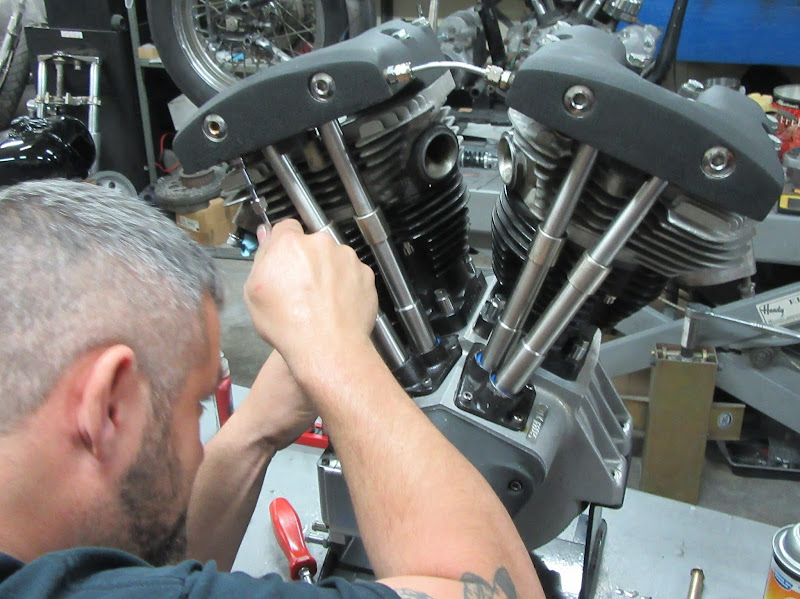
Finally looking like a motor again.


Fresh stator.


Rotor on.


Oil lines.


On to the intake, yes my intake hasn't been correct. It's a zero, but I need a plus one for this stroker.


Daniel searched the shop, but could only find a plus two. The fit is a lot better and should work just fine.


O-rings and bands.


Trap door goes on.


Okay, here's Daniel's incredible feat of strength for the day. After he built the steering stops on my frame for my springer(blog on that will be published soon), he was ready to put the motor into the frame. I had assumed that the roller would be put onto the lift and motor worked from there. So there we were by the lift with the bike about twenty feet away and motor sitting on the floor about halfway between. Daniel walks toward the motor and bike, picks up the motor and carries it into the frame all while almost not breaking stride, let alone straining or asking for help. It was pretty amazing. I have seen a lot folks hug and carry motors, but nothing like that.


They never want to line up easy though. Even Daniel's dad had to help Daniel and Jeff.


A little closer now.


Jeff gets the bolts tight enough for the trailer ride home.


We slapped the right tank on it for a photo op.


This is coming together nicely.


I like it.


Friday, December 30, 2016

Longbow Custom fixes this Stroker Shovelhead Part 3

Part 1:
Part 2:

Did I tell you Daniel has about every special tool for Harley? This is one of his boxes. It's a double bay with every drawer full of just specialty tools.


Daniel had already pulled the wristpin bushings and discover that the Truett & Osborn rods take a larger OD bushing than stock. So he had to get those directly from Truett & Osborn. So here he is installing the bushings with the proper tool. These bushing do not a have an oil hole in them. So instead of lining up the holes during the install, the holes will be match drilled after installation.


Presses right on in.


By the book you ream the bushings and then hone them to final fit.


These bushing were crazy tight and Daniel had pre-hone them just to get the reamer to start.


The fit with the ream was still too tight. Daniel says usually you can ream the bushing without supporting the rod. He said these were too tight and he didn't like the sideways force he was going to have to use on the rod. So back into the toolbox for another specialty tool. The two set screws on this support the rod while you ream.


It was still a lot tougher than it usually is.


Daniel is a man of extreme feats of strength.(more on that later)


Finally time to hone it to the finished size.


Looking good.


A little on wristpin fit.


Hindsight being what it is, the holes should have been drilled before the reaming and honing. The burrs got removed just fine with a little more work on the backside.


Finally time to make real progress today. All that work was progress, but things that were not planned for in the original timetable for sure. But there's always something.


Wristpin going in.


Keepers going in.


Oil up the rings and make sure the gaps are not aligned.


Daniel had the proper tool. I usually use a big hose clamp.


Jug going on. Notice his special ratcheting wrench that fits the crank. He used it to hold everything still while he fought the piston, rings, and jug. I would like to find a similar tool, but this one didn't have a mark on it and Daniel doesn't remember where he got it from. 


Tool coming off.


On the stroker there is one headbolt on each cylinder that has to be slipped in before the base nut goes on.


Torque base nuts.


This is the front cylinder headbolt that goes in before the base nut.


Annealing my copper headgaskets for reuse.


He put the gasket sealant on both sides, but I was quick enough to get the pictures.


On with the heads!


Daniel torqued both heads to spec and pattern. I just missed another picture, either because I was talking too much or because he was working that quick. Something that Daniel didn't do, that I have always heard to do, is matching the intake to the heads before torqueing the heads down. In his experience when using S&S jugs, the heads will go to their happy place when torqued regardless of what you may try to adjust. You just need to make sure your intake fits properly. Stay tuned and we will finish this up.

Longbow Customs fixes this Stroker Shovelhead: Part 2

Part one is here.

I will start off this episode with a shout out to JamesD for having a stator to replace my stator with plug wires starting to chafe. He didn't have a stator to match the regulator. The regulator I had gotten from him when we had to K-ball my bike to get Speedjunkie home. So JamesD had a 32 amp stator and regulator instead. It's not as pretty, but it should work fine.

Time for Daniel to get back to business. The cases needed a helicoil for the tappet block, and the connecting rods needed wristpins and wristpin bushings.


Pull the camcover back off. Loosen the bolts.


But the ignition needs to come out before the cover.


Off with tappet block that has the bad threads.


The front outside bolt hole of the rear tappet is the problem.


So this oddball pitch meant that the proper helicoil kit had to be ordered. And wasn't even a kit, just the inserts and tap sold seperately.


It should be a G bit, but he didn't know that ahead of time and he used the closest bit we had. That's an internet helicoil table.


I always double check to make sure the insert fits the fastener especially on a odd ball pitch into a part that I really don't want to mess up.


Jeff helped hold the vacuum hose to the hole while Daniel drilled in out.


Then the tap.


Install the insert.


Install the tappet block. The fastener holds torque, success.
I

Going back up. More assembly fluid never hurt anything.


I suppose Daniel didn't trust my previous two teeth off breather timing efforts. We wanted to verify.


Ran it through the degree wheel several times.


He finally settled to what he thought was correct timing.


His timing was only one tooth off.


Back on to it's side to get at the wristpin bushings.