Search

Search all blog posts here.

Search This Blog

Saturday, August 24, 2013

Installed a Lucky Charm

I got this lucky charm from a broke down biker I helped. I have been wanting to mount it somewhere, but I hadn't had a chance.


Got some hardware.


Found my spot. It couldn't hurt to try and add some luck to the bike. Centerpunched my first hole location.


Drilled.


Tapped.


The hole needs a countersink to fit tight.


Bumped the face with a bigger bit to make a countersink.


Perfect.


Centerpunch second hole.


Drill. Countersink, Tap.


Install screws and backer nuts, then test. I think it's the only part of the bike guaranteed to always work right.


Band-aid solution for stroker pushrod clips

Learning stuff. My pushrods are leaking because a stroker needs 3 1/2 inch clips on the top and not 3 5/16. I couldn't get any locally and BigJim is sending me a set of stainless ones, but I have to get to Shovelfest to get them. Here's my solution to get my motor broke in and get to Shovelfest.
 
1/2 inch pipe, 1/2 copper coupling pipe because it has a larger ID than a pipe and the too short clip for reference.


Figure out 3.5 inches.


Dye it to mark it.


Use my wood working marking tool.


Brand new Dremel kit.


Chuck it up in the vise.


Trying to cut to it to exact length was a total hack job.


Square the end on the belt sander. I'm glad I started with 12 inches.


Something is wrong with this new Dremel it got hotter than my work piece and I had to put it down and rest it alot. It even made that neat burnt plastic smell. I never made it through a whole song on the radio without resting it. It's going back to the store.


Cutting down the length of the pipe first was better. I left a bit of material on each end to hold things together.


It's not really a full half of pipe, so I had to make three cuts and section part of it out.


I cut it to length well past the mark.


I sanded each piece to length and square.


This was the whole point of the pipe piece. The copper coupling needed just a slightly larger ID and this got it perfect.


I could clean off the dye and let the copper patina properly, but I won't. This is just for the next week or so.


Wednesday, August 21, 2013

Got the shovelhead home

It's about 25 miles from Lummie's place to mine. It took me about an hour down the surface streets. Going up through the gears and back down through the gears. Bike kickstarts real easy enough. The Dyna-S is the great. Front exhaust pushrod and maybe intake pushrod are leaking. I found out that keepers are too short for a stroker. Clutch is definitely a touch tight. It's not idling correct and felt a little lurky at steady low throttle. Got worse as the engine warmed. Probably put the 31 back in. Snap ring from the clutch lever pin is gone, but I didn't loose the pin luckily. Very smooth motor as far as vibes go though.

Saturday, August 17, 2013

Retorqued, Fattened, Heated, Cooled, Retorqued, Rode

I did the retorque again a few bolts moved. Swapped the jets to 32 and 72.


Ran it to 200 F on the heads again. Let it cool to ambient temperature. Retorqued again and nothing moved.

Rode it.

More Big Twin Oil Pump Check Balls

This information was put together by Micheal Henry and reused with his permission. The part number info came out of Donny Peterson's Guide to the Shovelhead part II. It's pretty interesting. Given how popular my check ball post is, I would think this is good follow-up to it. This may be root of some folks sumping issues.

Yall may already know this but it was new information for me and maybe it will help someone.
I upgraded my oil pump plugs with a set of aftermarket ones back in the spring and all was fine until I had to park the bike for the entire month of July due to rain almost every day (that’s right, I don’t ride in the rain if I don’t have to). When I finally got a chance to ride, the bike sumped like a mother on crank up. I know that a lot of folks say this is normal but this bike has not sumped even a little bit since the top end rebuild and it sumped only rarely before that.
I ordered a new ball and spring from J&P and this is where I first realized that there might be something weird with my 1980 oil pump. J&P does not list a check valve spring for 1977 thru 1980 so I ordered the 1981 and up spring and a new ball. After talking to a member here, I now realize that the chances of a steel ball going bad before an aluminum seat is slim to none but I ordered it anyway.
New spring and ball arrived so I clamped the supply hose and pulled the old stuff out with a pencil magnet. Got most of the old oil out of the check valve seat and spritzed some brake cleaner in there JIC there was a bit of trash. Dropped new ball in but noticed that the new spring was longer than my old spring by .337 inches. Put my old spring back in and ordered the 1976 and earlier spring.
Received the new spring and installed it but the bike was still sumping like a pig after sitting for more than a couple of days. I don’t know why but I figured that I would check the spring recess hole in my new aftermarket plug and compare it to my old stock plug. The stock plug spring recess hole has a depth of .358 and the new aftermarket plug recess is .564. All measurements taken by a nonmachinist on an analog vernier but you can get the gist of what I am saying. I put my old stock plug and the early spring in the bike and let it sit for 8 days. Cranked it up yesterday and not a drop of sumping. So here is what I deduced after doing some reading.
1966 to 1972
Check ball spring 26363-36
Check ball plug 26362-36
1973 to 1980
Check ball spring 26363-36 (length 1.626 inches)
Or 26262-80 (length 1.963 inches)
Check ball plug 26362-36 (spring recess hole depth .358 inches)
Or 26263-80 (spring recess hole depth .564 inches)
1981 to 1985
Check ball spring 26262-80
Check ball plug 26263-80

There are 2 different check ball part numbers also but I don’t know the differences in them (HD-8866 or HD-8873). Both are basically 3/8 ball bearings as far as I know.

My 1980 oil pump could have either the early spring and plug or the late spring and plug but if you use a -36 spring, you must use the -36 plug. Likewise, if you use the -80 spring, you must use the -80 plug.
So back in the spring I had installed a -80 style plug on a pump with a -36 spring and I was not getting the correct check ball seat pressure (the -36 spring is .337 shorter than the -80 spring).
So, if you have a 1973 to 1980 oil pump, insure that you don’t mix and match dash numbers like I did.

Friday, August 16, 2013

Heat cycles/re-torques on the fresh top end

I wanted to share my heat cycles/re-torques so far. We build the motor on Saturday and ran it 200F head temperature per HF no touch thermometer. Sunday was a cold re-torque via calibrated elbow, breaker bar and doing an every other bolt pattern. We got pretty much a 1/8 to 1/4 on every bolt. We ran it up to 200F again. Monday was another cold torque sequence and less than 1/8 of a turn on each bolt. We ran it up to 200F again.

The plan is another re-torque and neighborhood ride. Another day and another re-torque and easy ride home about 15 miles or so.

Tuesday, August 13, 2013

Brand new S&S Topend

Here you go, brand new S&S Super Stock Big Bore heads with triple springs and 0.590 lift. Fully assembled and ready to go.


Check this out, Keenserts or something similar for the headbolts.


New S&S cylinders and pistons, too.


The pistons are already fitted to the cylinders.


Getting everything ready and lined up on the bench.


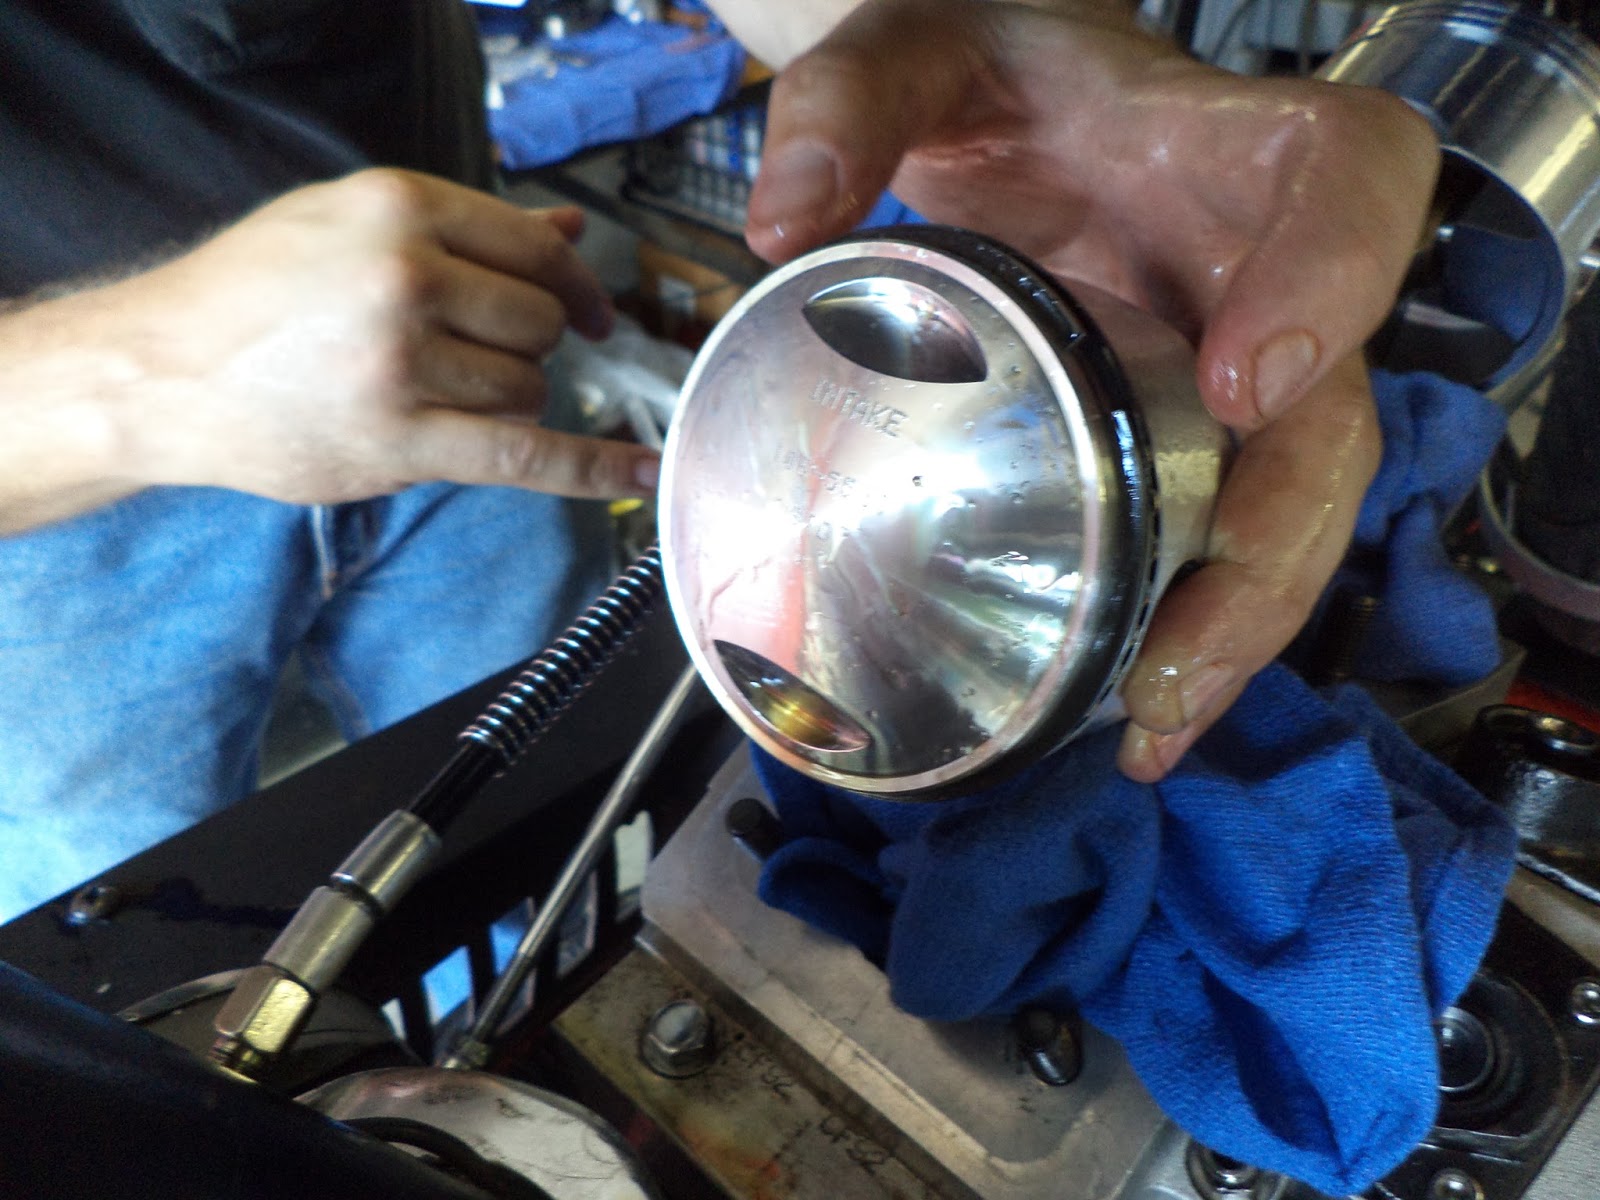
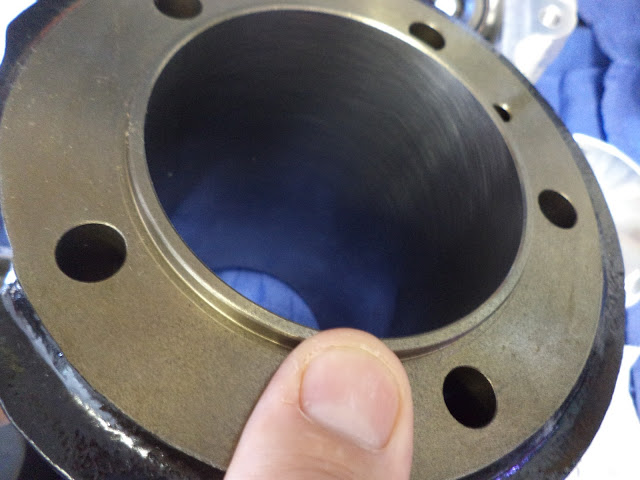
Check out the beautiful crosshatching.


Here are the rings. The top one has the chrome edge.


Both rings have a dot to face up.


Put one ring into the cylinder.


Use the piston to make sure the ring is square.


Check the ring gap with a feeler gauge. The rule of thumb is 0.004 inch gap minimum for every inch of bore. That's 3 5/8 X 0.004 = 0.0145 inch. We actually tried to get 0.018 inch gap. Of course it was too tight to start with.


So we worked it over.


Then checked and then reworked until it was good to go. We did this for all 4 rings for each cylinder.


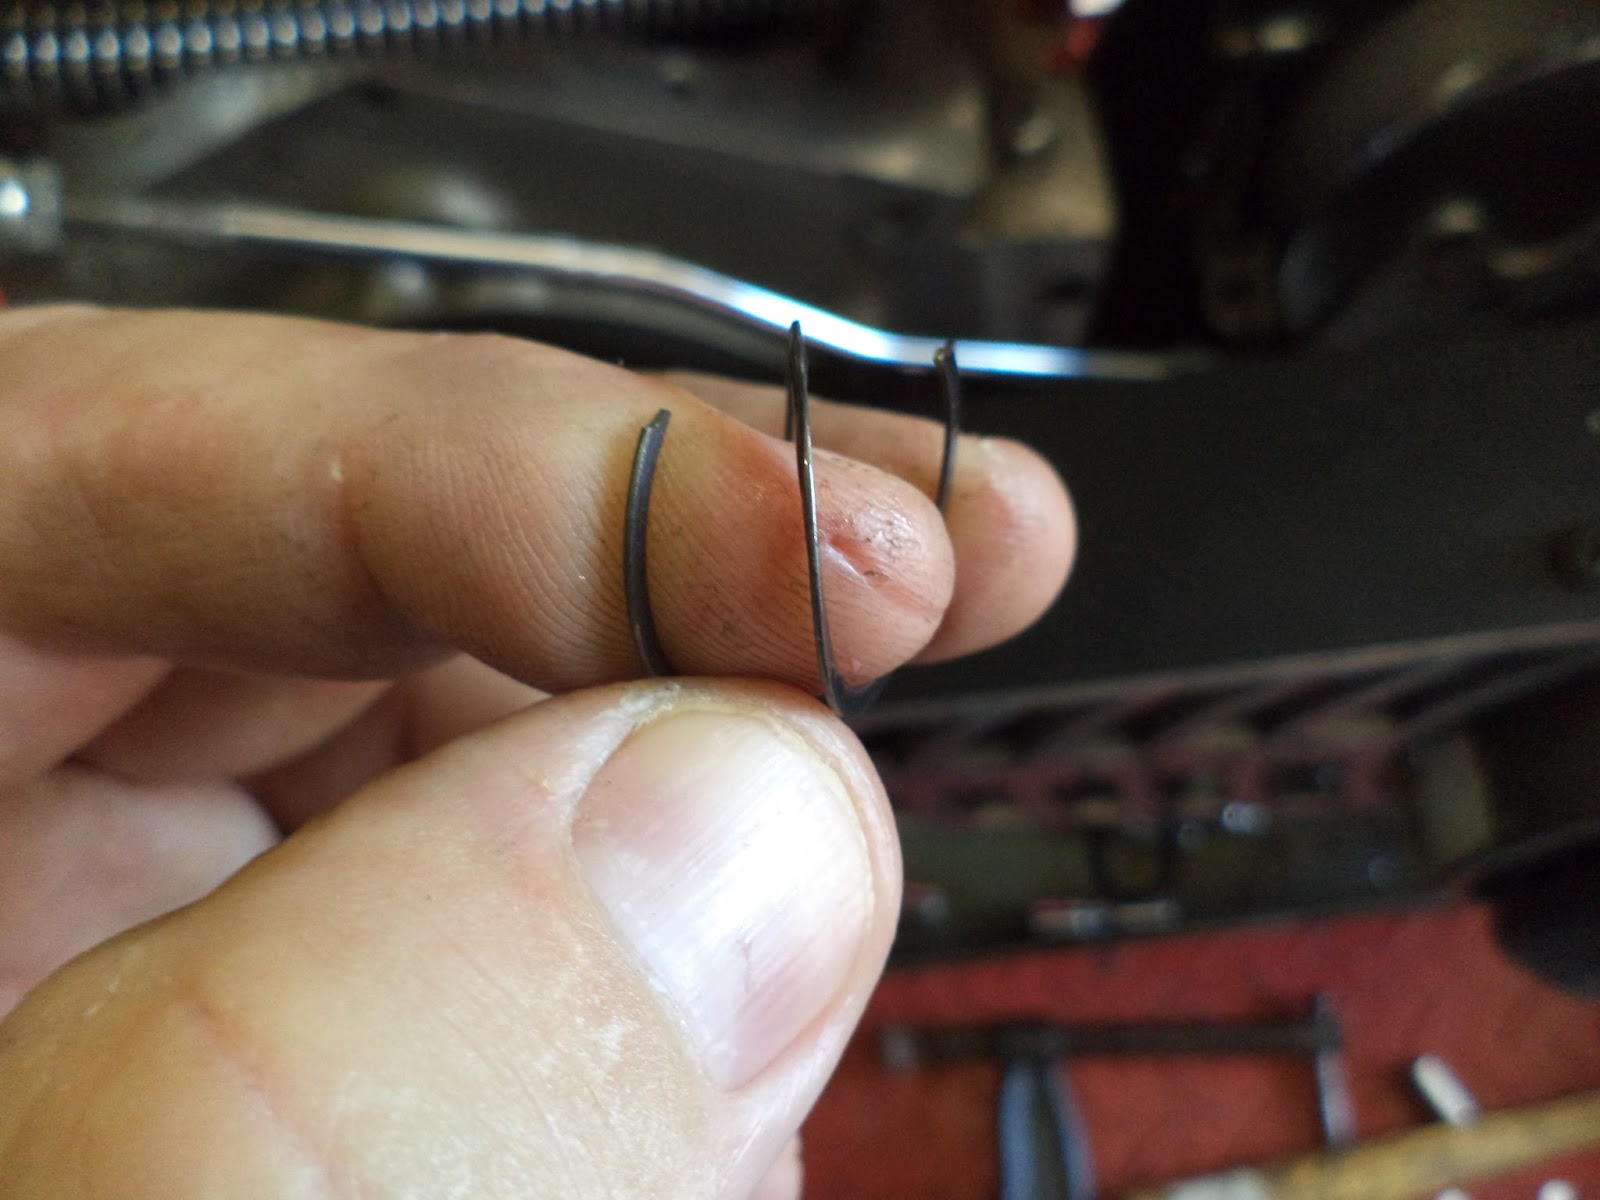
Pull the spiral wrist pin keeper. We had planned on using teflon buttons, but we managed to not get any in hand in time.


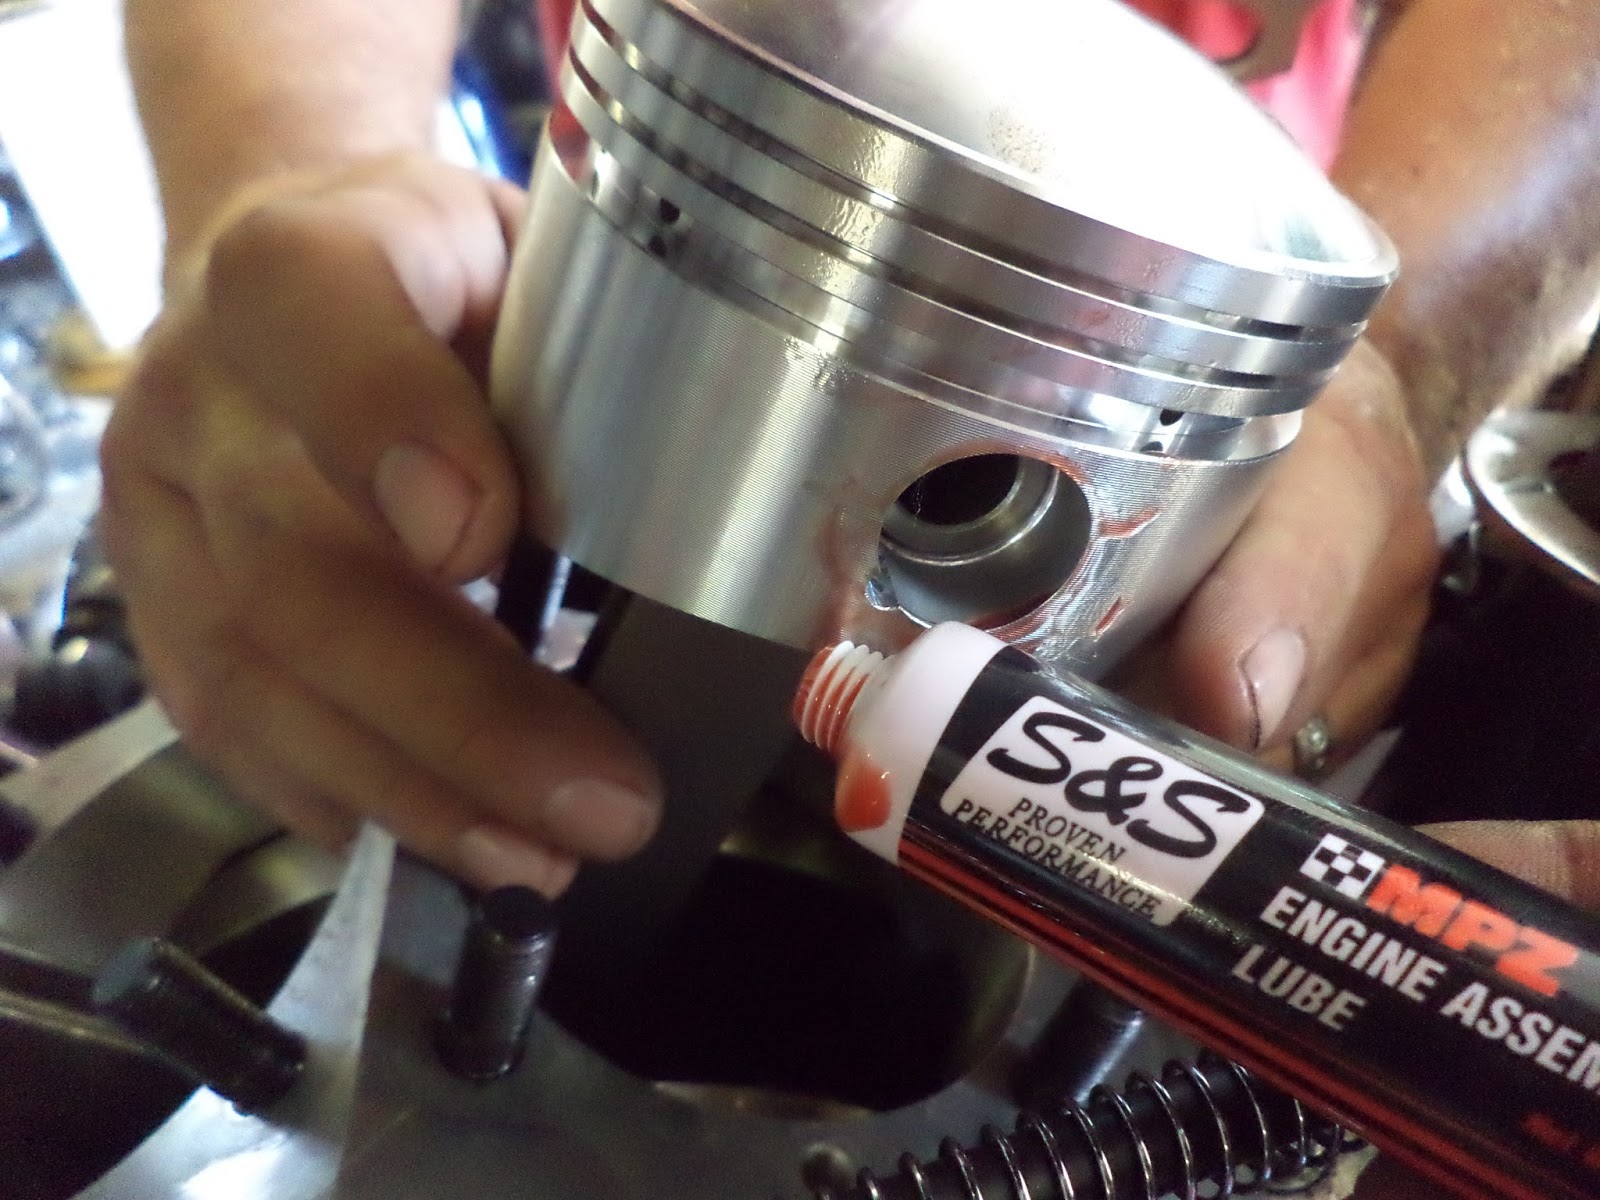
Assembly lube and the wrist pin goes through the piston and wrist pin bushing in the rod.


Work the wrist pin keepers into place.


Get both pistons on and all four wrist pin keepers in place.


Oil down the pistons real well.


Expander ring goes in first. Gap to the back.


Oil ring rails go in with the gaps offset toward the back. (Gaps at my thumb and fore finger.)


Second and top rings go in with gaps offset to the front. (Gaps at my thumb and fore finger.)


Front rings go on the same way.


Base gasket time. S&S did the poka-yoke on these gasket by printing CYL SIDE on them. Otherwise just make sure the hole in the gasket lines up with the oil return hole in the case.


We're going to use copper head gaskets this time. They need to be coated with Gasgacinch sealant and that needs a bit of time to dry. So do this now.


Compress the rings.


Install the cylinder and remove ring compressor.


This is interesting. For a big bore engine you need these funny nuts for the base nuts. The Colony version is taller(right) than the S&S version.


The S&S head bolt hardware is a bit different, too. The S&S washers have a chamfer on one side.


The chamfer goes toward the head of the head bolt like this.


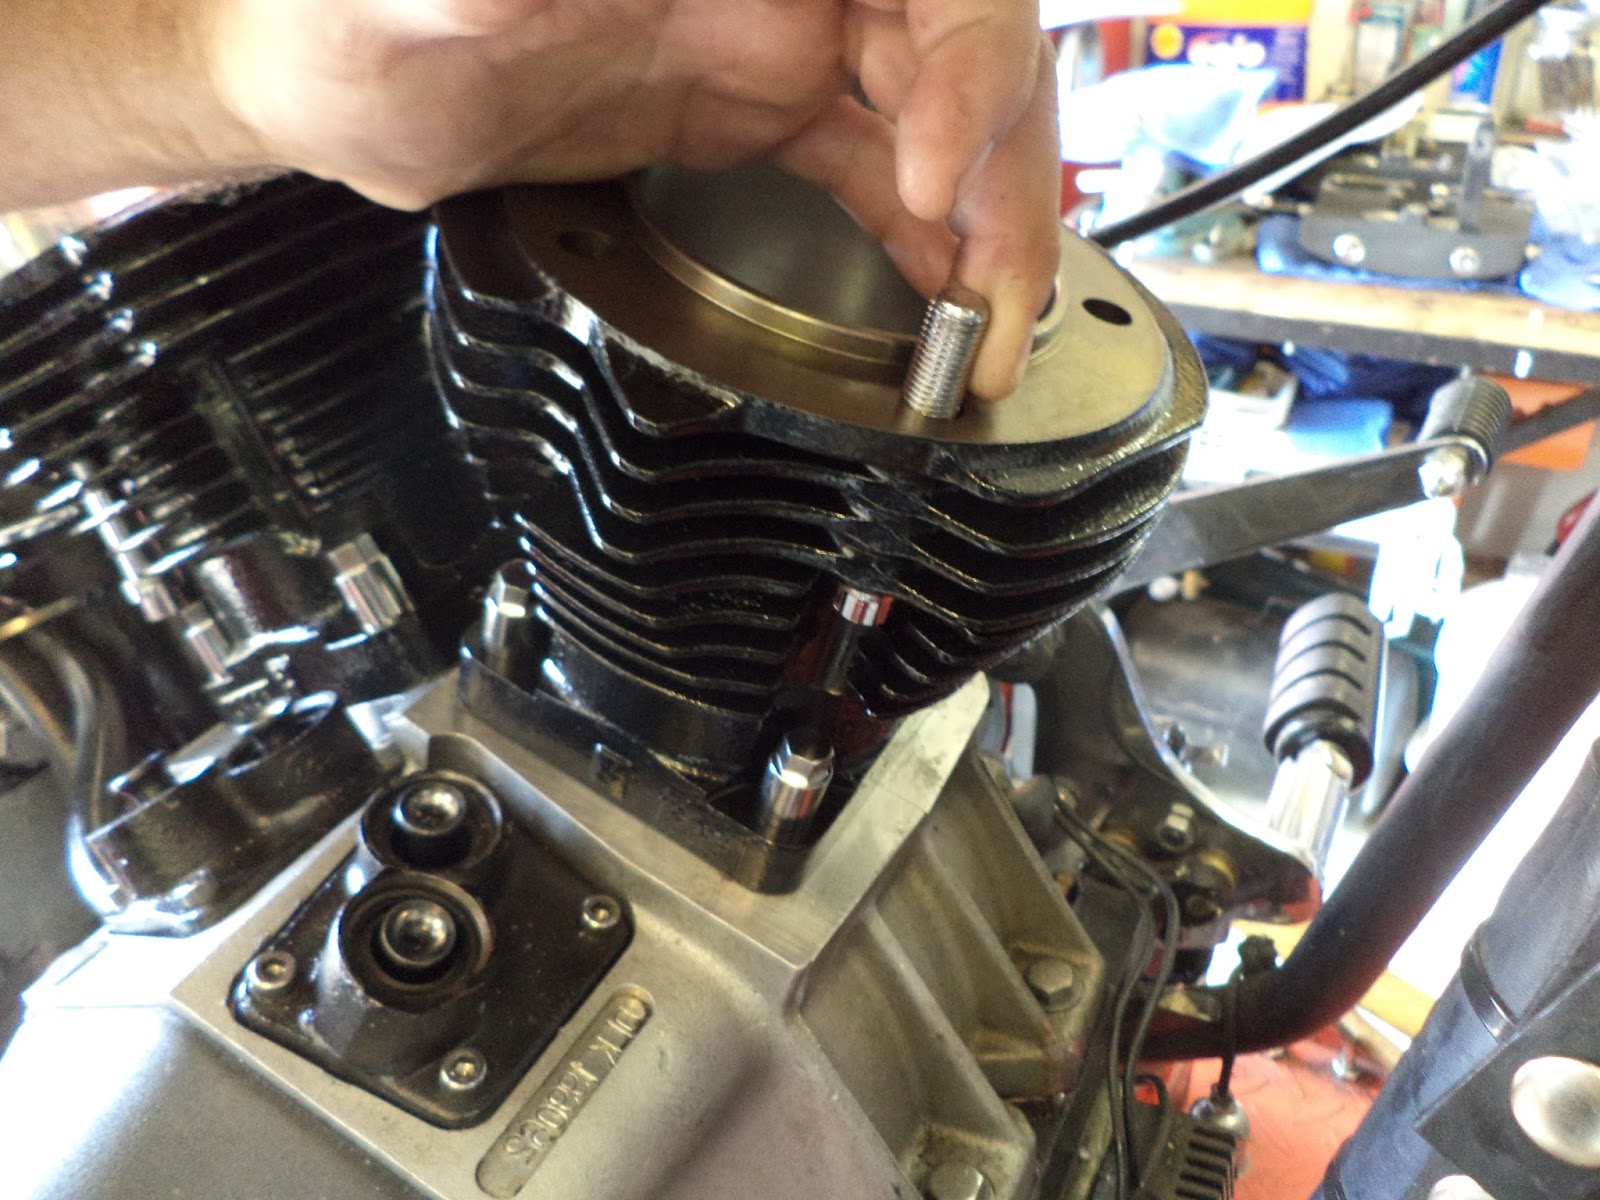
This rear cylinder right rear head bolt needs to be put in before you put the base nut on. Trust me. Lightly seat all the base nuts at this time.


Oil the inside of the cylinder real well for start up purpose.


You the ring compressor and install the front piston into the front cylinder.


This front cylinder right front head bolt needs to be put in before you put the base nut on. Trust me. Lightly seat all the base nuts at this time.


Head gaskets. There is poka-yoke on these gaskets so be sure the hole in the gasket is lined up with the hole in the cylinder.


Now on to getting the rocker boxes onto the heads.
Isn't this interesting.


Yes. The valve has kissed this one here a bit.


Dremel out some clearance.


Should be enough.


Another kiss spot here.


More clearance now, Clarence.


Thoroughly wash out all the aluminum chips.


Blow dry.


The rockerbox hardware for the S&S heads is different, too. Instead of studs and nuts, the S&S set-up uses standard bolts. You can at least pull the front rocker without pulling the head with the engine still in the frame, maybe the rear, too.


The use of bolts means you have to build the rockerboxes and heads upside down.


Flip.


Long and short bolts.


Short ones go here. Long ones go everywhere else.


Criss-cross pattern to 20 ft*lbs torque.


Drop the heads onto the cylinders.


A 12 point universal socket really helps run these headbolts down, but just barely tight for now.


With both heads mostly attached...


Check fit the intake.


Now tighten the bolts. I'm going with the tried and true calibrated elbow method and not a torque wrench. Torque adaptor, 3/8 to 1/2 drive adaptor, and a big 1/2 inch breakover. Go evenly and progressively on every other bolt around the cylinder. 5 bolts per head means you'll get the ones you skipped next time around. When you feel the bar want to bend instead of turn then it's good.


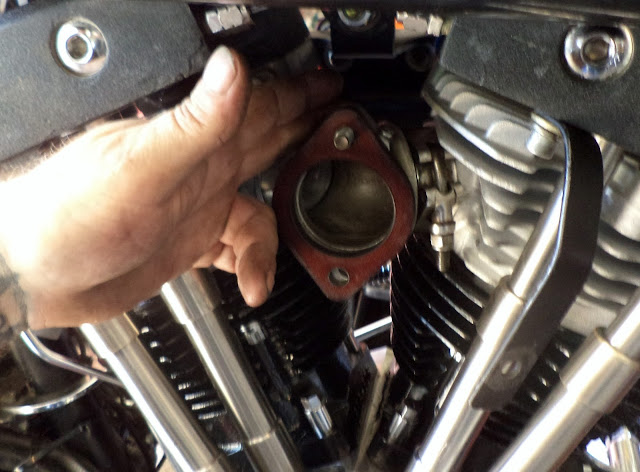
This is the trick to intake O-ring installation. Put them on here like this.


Lube up the O-rings and the O-ring grooves with petroleum jelly.


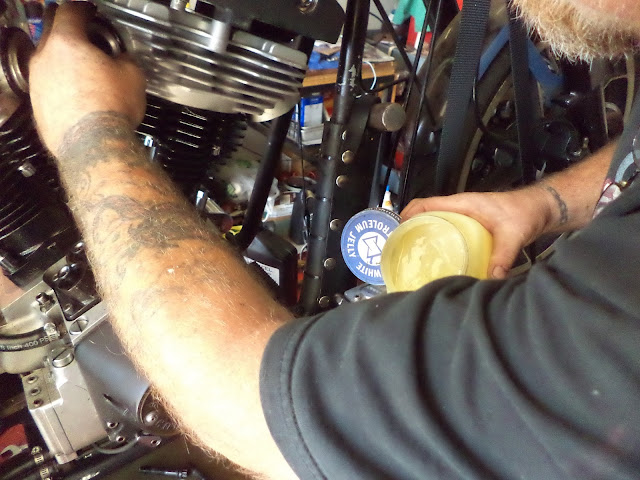
Lube up the clamps with petroleum jelly.


Hold the intake in place and roll the O-rings home.


Have someone hold the intake in place and slip the clamps on.


Put the pinch bolt of the rear clamp toward the left side of the engine and the pinch bolt of the front clamp toward the right side of the engine. More on why later. Tighten both clamps.


Install the pushrods and pushrod tubes.


I took a picture of my jets for future reference. Turns out the 70 main is too lean for a stroker per S&S guidelines.


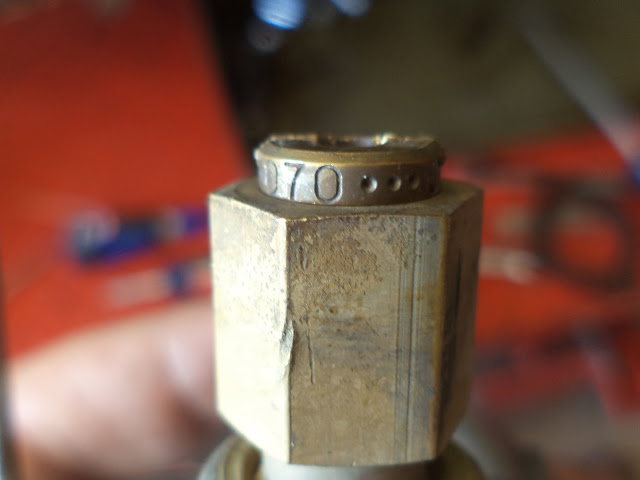
And a 31 intermediate is at the lean end for stroker. I can fix both of those easy enough later though.


Bolt the carb to the intake.


See, you wanted that pinch bolt away from the throttle cables.


This side doesn't matter though.
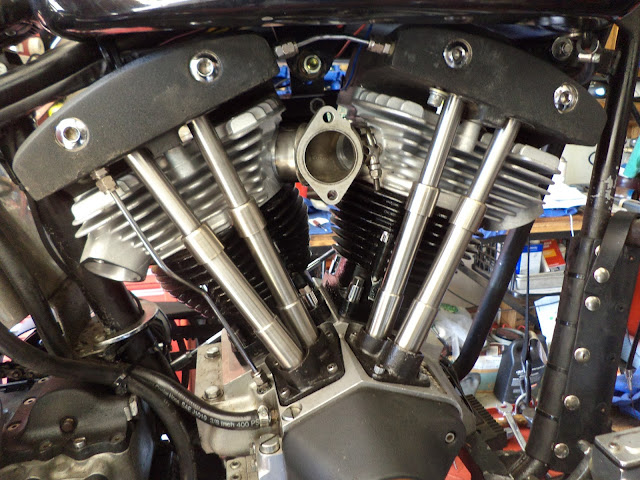

Looking good.


Loosen adjuster, install, and re-adjust throttle cables.


The pipes don't want to fit into there new home.


Tighten, worry the pipe, tighten, and you can get there.


The front was worse. It needed some shaving to fit.


It's a bike again.


Hear it run. Ed says I shouldn't have blimped the throttle like that. Oops, too late. (Sorry Columbus shot the video sideways.)


This fender is more jacked up than ever. Too many four men pick ups into a pick-up bed have taken their toll, but I guess it matches the tank.