Friday, October 28, 2011
Sunday, October 16, 2011

Wednesday, October 12, 2011
Shortblock to Topend
Time to take the shovelhead up from the shortblock to the top.
First the trapdoor needs to go onto the Delkron cases.

Up on the bench and to get started with the camchest.

Pinion gear and oil pump parts.

Oilpump shaft inot the case and gear and woodruff key.

Shaft and gear.

Slide in the woodruff key.


Now a new snap ring goes onto the end of the shaft.


Inner gasket, drive gear, pump body...

and key.


Top bolts hold it together. I think these are usually studs and that would make aligning the gasket easier for sure.

The outer drive gear and key go on next.

It's easier to hold the key in place with the slave gear out of the way.

Nice.

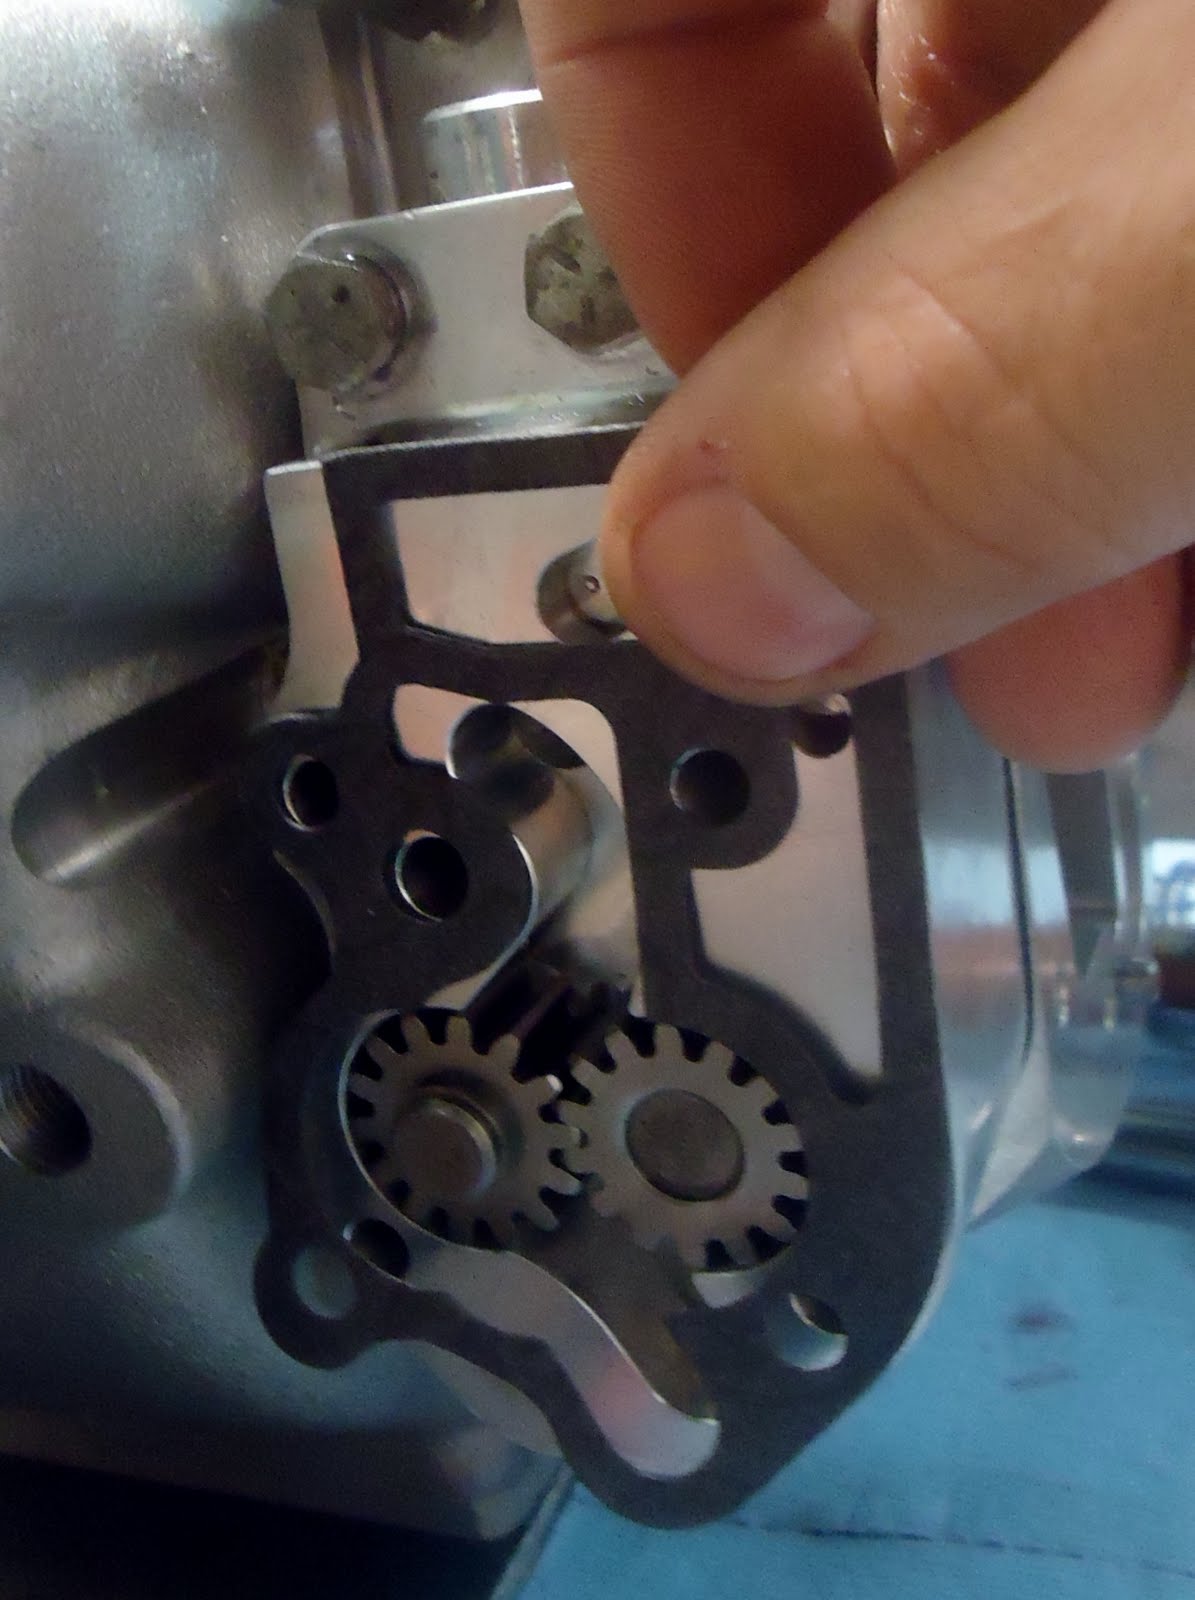
Now this little problematic keeper ring. It's relatively easy to install if you have a helper push the drive shaft out from inside the camchest.


Outer gasket and body.

Torque the bolts. Rebuilding the oil pump is so much easier to do on the bench than on the bike.

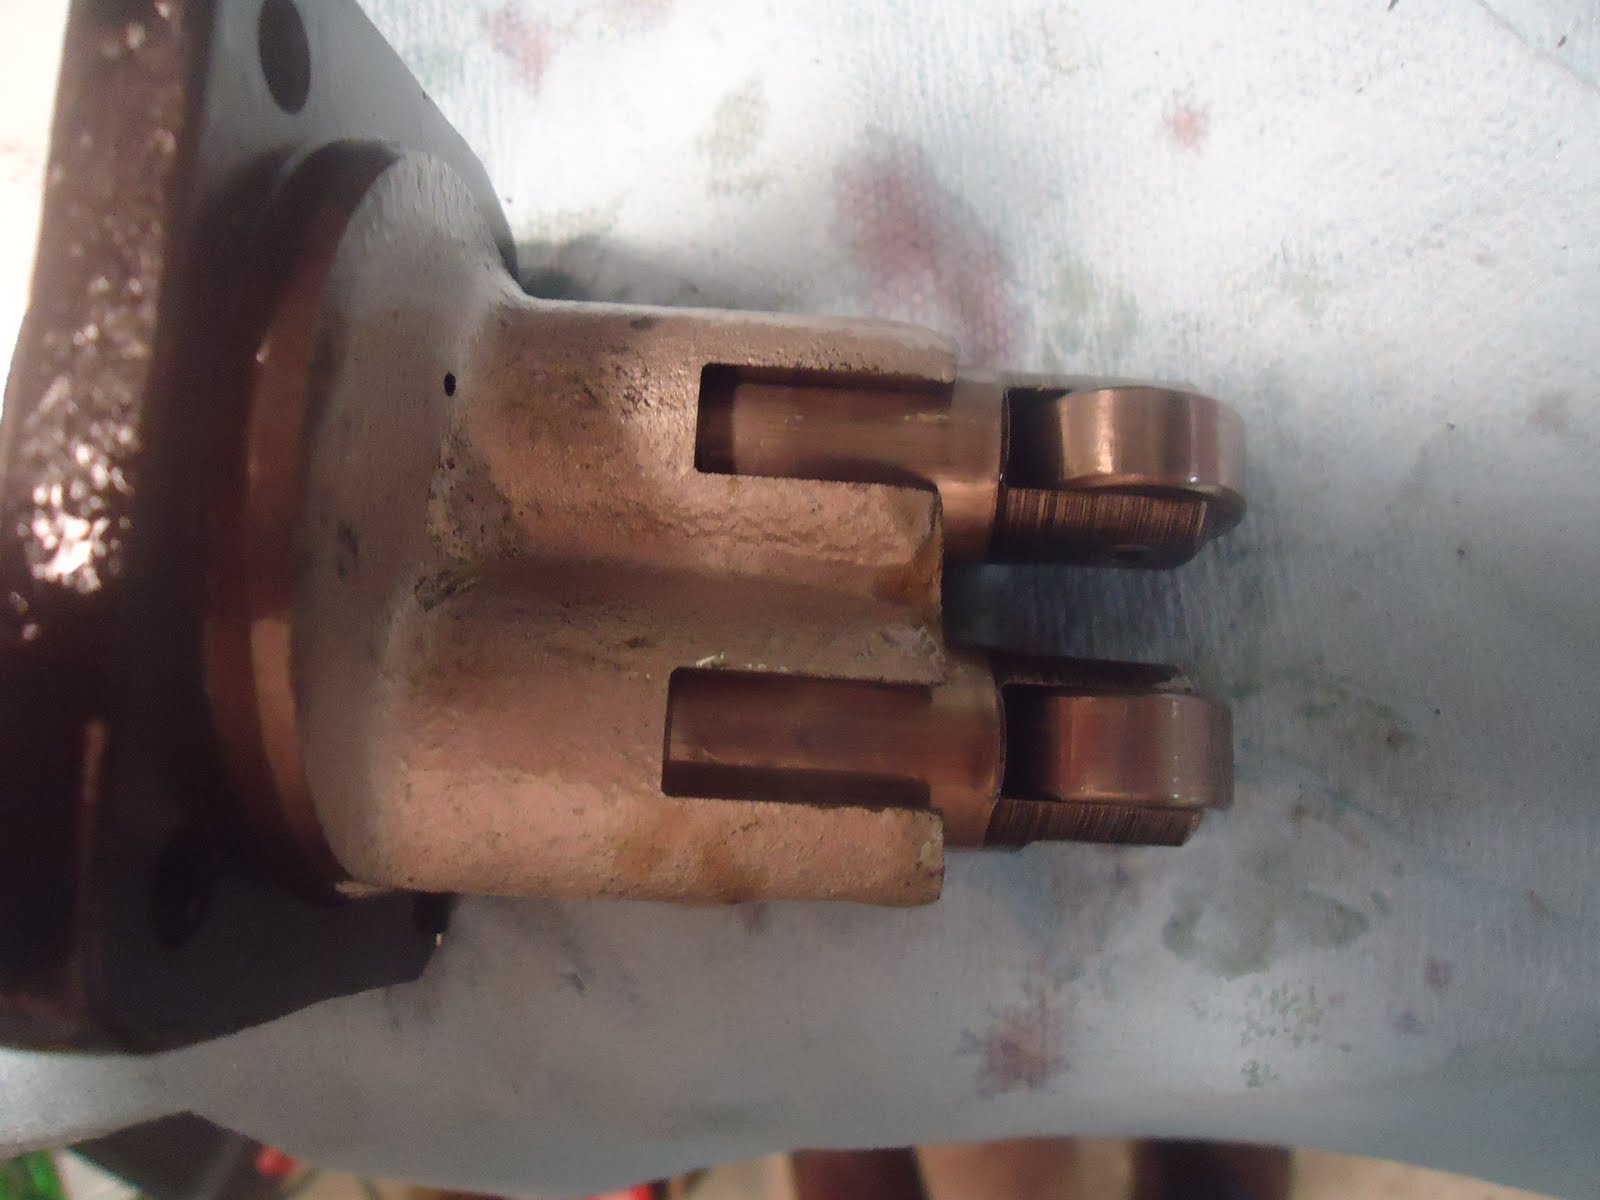
I need to spin the crank to find the keyways in the shaft.

Cut it loose.

Spin and resecure with the keyways up.

Worm gear and key.


Spacer.

Pinion gear and key.


Funny left-handed nut.


I tried to properly torque it with a crow's foot, but it didn't quite work. However it the nut is tight.

Cam, tab washer, and spacer.


Turn the motor and align the marks.

Breather gear goes in.

Align the breather timing mark and don't lose the spacer.


Tappet block gaskets.

Verify the oil holes are pointing at each other.


That says "Front," too.


Put the solid adaptors in and two of the wierd counter screws to align things.

Two socket head bolts.

Now all four.

Install the rear the same way.

Torque everything.

Okay, here's the trick custom part. I had T&O paint the timing mark with hot pink nail polish.

Stator goes in.

Set screw holds the plug.

Screws and tab washers hold the stator in.


Rotor goes on. (Yes, I did forget to put the main seal in. I'll need to go back and do it before I add oil and start it.)


Rotor cover.


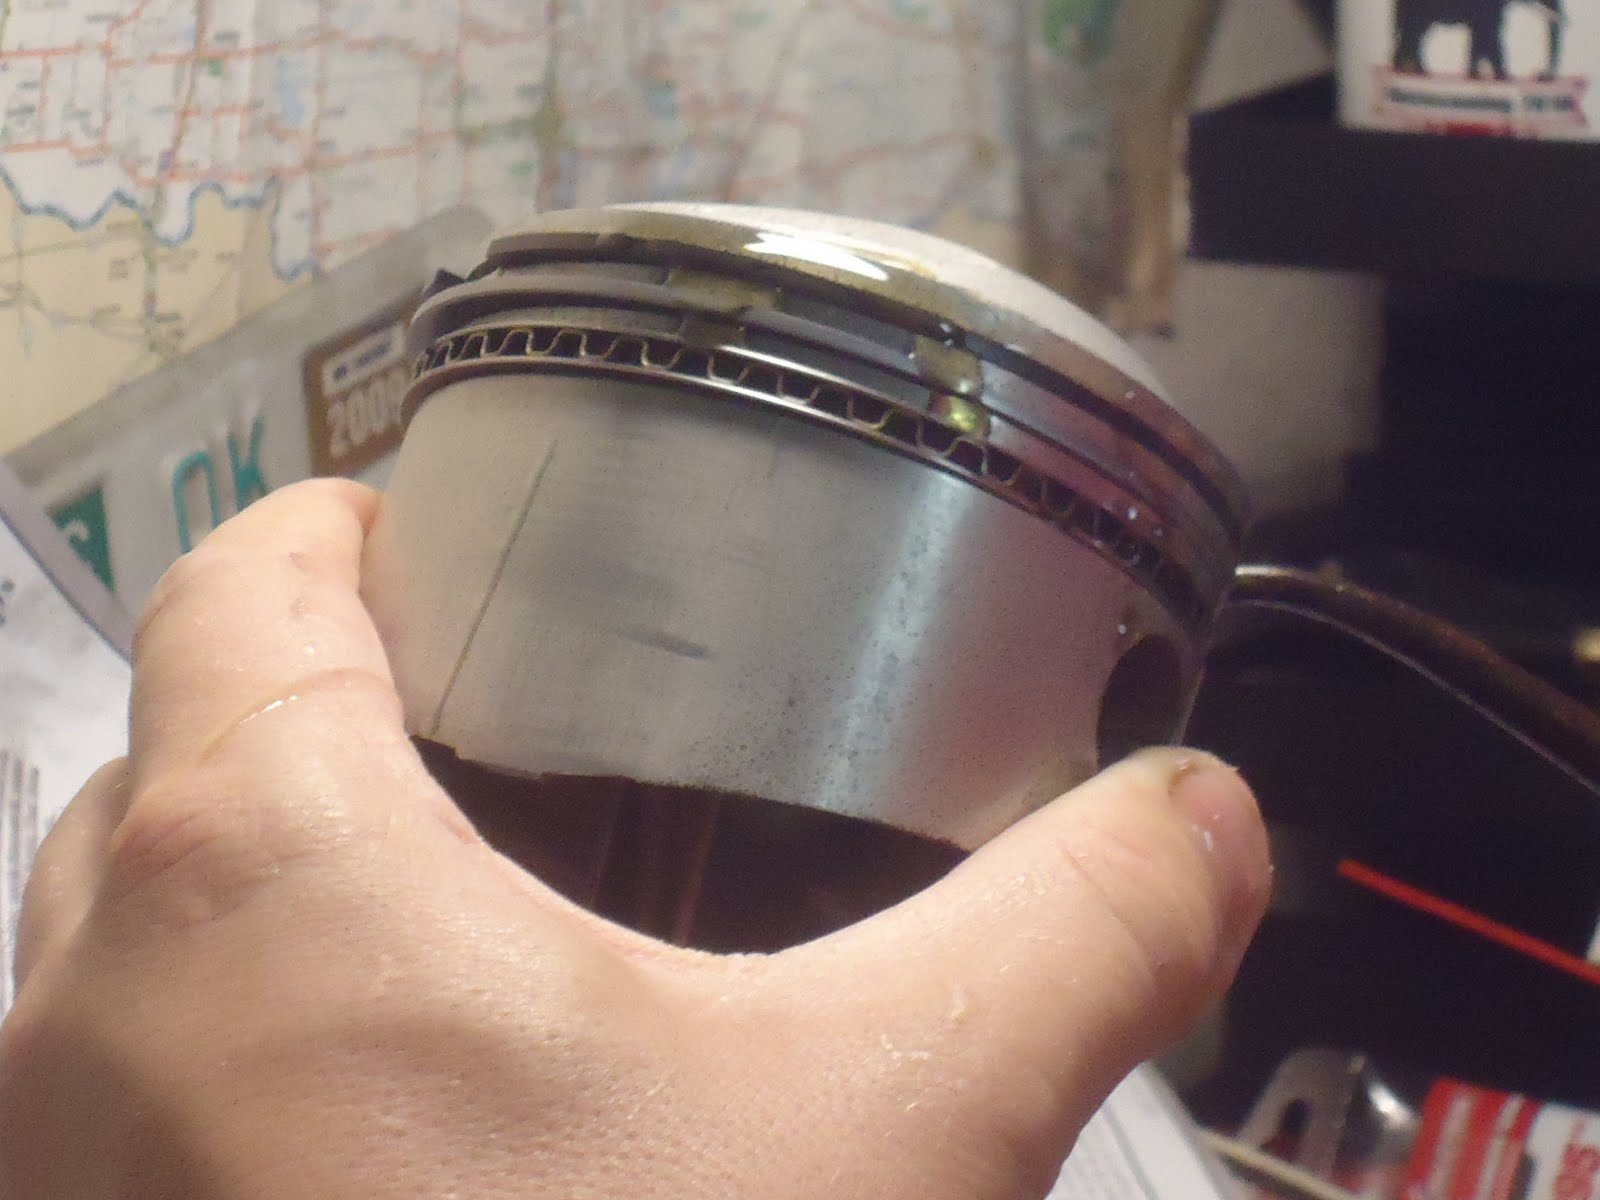
Now to the pistons. Interestingly the front is symmetrical and the rear is asymmetrical

The asymmetrical rear has a skirt relief to the intake side.

And a larger intake valve relief.

The symmetrical front has no skirt relief and the valve reliefs are symmetrical. (Duh.)

Piston ring gap is good, between 0.010 and 0.020 inch.

Spring the wristpin spiral keepers.

Work in.


One keeper in each piston and now into the 200 deg F oven for a bit.

I checked fit of the wristpins into wristpin bushings. Then I lubed them up to go into the pistons.

Push the pin in toward the keeper with a C-clamp.

Then use a socket to push it that last little bit.

Pistons on!

Now the other keepers need to go in. (I had to back track on this one.)


Now to get back to piston rings. I didn't get good instructions with the pistons so I had to reference a Kawasaki book.


There's the RN and the R.


Rings on!

Base gasket.

Oil up the rings.

Red neck hose clamp ring compressor.


Oil the cylinder.

Slide it on and remove the clamp. This job is much easier with a helper. Thanks, Pat!

New base nuts for the big bore cylinders.

A bit of chrome in the first threads.

Chase the nonsense out.

Put them on.


Crisscross torque.

Looking great.

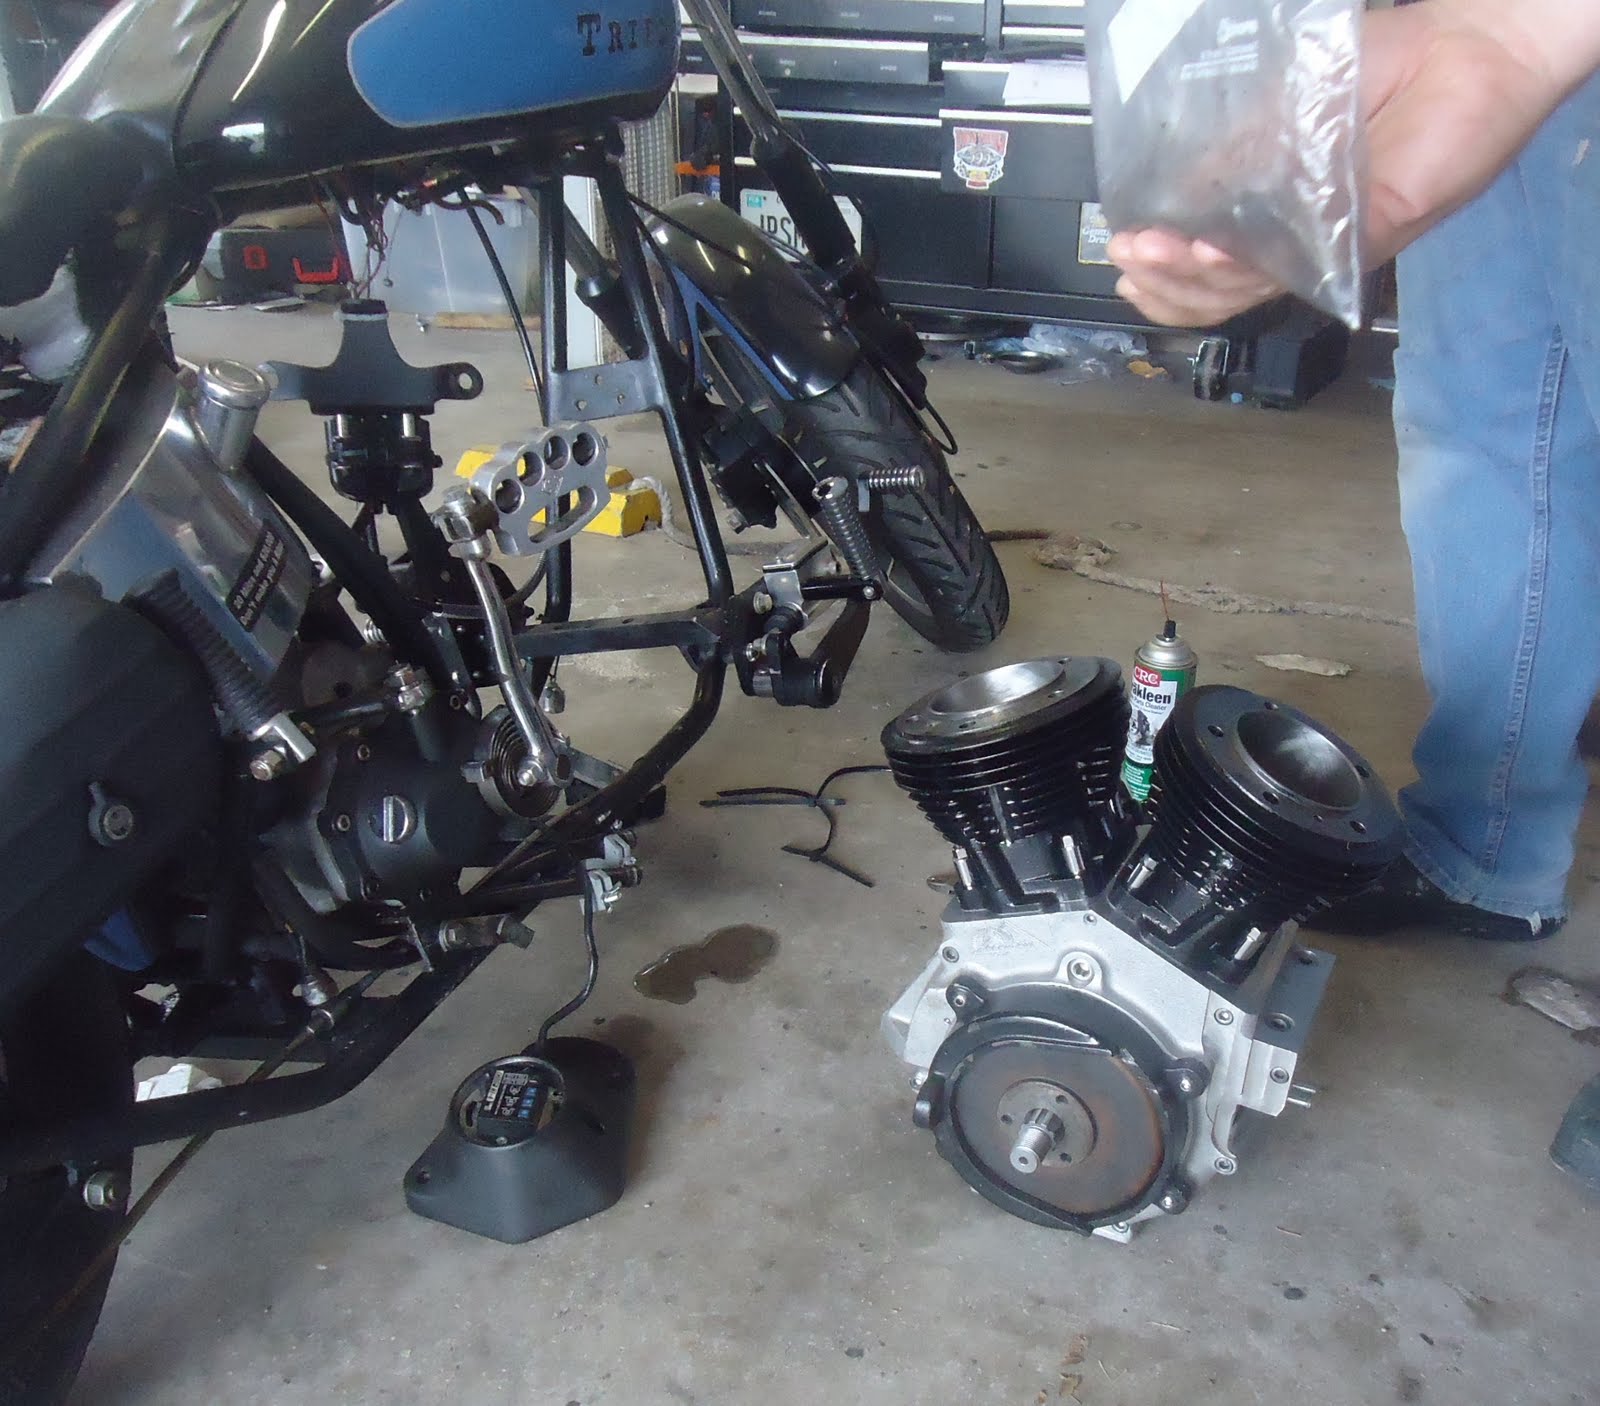
It needs to go into the frame because we can't hold the block and torque the head bolts.

Mount bolts ready.

Breather fitting goes on.


Into the frame.

Line it up.

Stick the bolts.


Torque the bolts.

Mount the rectifier.

Headgasket on.

Front head on.

Oh no! The head bolts would slide in on the front right and the right rear corners.

Basenuts off and headbolt in.

Basenuts back on.

Retorque.

Heads on.


The nuts are barely touching and I can still adjust and the heads to the align with the intake.

Time to torque. I did I crisscross pattern and torqued my way up to 65 ft*lbs. It takes a lot of time and a lot laps around the motorcycle to do this correctly by yourself.

That's enough work for awhile. Cover the holes and put up the tools.


First the trapdoor needs to go onto the Delkron cases.

Up on the bench and to get started with the camchest.

Pinion gear and oil pump parts.

Oilpump shaft inot the case and gear and woodruff key.

Shaft and gear.

Slide in the woodruff key.


Now a new snap ring goes onto the end of the shaft.


Inner gasket, drive gear, pump body...

and key.


Top bolts hold it together. I think these are usually studs and that would make aligning the gasket easier for sure.

The outer drive gear and key go on next.

It's easier to hold the key in place with the slave gear out of the way.

Nice.

Now this little problematic keeper ring. It's relatively easy to install if you have a helper push the drive shaft out from inside the camchest.


Outer gasket and body.
Torque the bolts. Rebuilding the oil pump is so much easier to do on the bench than on the bike.

I need to spin the crank to find the keyways in the shaft.

Cut it loose.

Spin and resecure with the keyways up.

Worm gear and key.


Spacer.

Pinion gear and key.


Funny left-handed nut.


I tried to properly torque it with a crow's foot, but it didn't quite work. However it the nut is tight.

Cam, tab washer, and spacer.


Turn the motor and align the marks.

Breather gear goes in.

Align the breather timing mark and don't lose the spacer.


Tappet block gaskets.

Verify the oil holes are pointing at each other.

That says "Front," too.


Put the solid adaptors in and two of the wierd counter screws to align things.

Two socket head bolts.

Now all four.

Install the rear the same way.

Torque everything.

Okay, here's the trick custom part. I had T&O paint the timing mark with hot pink nail polish.

Stator goes in.

Set screw holds the plug.

Screws and tab washers hold the stator in.


Rotor goes on. (Yes, I did forget to put the main seal in. I'll need to go back and do it before I add oil and start it.)


Rotor cover.


Now to the pistons. Interestingly the front is symmetrical and the rear is asymmetrical

The asymmetrical rear has a skirt relief to the intake side.

And a larger intake valve relief.

The symmetrical front has no skirt relief and the valve reliefs are symmetrical. (Duh.)

Piston ring gap is good, between 0.010 and 0.020 inch.

Spring the wristpin spiral keepers.

Work in.


One keeper in each piston and now into the 200 deg F oven for a bit.

I checked fit of the wristpins into wristpin bushings. Then I lubed them up to go into the pistons.

Push the pin in toward the keeper with a C-clamp.

Then use a socket to push it that last little bit.

Pistons on!

Now the other keepers need to go in. (I had to back track on this one.)


Now to get back to piston rings. I didn't get good instructions with the pistons so I had to reference a Kawasaki book.


There's the RN and the R.


Rings on!

Base gasket.

Oil up the rings.
Red neck hose clamp ring compressor.


Oil the cylinder.

Slide it on and remove the clamp. This job is much easier with a helper. Thanks, Pat!

New base nuts for the big bore cylinders.

A bit of chrome in the first threads.

Chase the nonsense out.

Put them on.


Crisscross torque.

Looking great.

It needs to go into the frame because we can't hold the block and torque the head bolts.
Mount bolts ready.

Breather fitting goes on.


Into the frame.

Line it up.

Stick the bolts.


Torque the bolts.

Mount the rectifier.

Headgasket on.

Front head on.

Oh no! The head bolts would slide in on the front right and the right rear corners.

Basenuts off and headbolt in.

Basenuts back on.

Retorque.

Heads on.


The nuts are barely touching and I can still adjust and the heads to the align with the intake.

Time to torque. I did I crisscross pattern and torqued my way up to 65 ft*lbs. It takes a lot of time and a lot laps around the motorcycle to do this correctly by yourself.

That's enough work for awhile. Cover the holes and put up the tools.


Subscribe to:
Posts (Atom)