Did I tell you about breaking a primary belt the other day? Yeah, that wasn't fun. I know chains don't break, but that's a lot of parts to switch over to a chain primary drive.
So I was considering carrying a spare belt with me on out of town trips. But wait, how the heck am I going to change it if I had too? The new belt is just a bit too tight to slip in behind a removed clutch basket, so I have to wrench it on with the front primary sprocket. The transmission is already as far forward as it could ever go. Also if you can do just the front sprocket, you don't have to readjust the clutch.
So I studied the situation while I had it apart. The sprocket already has two threaded holes for you to use with a puller. I have never used a puller on it though. Those could be used. This may not work out, but I'm taking pictures and writing about it anyway.

Clearly this washer and the top hat will be in the way a bit. I know guys that will run without the top hat, but I think I can make it work with it.

But let's get to work on the tool anyway. Something like this is the plan.

A smaller washer, two spacers, and two bolts.
This is getting there.

Transfer punch the top hat.

Paul Teutul Jr drill the holes in the top hat.

Clean those holes. I will need to remark the reference timing marks when I get all done, too.

That all fits okay.

That might work.

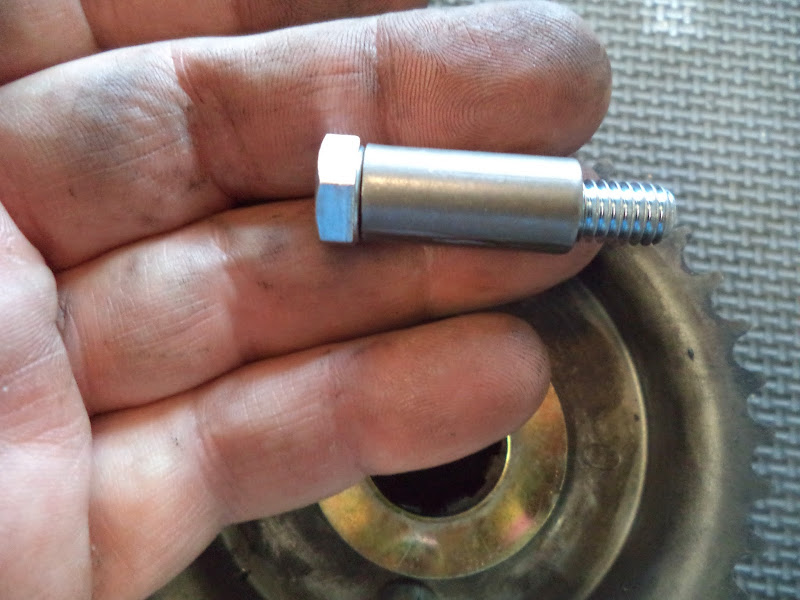
This is where things got goofy again. The nut I have been running is a 1 3/8 hex and that's an odd ball size. I guess. I have an impact socket for it, but I need something with a thinner wall to fit between the spacers and bolts. I couldn't find a regular socket anywhere that was open on a Sunday evening. I remembered I did have a nut from another primary and dug it out. It's an acorn style, and it's a 1 1/4 hex so that might be even better yet.

Another clearance issue made it's presence known; the hex head bolts aren't going to fit with socket on the main nut, so another trip to ACE and I have a socket head that should work better.

I could probably leave the bolts and spacer in the sprocket while I'm driving down the road.

The socket fits with the spacer and bolts, not much extra room though.

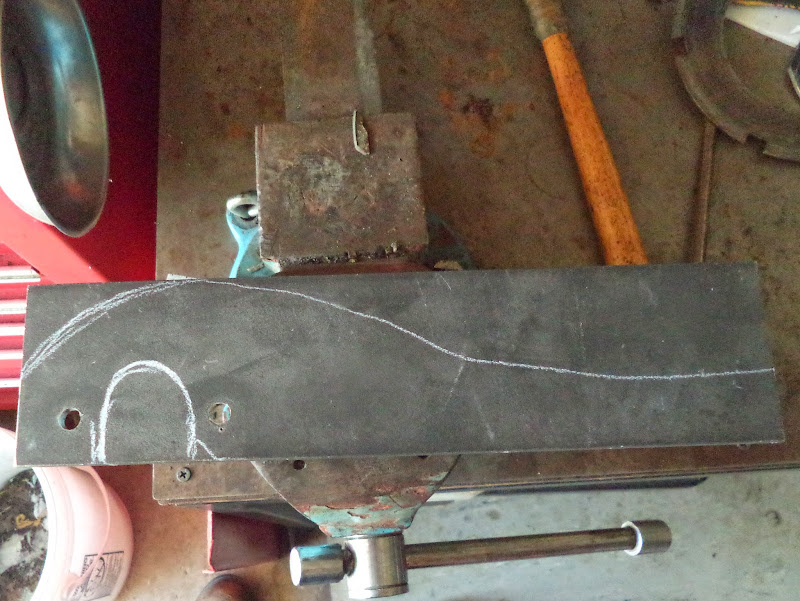
Transfer punch the steel for the tool.

Drill the holes and check the fit with the bolts.

Line out the shape of the tool on the steel.


Time to play with Lummie's newish plasma cutter.

It takes some practice and we both played a little bit.

Finding the right speed and head angle for a good cut was the key.

Roughed out shape.

Clean these things up a bit with an angle grinder.

This needs opened to let the socket fit.

Getting to grinding in there.

Looking good.

It took a couple fit checks and more grinding to get the socket to clear.

We used this tool to torque and then break the nut several times successfully. It was a two man job though. The only problem is the handle is too short to catch the ground to torque the nut or to catch the clutch basket to break the nut. So the plan is to use the cut off part and bolt it as an extension to the main piece of the tool. This set-up will fit nicely in the saddlebag for the next cross country trip. The best news is that if I'm ready to handle a broke belt on the side of the road, then it won't happen.


