Search

Search all blog posts here.

Search This Blog

Tuesday, July 13, 2010

More on cables

Here's how you properly bend a throttle cable end from 90 deg to 135 deg. Off the bike, benchvise before the threaded part, and 3/8 socket and 3/8 breakover.


Worked great...


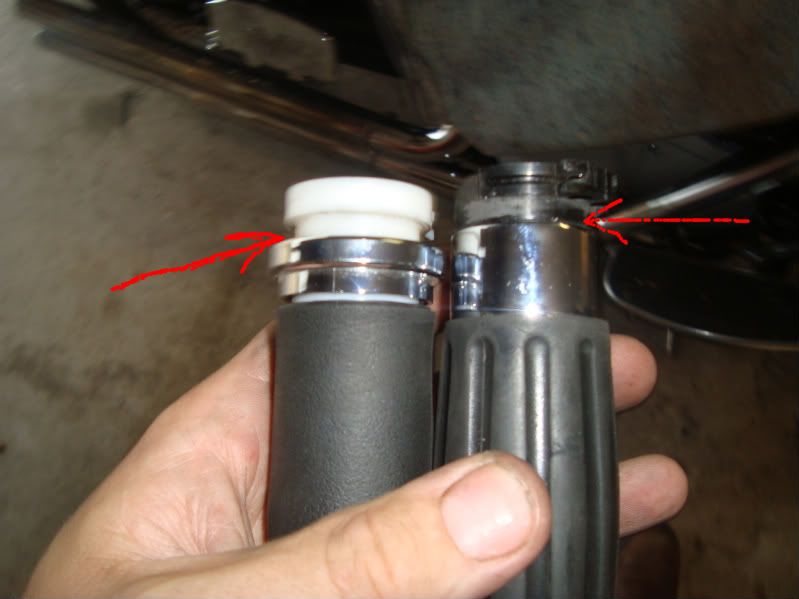
but I already broke the pull cable, so I ordered a new stock one to be bent, but the one that came in was wrong. Someone had repackaged a different cable in the package of the cable I needed. So the folks at the dealership helped me out with a set of used Nomad cables for free. The Nomad cables route differently and are actually like 6 over compared to the Classic's cable. I had to route them over the tree and can't decide if I like them or not, but free and working is a okay for now. I can get a stocker and bend it later, if I want to.

Also the clutch line is short. It's rideable for now, but it will need to be about 6 over when I buy my covered stainless lines. The front brake line is fine though.


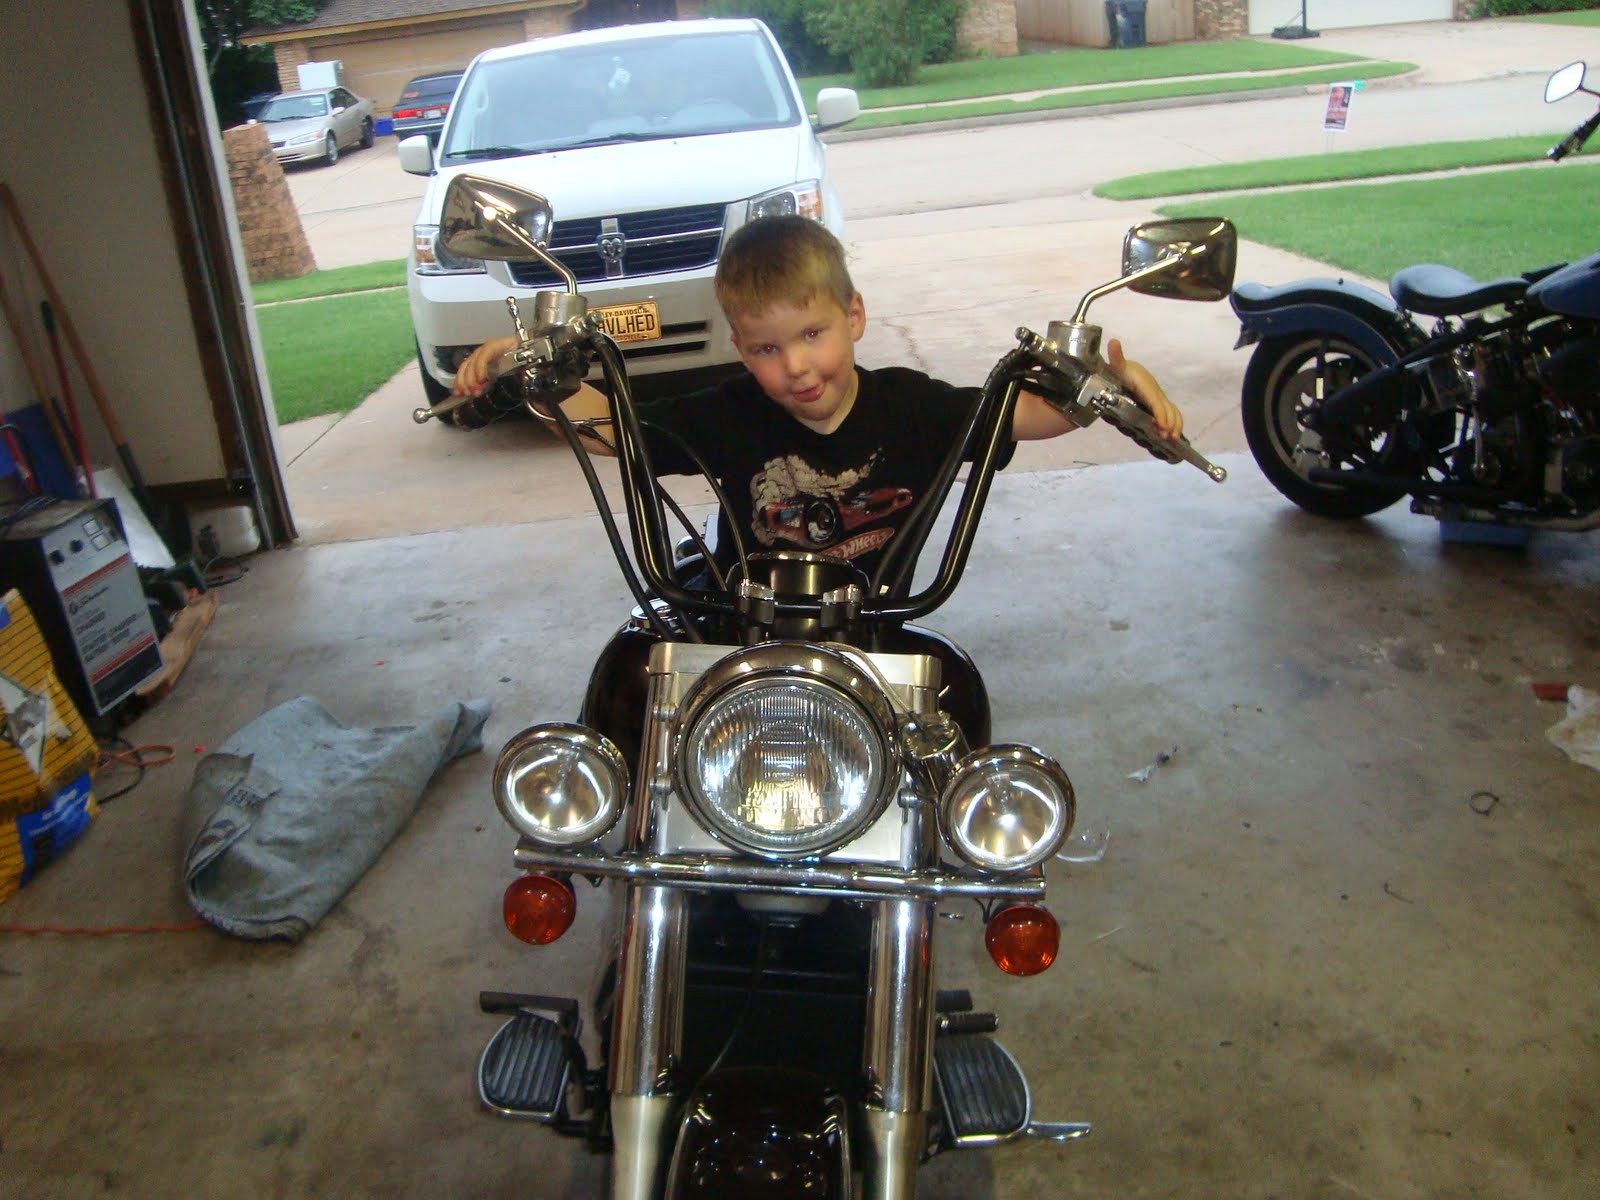
I ran about twenty miles with the new bars and I like them. The ergo's with these 12 inch apes are about the same as the shovelhead with 16 inch apes. I haven't figured that out yet.

Sunday, July 11, 2010

Wheel stand

Here's my homemade wheel lacing stand. I built it, big enough to handle 21 inch wheel just in case. I used a cheap travel gauge and holder from Steve's Wholesale Tools to true up the rear wheel. I got the rear pretty much good to go, but I quit halfway through the front wheel. Try again tomorrow.

Monday, July 5, 2010

Apes on a Vulcan

Here's the nasty old bars my friend gave and grips and risers I got at the swapmeet.

I'm going to have them powdercoated blasted aluminum, but I wanted to mock them up first to see if the cables work and make sure they would be comfortable. I painted them silver first, but it was just too Okie chrome, so went with black for mock and shakedowns.
Off with old bars and risers. COVER THE TANK FIRST!
Top clamps off.
The tach mount bolt was tight.
Now the risers have to go.
New shorty risers.
Bars on. I never thought I would say this but fatty bars would actually look cooler, but free bars look better than $160 ones, right now any way.
Brake M/C mounted. When I do the covered stainless lines I will need straight banjo fittings instead of the stock 15 deg ones.
There's a little tab in the throttle control box that has to go to fit these bars.
The next problem is the sliding part of the throttle grip I want to use is too big for the hole in the throttle box. I didn't realized when I started, but other folks have enlarged the hole with any problems. I'll just run the grips that was running.
Okay, throttle cables are long enough, but would fit better if they were 135 degrees instead of 90, then I broke the throttle cable.
On to the clutch side. Big boy had to help a little.
Big boy tries it out.
The big man likes it, too!

You say buddy peg, I say rear suspension


Alright the hardtail shovelhead isn't that rough of a ride, but sometimes you need a little help. I'm definately understanding why so many folks run mid controls on a hardtail frame. It's a lot of easier to stand on mids and use your legs as shock absorbers(like we teach like in the MSF Basic Rider Course.) Running forward controls and 16 inch apes is comfortable to me, but when I see a sign like this or hit some rough bridges, pulling myself up on those bars makes me think those bars are going end up in my lap and me in the ditch.


Here's my solution. This is buddy peg set up for a four speed frame. It mounts to the tranny plate. I had it powdercoated satin black of course.

Red loc-tite here.


Grade 8 flange bolts, locking flange nuts, star lock washers.


Clears everything, but won't fold down all the was because the bolt is like one thread to long.


These peg rubbers are all chalky, but the wire brush helped out.


Take the pegs mounts off and put a nut on to lock the bolt, then shorten the bolts.


Perfect. I can't wait to try them out.

Saturday, July 3, 2010

Electrical problem fixed this time

I had electrical problems on the shovelhead awhile back. I thought it was headlight related, but I couldn't repeat it.

http://tearitupfixitrepeat.blogspot.com/2010/06/electrical-problems.html

So I put a bigger battery in it and I thought it was a bad ground so I fixed that.

http://tearitupfixitrepeat.blogspot.com/2010/06/bigger-battery-and-broken-oil-bag.html

Last Saturday the bike died on the road again, but I pulled the headlight fuse and it went home just fine.

So we're back to headlight problems and voltage issues.

I have been using the old harley push button to ground the VW Hi-Lo latching relay. I'm not sure if the relay is sticking or the button is sticking, but neither will be a problem in the future.

I bought one of these switches from Radio Shack. Rated for 10 amps at 125 VAC, so a 6 amp high beam at 12 VDC shouldn't be a problem. The center position is off, so I can kickstart the bike without the headlight on. Also if I something else is causing my issues then I can turn off the light without pulling a fuse.


I also bought one these to monitor my voltage and charging, too. If the bike starts running crappy, I take a look and see how the battery is.


Here's the dang the relay. It's going bye-bye.

Solder the wires to the switch.


Here a little info on how I do electrical connections on a bike. I take the insulation off the connector, then lightly crimp the connection on to a stripped wire that has rosin on it already. Then I solder the connection on and tug check it once cools a bit.

Then some shrink wrap.


I use these cover connectors for most things, too. I like them because I can take things apart if needed or bypass a switch if needed for roadside repairs.

.Works
The switch is installed and works.


Here's the ground for the voltage gauge.

Here's the voltage gauge on the dash. I'm lucky that the old relay set-up has an extra power connection right where I need it.


Switch, dash, and gauge installed. That should be the end of dead batteries on the side of the road.

Powdercoated parts

Here are all the parts I could spare without major tear down. They are satin black powder coat and I love it.


Here's the hub cap in black and the rim in blasted aluminum.


Here's the reservoir cover on the bike.


Fender struts in black.


Here's a good picture of the powdercoated engine parts.


Dash nacelle in black. I think the switch plate will eventually get the aluminum finish, too.


I just need to chrome everything else on the bike.

Lacing Wheel(Wrong and Right)

Here's my front rim and hub cover fresh from the powdercoater.


Time to get started. (This is not correct, but I still have to publish the pictures.)


Seemed right.


I used extra fine steel wool to clean the spokes. This may have dulled the chrome a bit, but that's still a part of the look I'm going for.


First set in.(wrong)


Second set(still wrong)


Other side, still wrong.


The boy helps a bit.


Done, but all wrong.


This should have been my first clue, I couldn't get the spokes to tighten for a long time.


Spokes are almost through the nipples and the wheel is not tight yet.


Wheel is finally tight, but look at this. This ain't right.


The spokes should look like this. What my buddy J. calls cross three pattern, not a cross two like I built. I'm glad I still had a good example and pictures, too. I had checked both of them before my first try, but still screwed it up.

I had to wrench the thing back apart and re-map the pattern.


With the first set in, the second set crosses three, like this.


I got this first side done. Then the other side looked like this. CRAP, CRAP, CRAP! The spokes on the other side still in the hub, jacked up the powdercoat a bit. At least on the left side and rough is the look for this bike.


The wheel tight now and the spokes aren't out the nipples.


Full preview of the front wheel.


Now the rear wheel. I won't scratch this one!


This one is easy. The little spokes just make an X.


Piece of cake.

They're together! Now I have to true them.