Search

Search all blog posts here.

Search This Blog

Monday, August 13, 2012

Shovelhead 4 Speed Saga Part 2a

Not a lot of exciting things to report while I waiting on paychecks to save up for the gears and shafts.

Here's the inside of the kicker. It wouldn't normally need to come apart to rebuild the transmission, but it was leaking out the kickershaft and I plan to cut a counterbore for a real seal like Saddlebagrail(Ray) does.


Unbend the tab washer.


Hold this end.


Wrench this end.


Comes apart.


This shaft is junk too. The ridge in the middle of it about 0.005 inch deep. You can catch a fingernail on it.


See how leaky this thing was.


I would try to clean up and/or turn down the shaft and make some custom bushings for it, but the dang spring is stuck and I can't get it out. So a new shaft and spring will be ordered.


Check this side out.


Remove the kicker spring stop.


Back to the inside. There's an E-clip the holds the release arm shaft and fingers. Take that off and the shaft slides out.


Now I wait for the kickershaft and seal to come in.

This case is nasty dirty of course.


Into the Simple Green 50/50 water soak for the night.


Out of the soak, a little bit of work with a brass brush and a garden hose. It cleaned up so nice that I don't think I will need to glass bead blast it.


It may seem silly to clean everything up so nice and then put oil back on the steel parts, but I didn't want the steel to spot rust.


I'm going to seal the bottom studs nice and tight just like Saddlebagrail(Ray)suggests. So the studs have to come out.


I soaked and degreased these things, too.


Chase with a tap and clean the holes with brake cleaner.
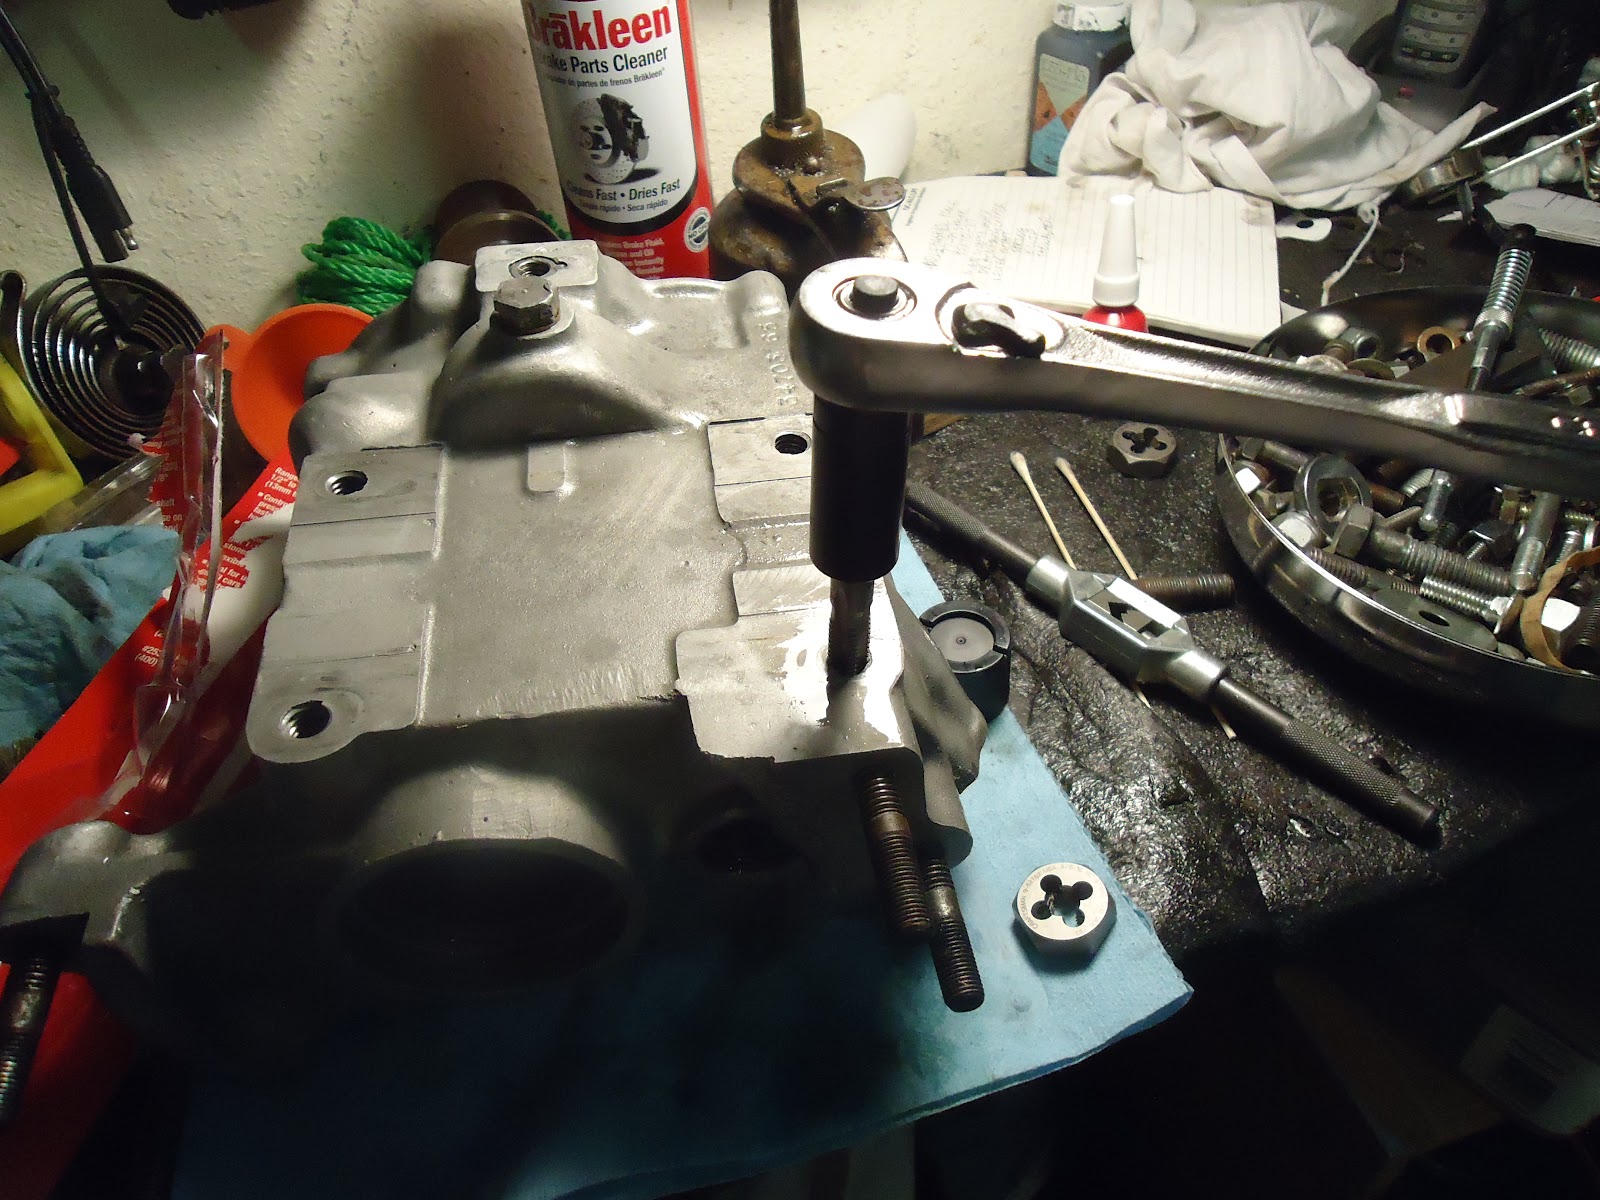

Run a die over the studs.


I used 7471 primer instead of 7649 primer that Ray uses. It was available and the specs seemed similar. I'm sure Ray will tell why I should have used the 7649. They are really proud of this stuff so I hope it helps set the studs extra tight.


I used 642 Red Loctite instead of 272 that Ray uses. Again available and seems to be appropriate per the specs. It seemed the 272 was high temp and 271 was for larger diameter bolts. The pictures of the 272 seem that it may be thicker and easier to use. Again I'm sure Ray will tell me why I should have used the 272. I plan to let everything set for 72 hours and then run a die over the other end of the stud and then I will know if the stud are good and tight for sure.


Set all the studs and don't mess around before the loctite sets up.


Oh geez. This thing is bleeding on the inside for sure. Fortunately it's still wet enough to towel up and clean right up.


Set it and forget it.


Now onto another little problem I want to fix. I think the countershaft o-ring was most of my big nasty leak. You can see the dirty rust spot where the o-ring sat. I'm going to clean up that with a brake hone. It's harder than you think to find 3/4 inch hone, but I got one that will work.


A little bit with the drill and hone and it should be good to go.


And Saddlebagrail's special o-ring spacer arrived via Par Avion.


Wednesday, August 8, 2012

Shovelhead 4 Speed Saga Part 2

Now it is time to really tear this thing down. I took it over to my buddy Pat’s house. Pat is giving me the rebuild lesson and at least his garage is halfway air conditioned. The bad news is that his garage is not quite lit up enough for picture taking and my camera only seems to have an automatic flash setting, so I had to fight to get decent pictures and even had to digitally brightened a few.
On the bench.


Remove the key from the mainshaft with dikes, useless you can’t find them then safety wire pliers work.


Only two nuts are left holding the support plate.


There are a couple of little shims under there here.


It appears that the countershaft O-ring is leaking and may be most of my problem.


Pull the clutch release arm.


Break all the kick bolts, but don’t pull the cover yet. I think I got ahead of myself on that one. The lid needs to come off first to lock the transmission to remove the nuts on both shafts.


Pull the rachet lid.


That thing seriously didn’t want to come off. One of the dowel rods from the case was stuck in the lid. I’ll have to clean those and red loctite them back into the case.


Don’t lose these bushings.


Lock the transmission in two gears at once.


Unbend the tab washer on the sprocket nut.


Special homemade deep socket. LEFT HANDED THREADS!!!


Sprocket nut, sprocket and tab washer off.


I was planning on using this super nut set-up.


The threads are rough and will need a re-work so we couldn’t really mock it up, so we measured.


Yeah, not going to fit as is. When we go to put things together, we may try to put the clutch hub back on see if the support plate can be spaced to clear the super nut and the clutch hub.


Pull the kick cover. This will need to be broken down and the kickshaft hole will most likely get new bushings and a counterbore and seal. The kickshaft was the worst leak I had until recently.


Pull the rod/slinger/bearing out together and bag them.


With the transmission still locked loosen this nut, but don’t take it off.


Whack it with a hammer and see if that will release the kicker gear off the taper.(That didn’t work.)


Try a gear puller. (That didn’t work.)


Try some heat. (That didn’t work.)


Hold some tension with a prybar on the still hot gear and whack it with a bigger hammer.


That worked!


Make sure you know where this key is.


If you leave it in the keyway and pull on the next gear, then you’ll mess up this bushing.


Unbend another tab washer. Well don’t seem to have a socket to fit that nut so we will leave it on there for now. You can still get to a bare case with this nut still on the shaft.


Take this set screw out.


Drive the shift fork shaft out.


Inspect the shift forks.


That’s ugly.


Put it back in to see what’s hitting wrong. It wasn’t shimmed correctly.


The dog holes in 4th gear jacked a bit, too.


Remove speedo fitting.


Unbend countershaft tab washer and remove the nut.


This funny washer gets jammed up a bit.


Remove it.


Drift out the countershaft.


It’s worn out. Add that to the list.


There’s a trick to it, but I don’t know what it is exactly, but this comes out all at once.


Dang, old style roller bearings. That sucks, but now I know.


The corner of this dog has been slammed a bit. I’ll get a new one.


Same here. It’s first gear so it should be okay.


Four screws hold this plate and you will need an impact driver to get them out. Don't loose the little tab when it comes apart.


With the plate out. Give the output side a good tap, but you can’t drive it out yet.


This seal was jacked, too.


That tap over by an inch or two exposes the circlip that hold third gear in place. You have to work this circlip off to get the mainshaft out.


Once the circlip is off the shaft, you can slide the mainshaft out of the transmission. This picture shows the shaft about halfway out. When the mainshaft is fully installed the ring groove shown with the circlip is to the right side (picture perspective) of the large gear. The large gear(3rd) will not pass by the hump in the case.


Mainshaft coming out.


Oh joy, more roller bearings.


Fourth gear is beat. I need a new one.


I think the dog was replaced and gear wasn’t, but I need a new one too.


Third gear is really beat up. I need a new one.


Mainshaft is hosed up, too. I need a new one.


Pull the seal and spacer.


I’m getting a new special spacer with an o-ring from “Saddlebagrail” Ray.


I don’t know what happened to the rear primary stand off.


Time to start gathering up parts and blast the case.