I bought a dual fire Dyna-S unit and Pat gave me an advance weight set, a dual fire coil, and the special bolt.

I read the Dyna instructions and it stated the magnetic rotor would only fit one way. That seemed wierd because intially it seemed to fit two ways. However on closer inspection I figured out that one way was close, but wrong. The rotor doesn't fully seat.

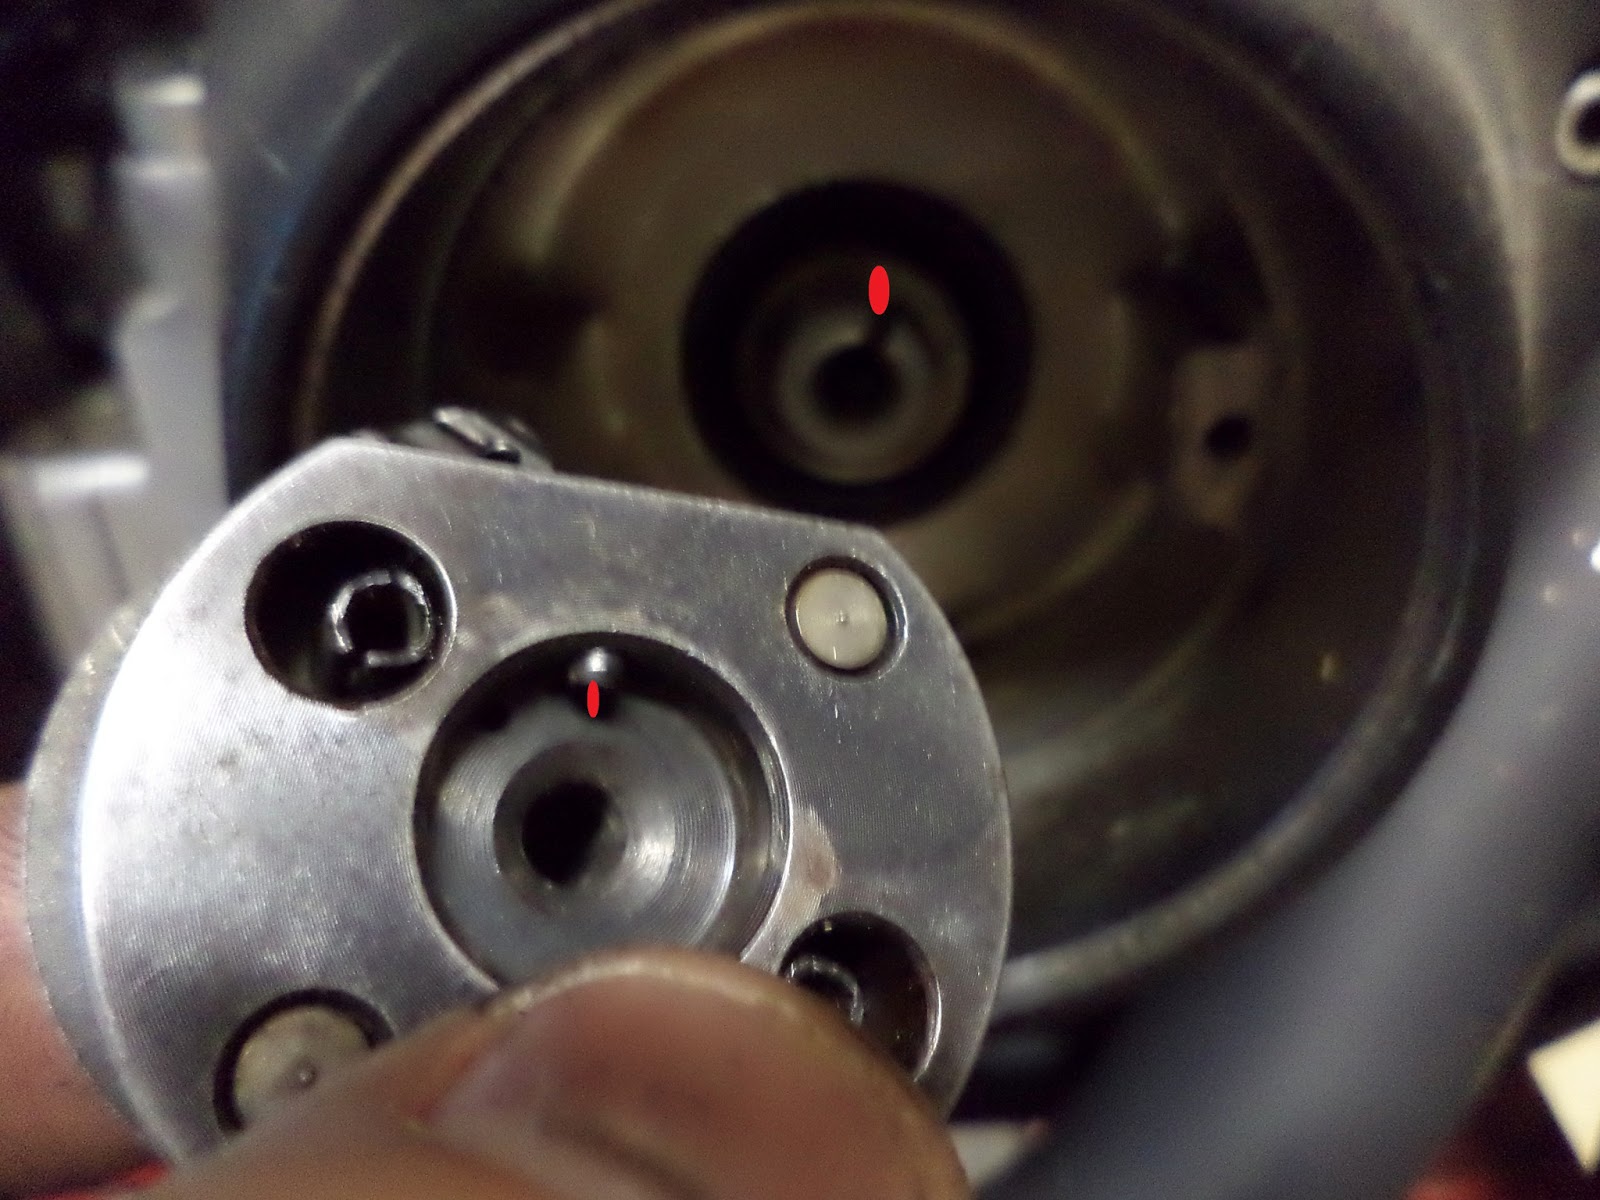
Proper fitment looks like this and means that the bolt will tighten against the weight set and not magnetic rotor.

Remove the old single fire coil.

Undo all the wires to coil.

Remove the old HI-4 unit.

Undo the wire holder.

Pull the wires all out.

Remove the electronic ignition cup.

I don't think you should have witness marks on the cup like this. This could be part of my problem.

Advance weights have a tang the fits into the groove on the cam. The red spots were added for clarity.
Weights on the cam end.

Magnetic rotor in place.

Rotor bolt in and torqued.

Ignition plate goes in. The pick-up goes at 12 o'clock in a bigtwin. In theory the stand off holes should be in the middle of the adjustment slots and it will be closed to timed.

Route the wires.

Ain't that something. The wires are only long enough to reach the seatpost coil mount location and not the motor mount coil location.

A little solder.

A little shrinkwrap.

That gets us into the neighborhood.

Solder on eyes.

Evidently this is real easy and real easy to screw up.
DO NOT PUT THE BLUE WIRE DIRECTLY TO 12 VOLTS.
I'm told that a lot of Dyna-S units have been destroyed by doing that.

That's about right.

Looking good.


Now to zip tie everything up again. This harness is not too much of a rat's nest.

did you check the timing afterwards or did you just run it??
ReplyDeleteIt kick starts and runs good, so I never put a timing light on it.
DeleteThis comment has been removed by the author.
Deletegreat! I'm installing one this week.
ReplyDeletethis is blog is soooooo good! I love it! thanks for all the helpful advice and clear photo's!!!