I also knew that I had gotten grease all over the place from putting the short bearings and cage back together the other day messing with the belt. That was dumb on my part.
Anywho, I figured I would put together a simple blog on how to disassemble my clutch, degrease everything and add the new upgrades. That was dumb on my part. The clutch was way worse off than I thought it was.
Let's get at it.

Take the lock nut off the pushrod adjuster screw.


Now you need a washer to hold the plate and spring sandwich together.

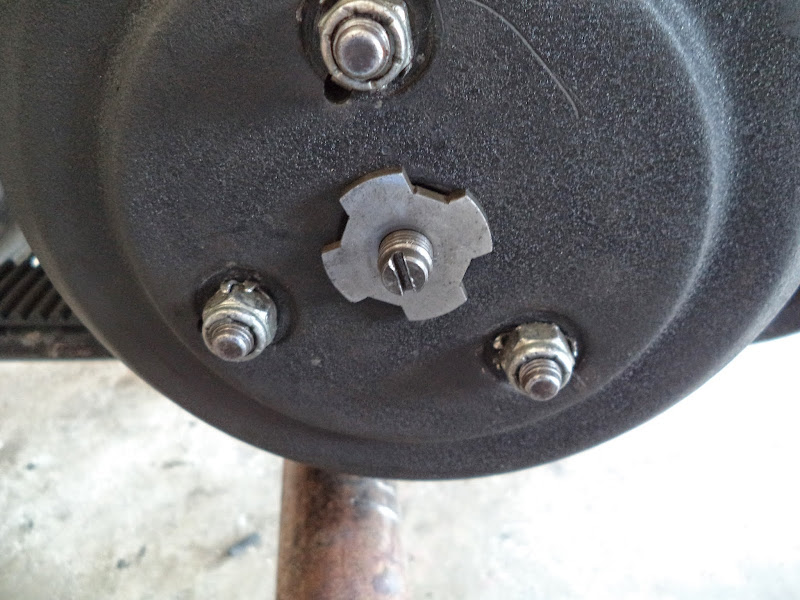
Put the lock nut on the screw and washer.

Open the lock tabs and remove the nuts.

There's the sandwich, the springs don't shoot out everywhere.

Yep, way too much grease on everything. I was trying to get the bearings to stay in the cage so I could install the bearings with the hub still on the transmission. After installing the long bearing kit, I doubt I will ever bother building a short bearing set-up again.

I used a piece of polished tile to check the steels for flatness.

Plain old tide to degrease everything.


What a mess.

Clean the steels, too.


Dry them in the oven.

Clean this nasty thing, too.

Then the bad news, the steels are pitted and the frictions are terrible too.

Good news, all new made in the USA Alto frictions and steel are only like another $75. I chose the steel without the anti-rattle stuff. The anti-rattle stuff has a tendency to break off and get caught in the clutch somewhere.

This is less than ideal for sure. The grease or something caught some abrasive stuff in the basket and cut grooves in it. I should reface this or replace it, but I'll just run it.

Here's a side-by-side of the inner pressure plates. The stock-style one on the left is a steel sheetmetal part. The upgraded version is all aluminum, thicker, heavier, and hopefully stiffer.

Here's a side-by-side of the outer pressure plates. The stock-style one on the left is a steel sheetmetal part. The upgraded version is all aluminum, thicker, heavier, and again hopefully stiffer.

Time to pull the stock-style bearing and retainer.

These coil springs hold it all together.

Here's a side-by-side of the bearing and retainer. The stock-style one on the left has short roller elements that are staggered and held together by a cage and steel sheetmetal retainer part. The upgraded version one has long roller elements and I will be using the plastic adjustable retainer.

This is some more sage wisdom from Ed(Bikerx775) on the Big Fix long bearing kit. The kit comes with 53 rollers, but you only need 52. Save the spare in case you drop and lose one, but don't try to shove 53 in between the hub and basket.

Just a little of the supplied grease on each roller, not a bunch of axle grease needed.

Put the basket on the hub and slide in a roller at 12, 3, 6, 9 o'clock.

Then start putting in the rest working your way up from the 6 o'clock position.

All 52, piece of cake.

This little gasket piece comes with the long bearing kit, don't use it if you're using plastic adjustable retainer.

Ed's advice was try B position first.

The retainer should slide all the way down to grooves in the long studs.

Now, here's another great piece of advice from Ed. The stock-style and long bearing kit come with springs(on the left) to hold things together. The adjustable clutch retainer come with snap rings. Those seem easy and reuseable, but they aren't. Go to the hardware store and buy 3/8 inch C-clips and buy at least four of them. These can be removed and reused, if you don't shoot them off too far.

So the C-clips in the B position seemed just a bit too loose.

So I used the C position. And yes I did lose C-clip doing it. I'm glad I bought a spare.

Alto steels, even without the anti-stuff, have a large and small notch to catch the basket.

So you need to offset the large and small notch when you stack them in your basket.

Friction, then...

steel, friction, steel, etc. until the last friction.

Put the springs in the new inner pressure plate.

Lay the outer pressure plate on the springs and inner pressure plate.

Adjuster screw, fender washer, and lock nut sandwich again.

Up and onto the hub.

Lock tabs.

Locknuts.

Remove locknut and washer.

Adjust adjuster screw, install locknut, adjust spring tension with lock nut.

This is where the swear words started. I still couldn't get the clutch to quit slipping and it wanted to drag and grab little crazy. About a $150 into it and it wasn't better. I talked to Ed and Columbus and we were stumped. Then Ed called me back asked if the frictions slid okay on the studs. Well not really, but I hadn't thought much about it. Well if the friction don't slide well and get hung sideways, then the clutch will hang and drag.
Here's a video showing how tight was just a bit too tight and how I fixed it. This fix worked well and I am happy with my new clutch so far.
Here's my first attempt at a how-to on clutch adjustment.
Very interesting. Thank you for taking the time to post this.
ReplyDeletehow many clips do you put on the bearing tamer ?
ReplyDeleteJust the three c-clip style not the snap ring style.
ReplyDeleteI have the same clutch, also with a rivera inner pressure plate and the aluminum outer pressure plate. I bought it as a basket case, and as soon as I tried to kick it over it slips. With the aluminum outer plate, how do you measure your clearance for inner to outer, and where do you measure to/from? Orininals are 31/32"........
ReplyDeleteIf it slips tighten the nuts evenly until it doesn't and still spins when you pull the lever it's good.
DeleteFrom bottom of outmost spring plate to top of aluminum press.plate. ..top of my al plate is about 10mm taller than the oem unit ,so subtract that from total of 31/32" (24.5mmm)=about 14mm .55" depending on other factors,may need.more distance to tighten springs enough to not slip . Stock outer spring plate is more than qualified to pressure all springs.If ur over concerned using just oem,get a new str8 inner clutch hub retainer and install with that on top oem unit.use stock nuts or replace with 6 jam nuts,or ten if 5 finger,. Half to adjust ,other half to lock those in
DeleteQuestion can you provide a link to where you got your outer pressure plate. I am currently working on an 82 shovelhead and I am setting up a belt drive.
ReplyDeleteIt was one of these, bnt I had to shorten it to work with a 1 1/2 belt.
Deletehttp://www.ebay.com/itm/Harley-Rivera-Primo-Early-Model-Clutch-Cover-PP-106-3P-897-/351580204462?hash=item51dbd02dae:g:gKIAAOSwEgVWSWNm&vxp=mtr