Search

Search all blog posts here.

Search This Blog

Showing posts with label wheel lacing. Show all posts

Sunday, August 8, 2010

Finishing the wheels and tires

Okay after trial runs with my truing stand, I went to ACE and picked up some shaft collars to hold the wheel in place.


Here's my tires. Shinko Classic 240's from http://www.motorcycle-superstore.com/


Here's the dial indicator and Pat getting to work on the rear wheel.


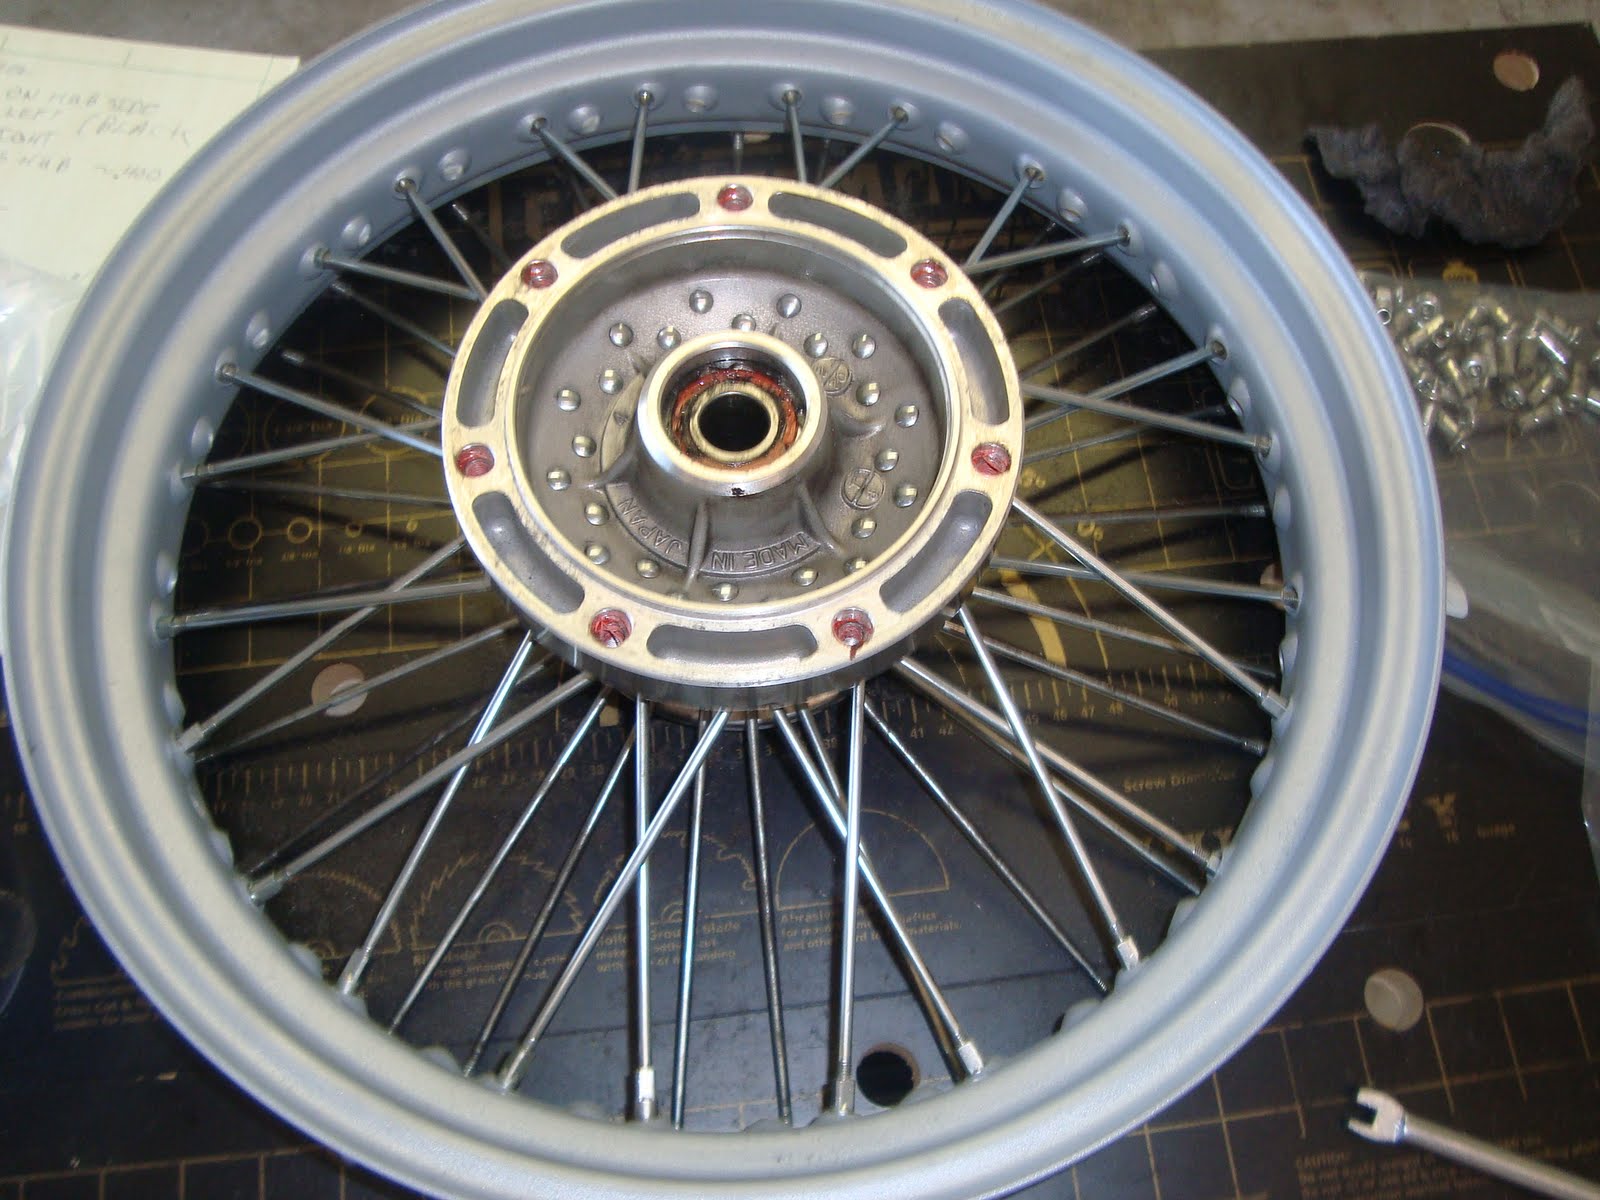
Pretty much good to go a couple of hours later.

Here's the redneck indicator,

On to the front, we tried starting out with all the spoke snug, but we kept have one real bad jump in the rim, so we actually started completely over and loosen all the spokes. We found a better plan in a Harley manual. (All the Kawasaki manuals don't even mention wheel building.)
So this is how it goes, mark four sets of spokes each 90 degrees apart. Snug those and leave the rest loose. True those four area's, for roundness and side-to-side, to each other.


When the wheel is good and true with those four sets, then torque all those loose spokes.

Check and fine tune the wheel again with all the spokes, but it should be very close.


With the wheels true, now on to tires.
Fresh rim strip.


A little spray wax on the bead, just the bead.

Work the first one on.


A little help at the end.


Put the tube in.


A little wax on this bead, too.


All together. Now fill the tube with air and empty it. I used dynabeads to balance the tire. We didn't get picture, because it was a big pain, but hopefully worth it.


Swap the rotors and the other wheel hardware and mount 'em up.

I love this nasty old style tire with no fender! I need to finish dechroming the front end for sure. I'm leaning to fork gaitors now instead of black beer cans.

Sunday, July 11, 2010

Wheel stand

Here's my homemade wheel lacing stand. I built it, big enough to handle 21 inch wheel just in case. I used a cheap travel gauge and holder from Steve's Wholesale Tools to true up the rear wheel. I got the rear pretty much good to go, but I quit halfway through the front wheel. Try again tomorrow.

Saturday, July 3, 2010

Lacing Wheel(Wrong and Right)

Here's my front rim and hub cover fresh from the powdercoater.


Time to get started. (This is not correct, but I still have to publish the pictures.)


Seemed right.


I used extra fine steel wool to clean the spokes. This may have dulled the chrome a bit, but that's still a part of the look I'm going for.


First set in.(wrong)


Second set(still wrong)


Other side, still wrong.


The boy helps a bit.


Done, but all wrong.


This should have been my first clue, I couldn't get the spokes to tighten for a long time.


Spokes are almost through the nipples and the wheel is not tight yet.


Wheel is finally tight, but look at this. This ain't right.


The spokes should look like this. What my buddy J. calls cross three pattern, not a cross two like I built. I'm glad I still had a good example and pictures, too. I had checked both of them before my first try, but still screwed it up.

I had to wrench the thing back apart and re-map the pattern.


With the first set in, the second set crosses three, like this.


I got this first side done. Then the other side looked like this. CRAP, CRAP, CRAP! The spokes on the other side still in the hub, jacked up the powdercoat a bit. At least on the left side and rough is the look for this bike.


The wheel tight now and the spokes aren't out the nipples.


Full preview of the front wheel.


Now the rear wheel. I won't scratch this one!


This one is easy. The little spokes just make an X.


Piece of cake.

They're together! Now I have to true them.


Thursday, June 24, 2010

Braking down wire wheels

This is the front wheel before I started. I mostly took this picture for future reference.


Measure the offset and take some notes. Front Wheel, rim letters on the hub side, under spokes go left, over spokes go right, offset is 0.400 hub higher than the rim. Disk side, under spokes go left, over spokes go right, offset is 0.500 disk mount higher than the rim.


I thought that marking the unders would help me rebuild the wheel, because the over and unders( I know it's supposed to be inner and out, but over and under is easier for me.) are different lengths. Turns out the marks don't matter because I'm not taking the spokes out of the hubs.


Now take it apart. Use the spoke wrench that came with the bike.

Once they are broken loose, you can also use a #3 Phillips screwdriver.
All done with front.
Now the rear. Offset is 0.025 under rim on drive side and dead flush with the middle flange on the disk side.
Rear's a part.
The rear's on the left and the front's on the right.
Now the powder coater has them.