Last Sunday I was able to really get to work. I knew I needed to start with fresh neck bearings; new timken rolling elements and outer races. The basic bearing part numbers are L44610 for the outer race and L44643for roller/inner race. I went looking at a couple of auto parts stores. Every major brand I found was Chinese. UGH. I would beg for Japanese or even Mexican, I don't think there is hope of a USA made bearing any more. I ended up at the local independent motorcycle shop and I got this set from All Balls. Sadly, I'm not sure of their country of origin because it wasn't marked on the packaging or bearings anywhere. I have run this brand before and at least the hope is that they are good enough for motorcycles and not just trailer wheels.

The first real step is getting the wiring for the handlebars and headlight unplugged from the rest of the bike. I built the wiring specifically to be able to do this at some point.

The plugs and wiring are mostly under here.

Can I get everything unplugged and unziptied without pulling the tanks?

Nope. The ground block is under the left tank and I put zip ties all along the backbone of the frame. And yes the speedo cable to the front wheel had to come out, too. Huge shout out to my buddy, Panhead Pat for helping on this project. I would have had to about pull every part of the front end apart to get it off by myself.
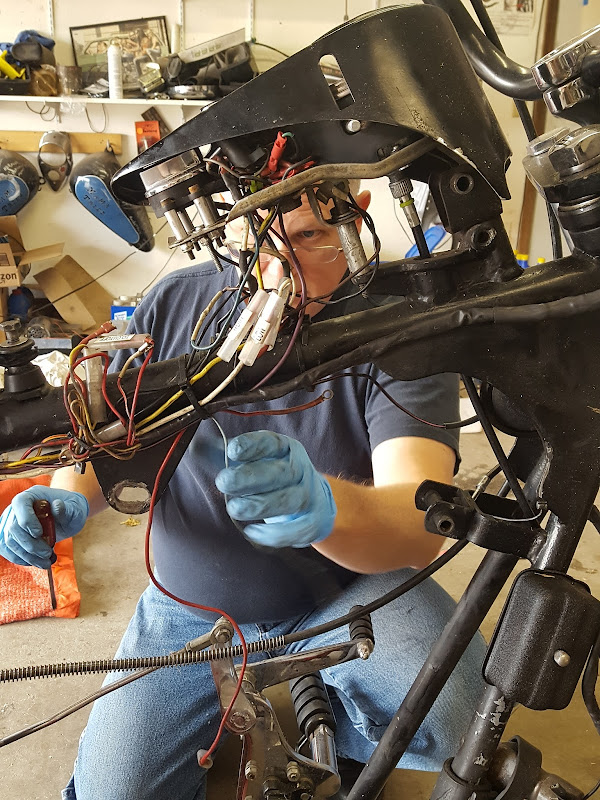
Everything is unplugged, now.

I pulled the throttle and cables.

Instead of pulling the wheel, handlebars, fender, each fork leg, do something with the brake lines and then pull the triple trees, this is how you do it with a helper.
Raise the bike. Loosen these top caps. James Vierkant is waiting to give me grief about how I loathe adjustable wrenches. This actually is one of the few jobs that actually requires one. It's a large hex head, but the corners are rounded and it seems like an odd size, too. I know the 12 point socket I have that should fit it won't grab the corners. There is a special Harley socket tool, but you would have to pull the bars. The adjustable wrench does the job.

Get those caps all but off and move on to the top nut of the top tree.

Before you pull the front end off, make sure the bike is strapped to the jack with the back end supported otherwise the back will get real heavy and tip over, especially with no motor in the frame.
Have one person hold the bars and top tree out of the way. Put the caps back into the tubes to keep them. The other person needs to screw the castellated nut off with a hammer and punch.

At this point I was glad I opted to go with new outer races. See the pits? I might should have gotten neck cups, too.

The outer races can be a bear to get out of the cup. I didn't know that until now, but we actually figured out a decent way to do it. A little heat all around the outside.

Then a chisel between the race and cup. Tap-tap-tap all around the cup until the gap is bigger than the chisel blade.
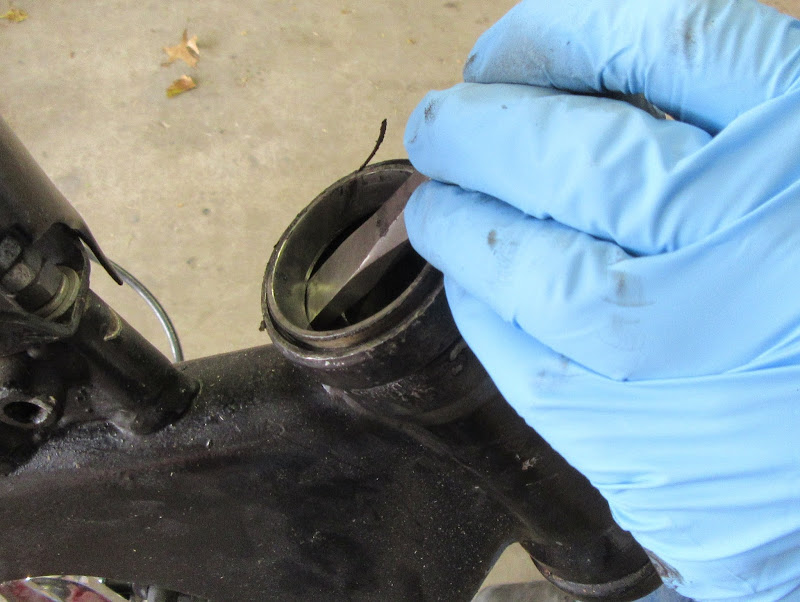
Then put a washer behind the chisel. Work that around until the gap is too big. Then use two washers under the chisel and it should finally pop out.

Use the chisel to knock down the high spots in the cup that you might have just made.

It's good to have a friend to help especially when he brings the special tools. George's Tools Steering Head Race installer 660040. The race fits like this.

You can install the top and bottom at the same time, but Pat says it's easy to use an already seated and square race to pull the other replacement race into place.

Pretty simple tool.
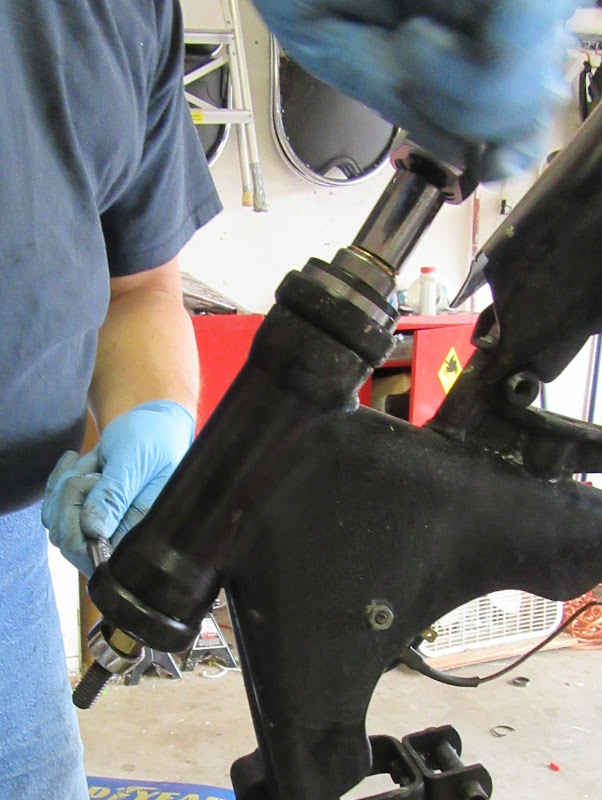
Looking good.

The bottom race is a little trickier because you don't have 360 degrees of access to swing a hammer in, but the same basic method used on the top worked for the bottom. And then a new race goes into the bottom of the neck.

Time to take the bottom neck bearing off of the springer's neck. These are slight press fit as well.

Cut the roller element cage and get rid of the cage and the roller elements.

A little heat on the inner race.

Catch the lip of the inner race with a chisel and knock it up and off. It's not real tight.

Pack the bearing that you need for the bottom with grease.

Slide the bearing down the neck until it stops on the wide section of the stem. Then use a 1 inch piece of PVC pipe as a driver. Smack it with a dead blow hammer until it seats.

I went ahead and marked my tool and put it my toolbox so I don't throw it away or have to cut a new pipe when I need one again.

Pack the other bearing and put it in the top cup and race.

This is another time that it is awesome to have a friend to help.(And a wife to take pictures.)
Stick the stem in the frame.

Wrassle a bit.

A little more.

Looking good.

Top cap on.

Top nut on.

There is a lot to do to set-up a springer correctly by the book. At this point we tightened the neck nut and judged the fall away by feel. A full going over of everything will be done before I actually ride it.

It was a good thing that the tanks were already off. The steering stops on the springer don't touch the frame before the springer hits the tanks. I have talked with Daniel at Longbow Customs and he said he could fix this for me, too.
It took a little figuring, but we got the wheel on. The caliper has to come off if the wheel has a tire on it. I still need to get a rotor for this wheel, too.

We had to make a trip to the hardware store for nuts for the bottom of the clamps and bolts for the top caps.

It took a couple of tries to get the clamps in line properly.

Pat had to get it just right even though the bars will probably come off a few more times. Another huge shout out goes to Columbus for leaving me these nice 16 inch springer bars, even when I didn't have a springer yet. Going with chrome bars makes a nice contrast with the black and chrome springs.

Fits good and got a chance to make some motorcycle noises.

Bonus! The headlight from the other frontend fit perfectly.

Looking good in black and chrome, too.

Oh yeah that's what I am talking about.

No comments:
Post a Comment