First get a front wheel. $30 special right here.

U drill bit for the 7/16-16 UNC tap. 5/16 drill bit for the 3/8-16 UNC tap.

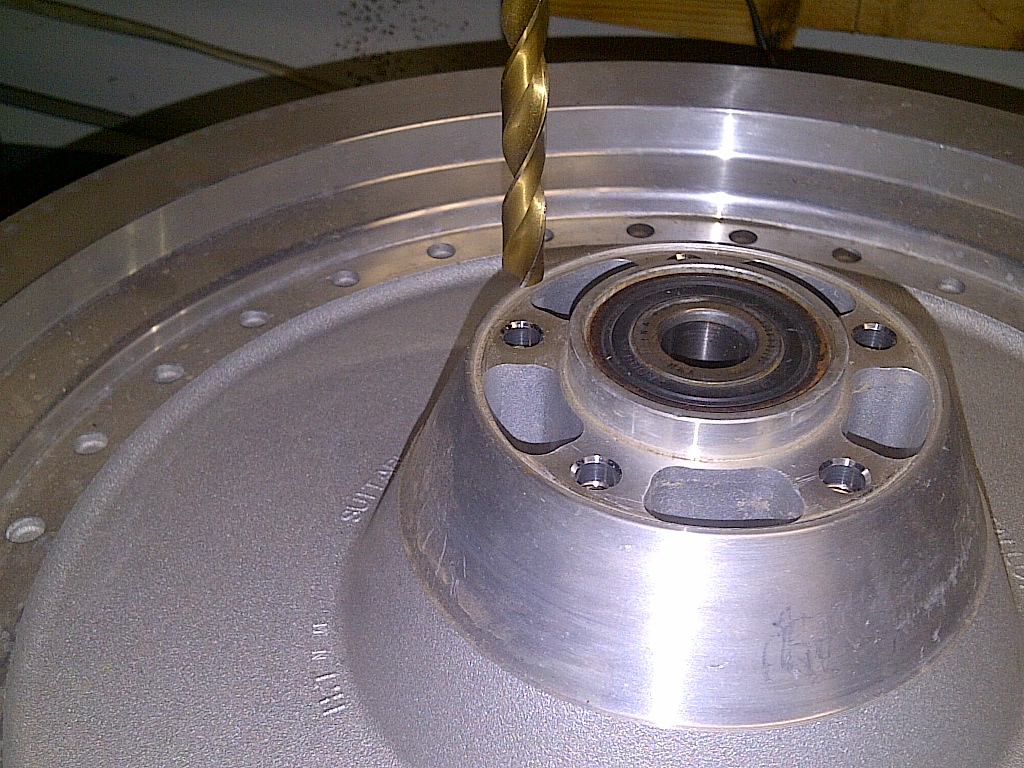
The sprocket side will be the side that sticks out more and has the lettering(if it hasn't been polished). Center up on the existing hole and drill with the U bit about 1.00 inch deep.

Tap the hole to 7/16-16 UNC. Had to use a very short dead center, because the drill-mill didn't have a deep enough drop.

Center up with a small drill bit for a dead center when it got deeper.

This tape is used to mark how deep to go with the tap. Should have done this before we started tapping.

Flip the wheel over to do the rotor side.

This side needs 5/16 drill and 3/8-16 tap. Keep the drill and taps straight as always.


Drill and tap them all and a front rotor goes no problem.

The sprocket side needs more attention. The spacer holes need to be drilled out 7/16 or maybe one step bigger. Paul Jr. uses a Uni-bit for everything and he's a badass builder, right?

The step on the sprocket side is about 2.300 inch so standard chain sprocket will not quite fit.


Yes, Columbus has a mill and a lathe, but chose to go poor boy just to show a garage builder how to do it. Mark the area around the hole with red sharpie. Cover the marker with soapstone. A compass or caliper may then be used to mark the difference in the radius that's there and the one you need. This needs to done to both sides of the sprocket.


This choppa is going to be awesome.

Excellent pics and clear instructions. I just scored two rims with good tires for cheap and this will speed my putting them to work.
ReplyDeleteGreat write up man,
ReplyDeleteThank you for taking the time to post,
Thanks for posting this. I have a custom soft-tail Sportster that I am building. I have the machine shop but I needed to know which side to re-drill & tap for the sprocket - and which side for the disc. Your chassis looks good!
ReplyDeleteThanks for posting this. I have a custom soft-tail Sportster that I am building. I have the machine shop but I needed to know which side to re-drill & tap for the sprocket - and which side for the disc. Your chassis looks good!
ReplyDelete